Google Cloud Platform* 上的 Clear Linux* OS
本页说明在 Google Cloud Platform (GCP) 上创建 Clear Linux* OS 虚拟机实例的步骤。
在 GCP 上安装 Clear Linux OS 虚拟机
在 Google Cloud Console 上登录 Google* 帐户。
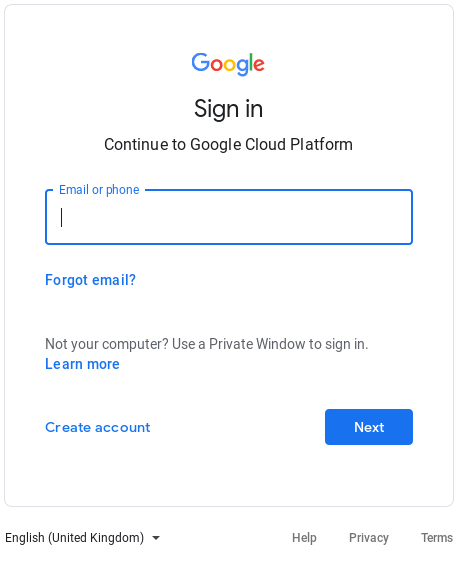
图 1:Google 登录页面
Google Cloud Platform 使用项目管理资源。选择或创建新项目来托管 Clear Linux OS 虚拟机。
注解
请参阅 Quickstart Using a Linux VM 指南,了解在 GCP 上创建虚拟机实例的过程。
导航至最新的 Clear Linux OS release folder,查看当前发布的 GCE 映像,下载
clear-<release number>-gce.tar.gz映像档案文件。您无需解压缩映像档案文件,完整文件稍后将上传至 Google Cloud Storage。
创建存储 Bucket 以托管上一步下载的 Clear Linux OS 映像源档案文件:
- 点击左上部屏幕菜单中的 Navigation menu 图标。
- 从左侧边栏上选择 项。此时您将前往 Storage Browser 工具或 Cloud Storage 概览页。
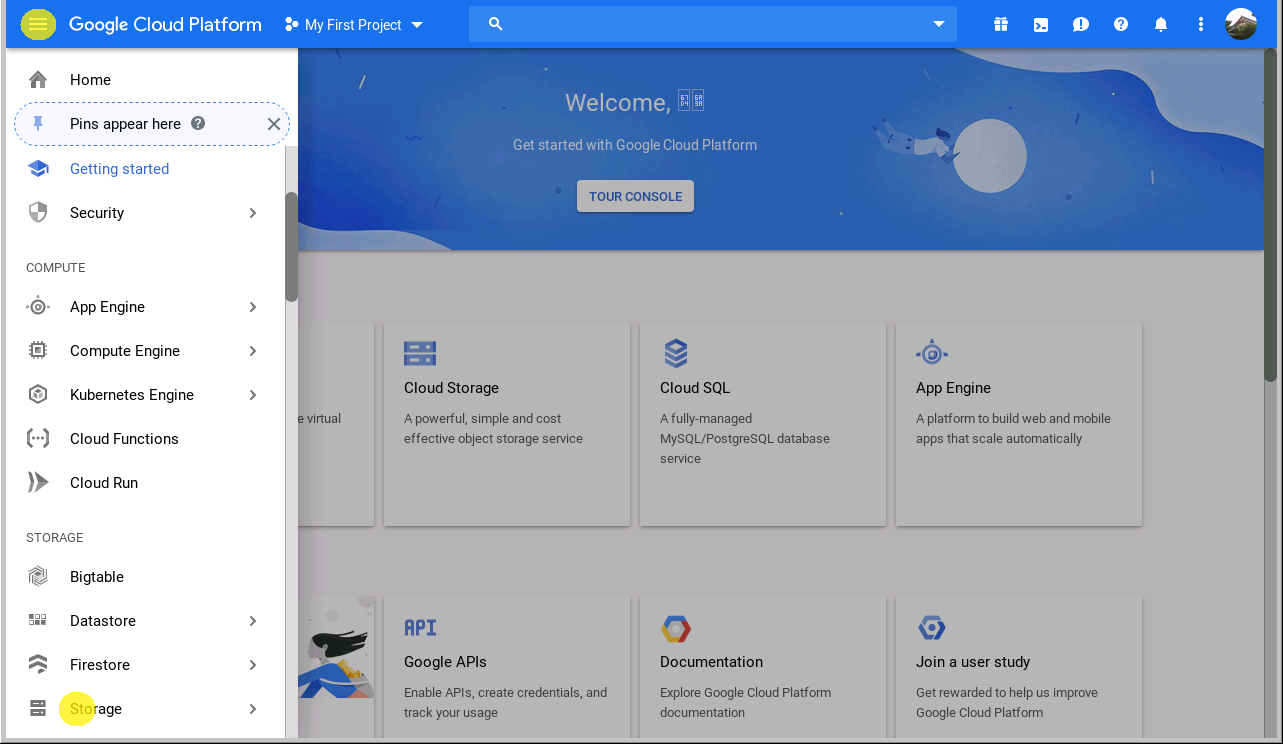
图 2:浏览 Google Cloud Storage
注解
创建 bucket 之前,最好需要创建一个计费帐户,将其链接至此项目。

图 3:Cloud Storage 浏览工具
点击 CREATE BUCKET 按钮,进入 bucket 创建工具界面。bucket 的名称必须是唯一的,因为 Cloud Storage 中的所有 bucket 共享一个全局命名空间。
其余设置选项保留默认值,然后点击底部的 Create 按钮创建 Bucket。
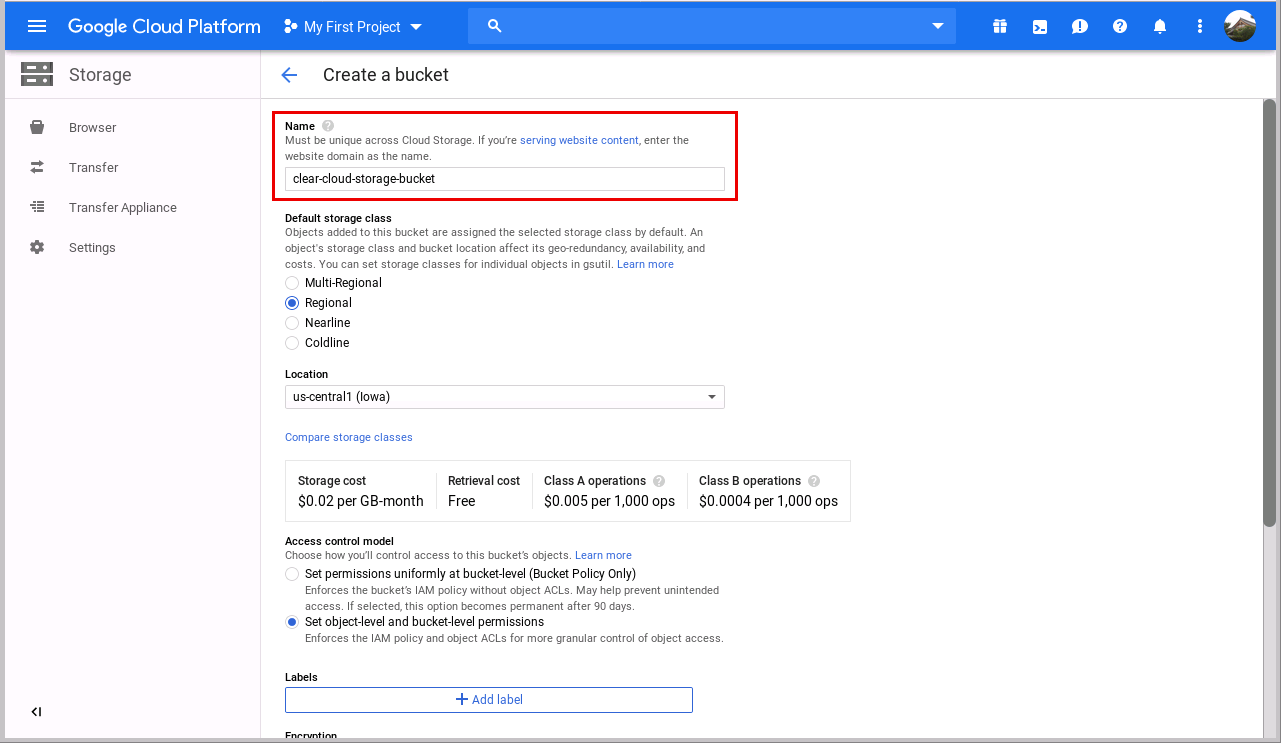
图 4:设置 bucket 名称
创建 bucket 后,点击 Bucket 详细资料页上的 Upload files 按钮将 Clear Linux OS GCE 映像档案文件上传至指定的 bucket:
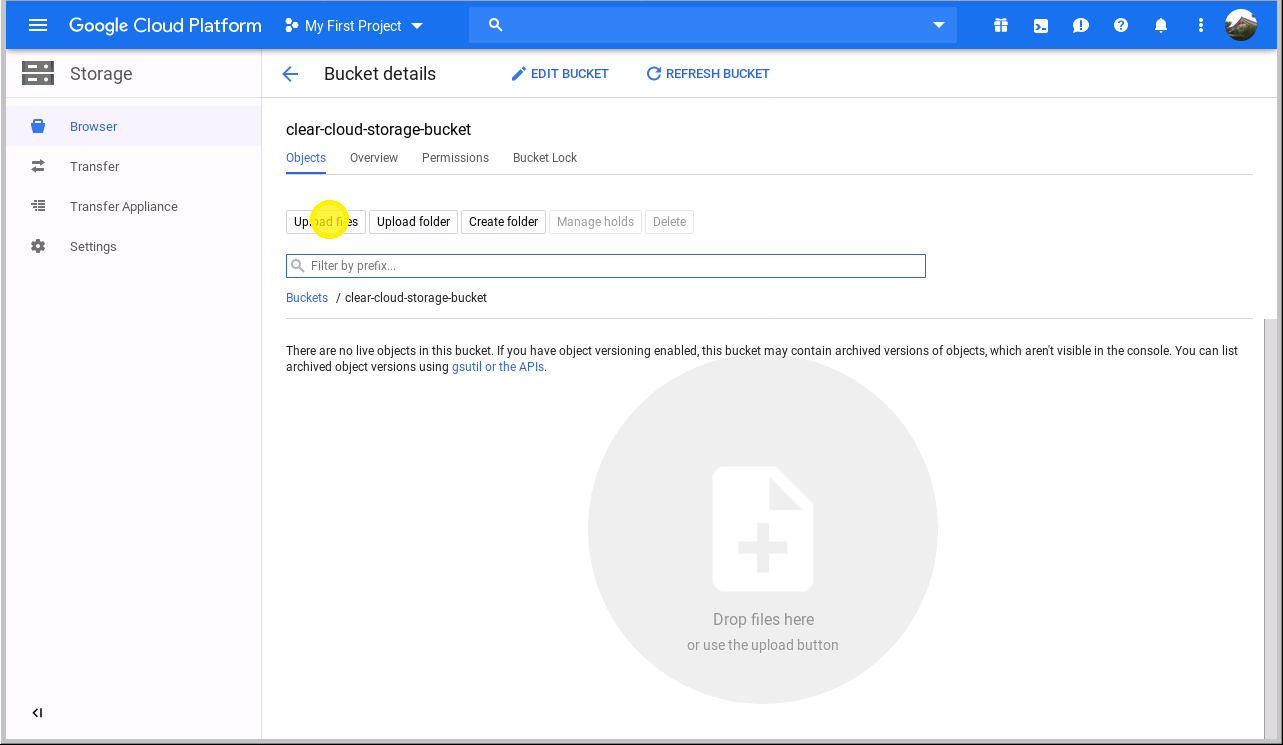
图 5:Cloud Storage bucket
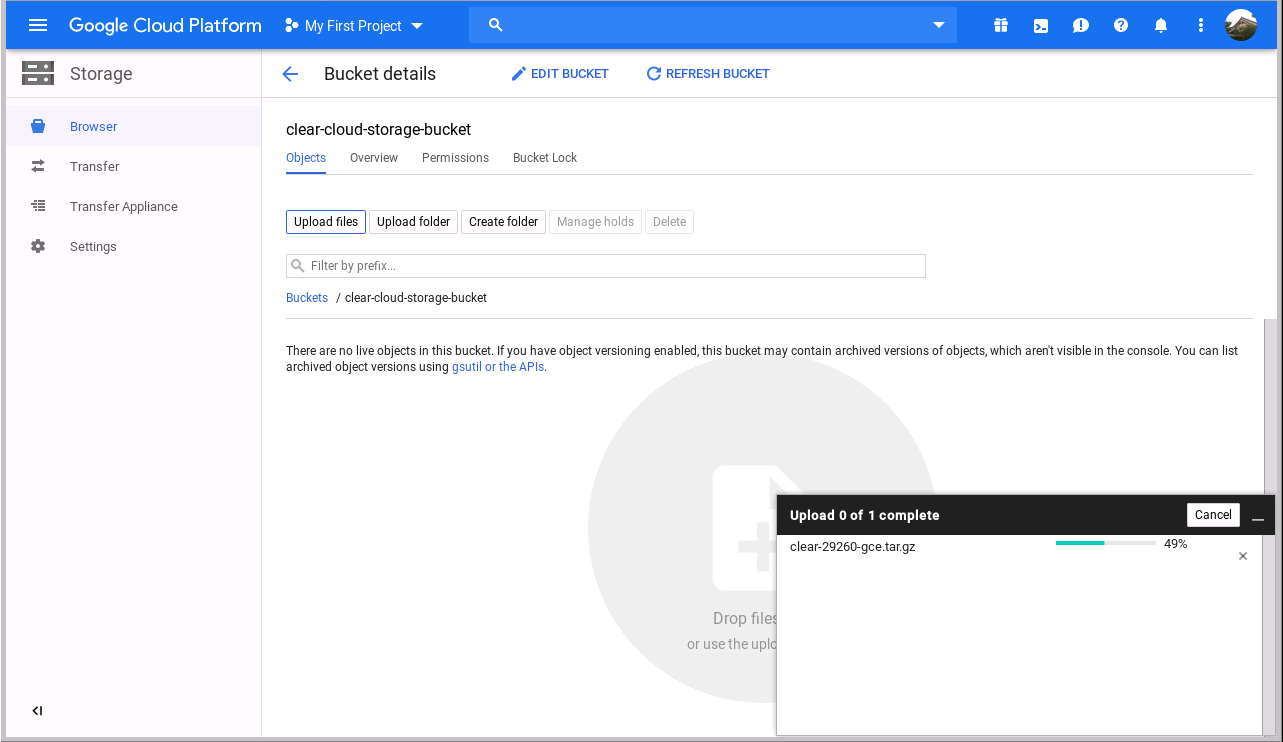
图 6:上传映像源档案文件
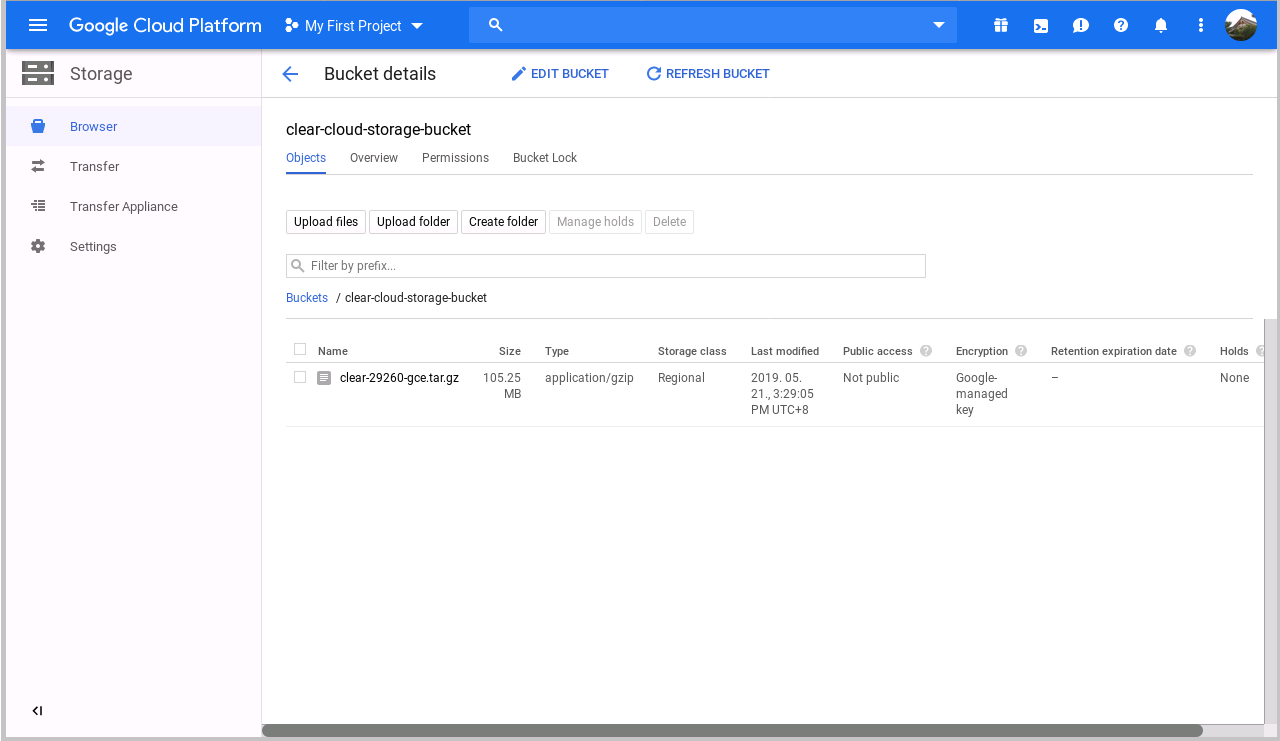
图 7:导入完成
浏览 Compute Engine 映像库页:
点击左上部屏幕菜单中的 Navigation menu 图标。
从左侧边栏选择 。
图 8:映像库
在 Compute Engine 映像库页面,点击 [+] CREATE IMAGE 菜单项创建定制映像:
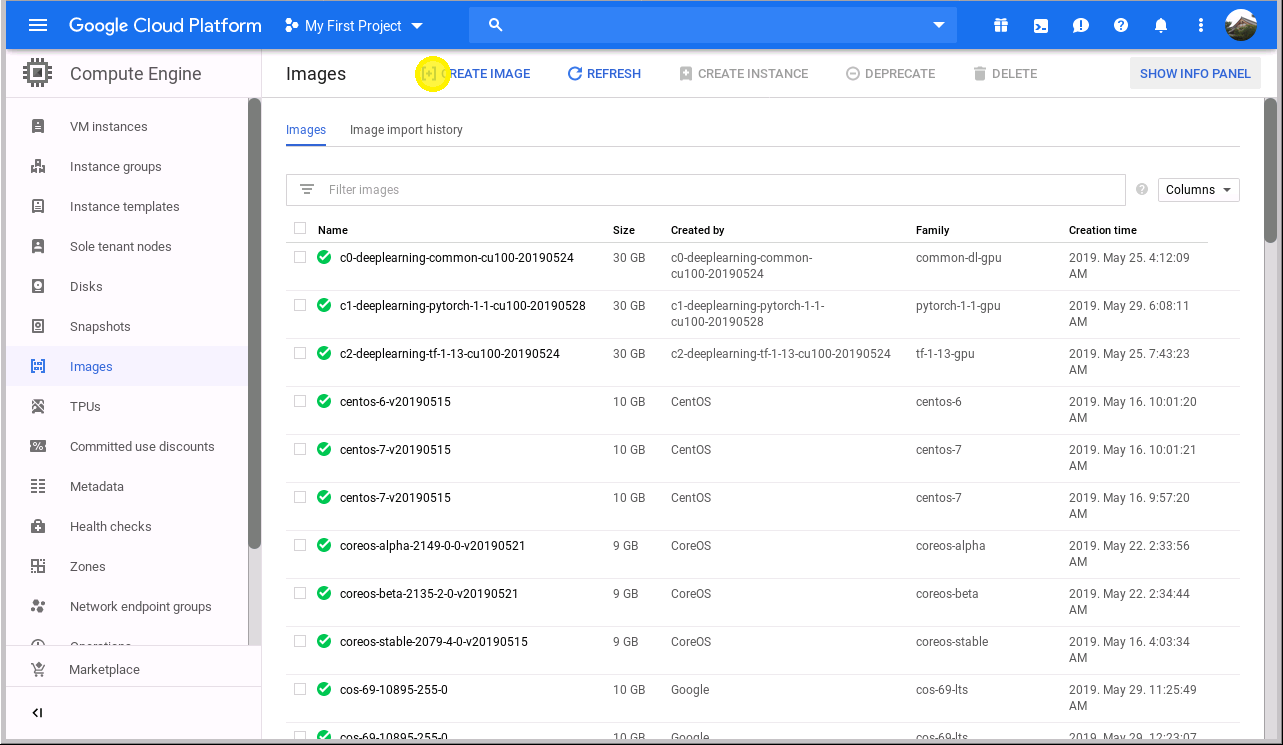
图 9:创建映像
在虚拟机映像创建页上,将映像源类型更改为 Cloud Storage 文件。
在 Source 中,选择 Browse。
找到
clear-<release number>-gce.tar.gz文件,然后点击 Select。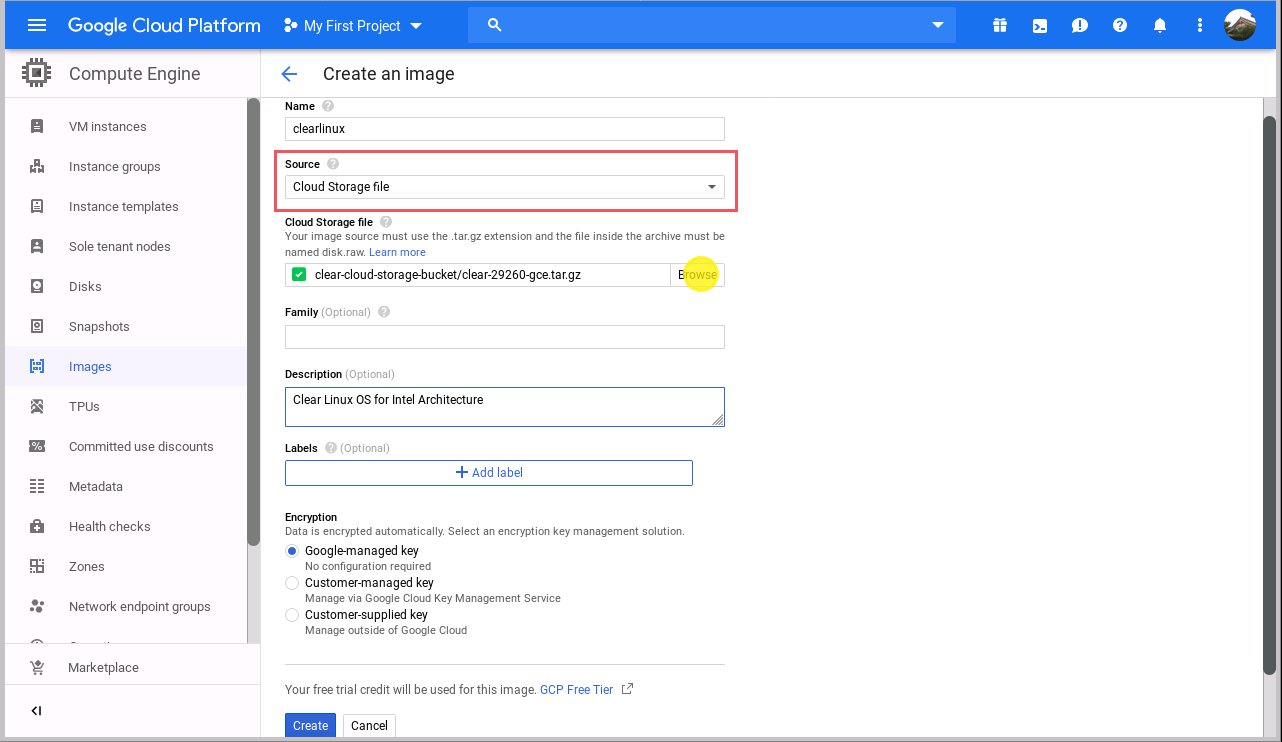
图 10:利用导入的对象创建映像
接受所有默认选项,然后点击底部的 Create 按钮,将 Clear Linux GCE 映像导入映像库。
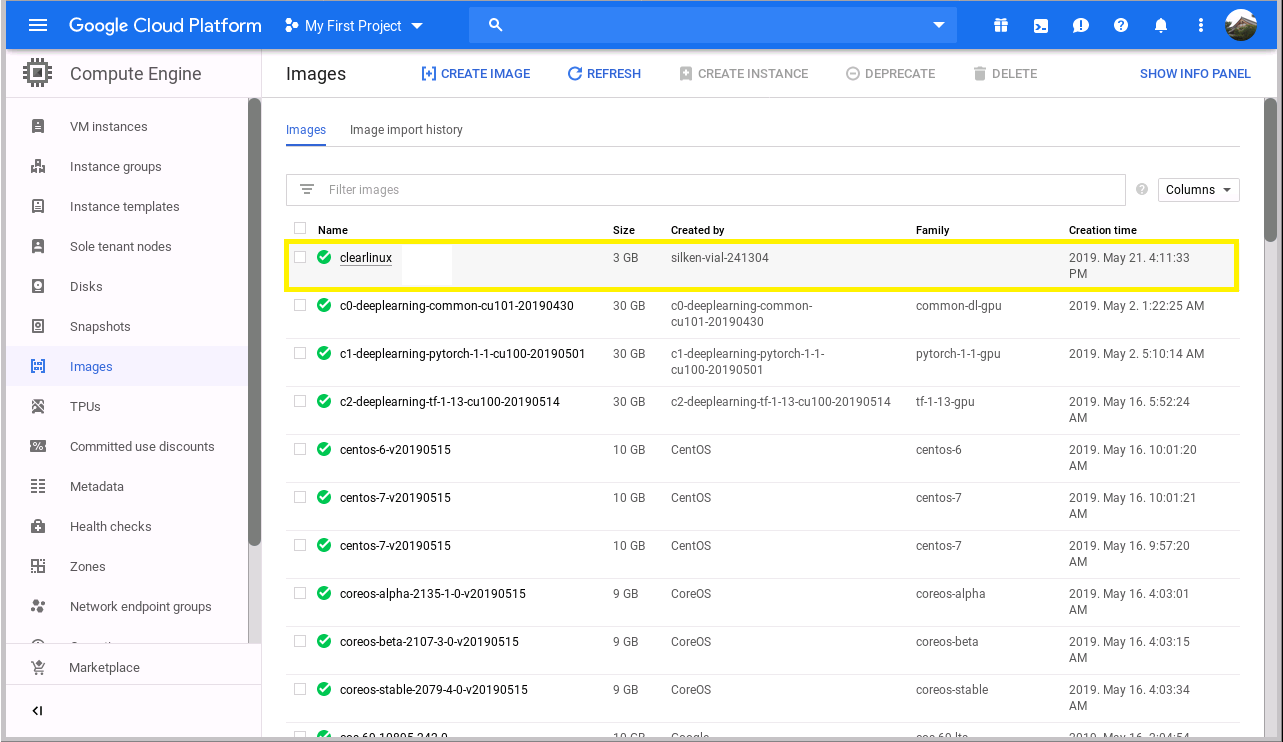
图 11:映像已创建
Clear Linux OS 映像导入后,可以启动一个运行 Clear Linux OS 的虚拟机实例:
- 点击左上部屏幕菜单中的 Navigation menu 图标。
- 从左侧边栏选择 。
图 12:虚拟机实例目录
如果此项目中没有创建虚拟机实例,系统会提示您创建一个实例。
另外,也可以点击虚拟机实例页上的 CREATE INSTANCE 按钮创建虚拟机实例。

图 13:创建虚拟机
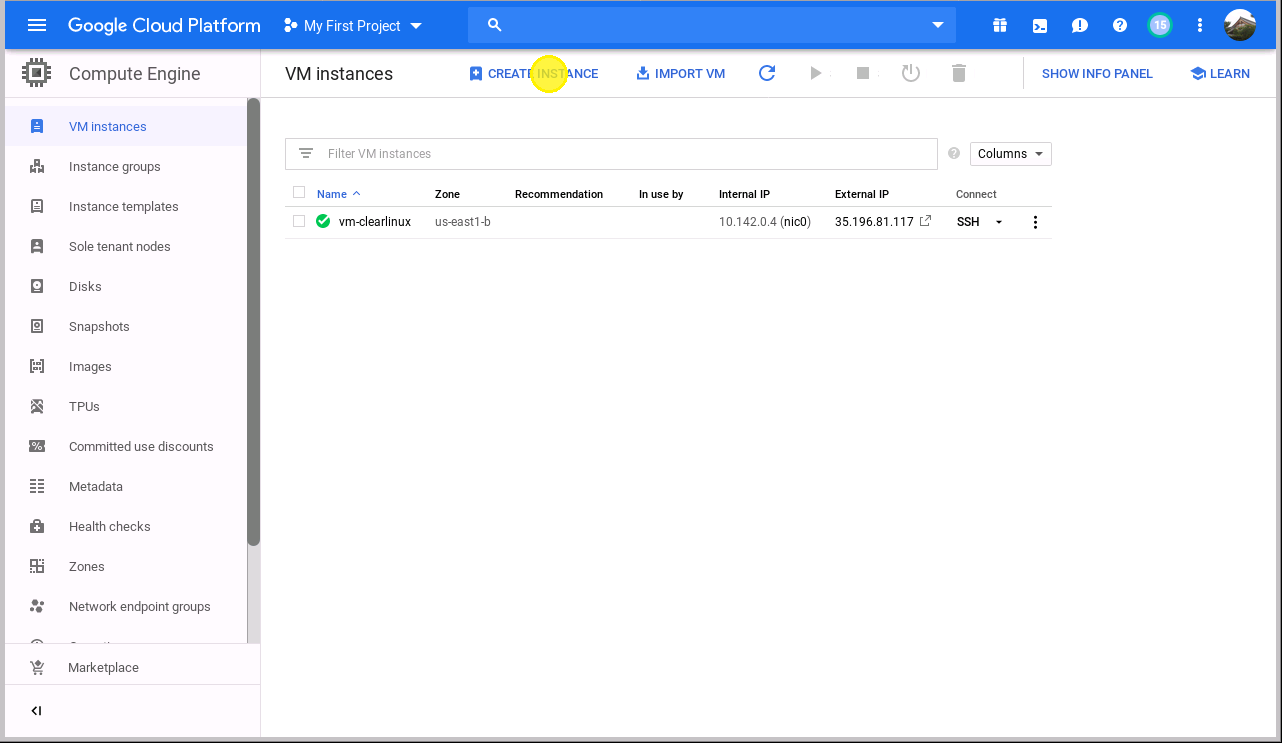
图 14:虚拟机实例列表
在 Region 中,根据 Best practices for Compute Engine regions selection 选择一个区域。
在 Boot disk 中,点击 Change 按钮。
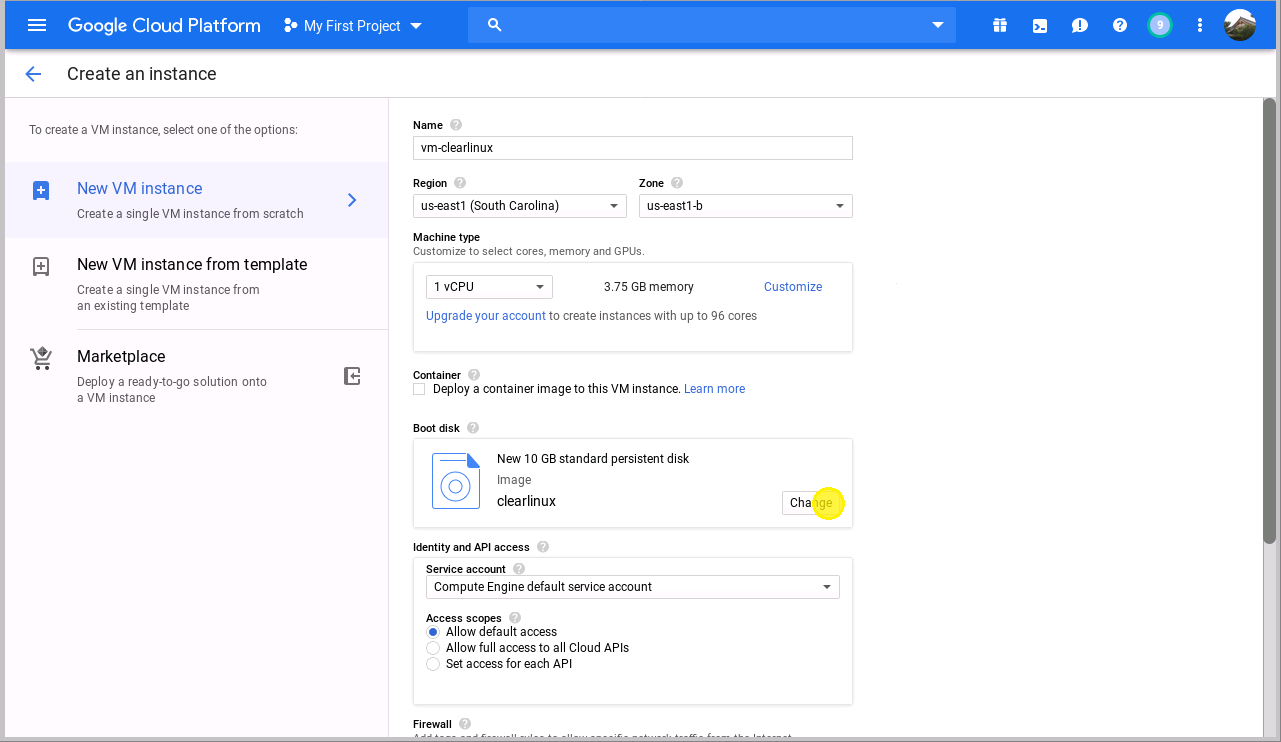
图 15:使用定制映像
选择 标签,以使用 Clear Linux OS GCE 映像。
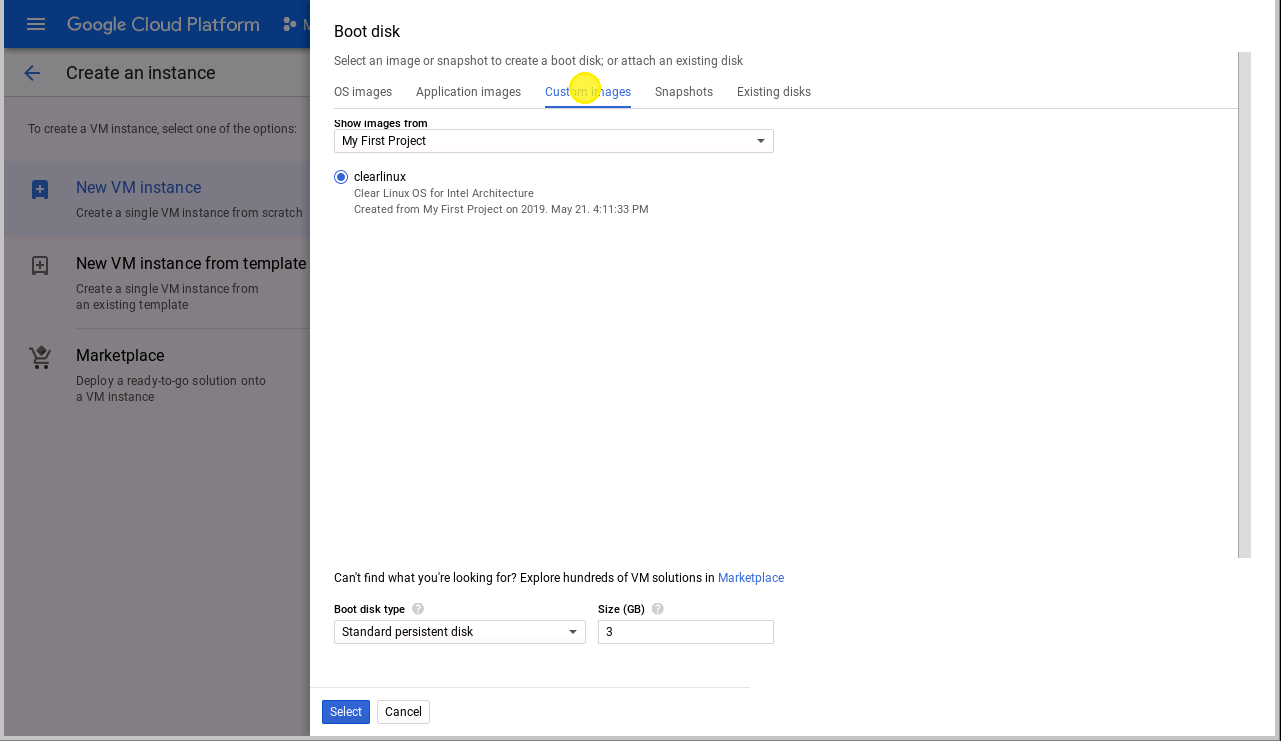
图 16:选择 Clear Linux 引导磁盘创建虚拟机实例
向下滚动至虚拟机实例创建页的底部,展开 Management, security, disks, networking, sole tenancy 群组。
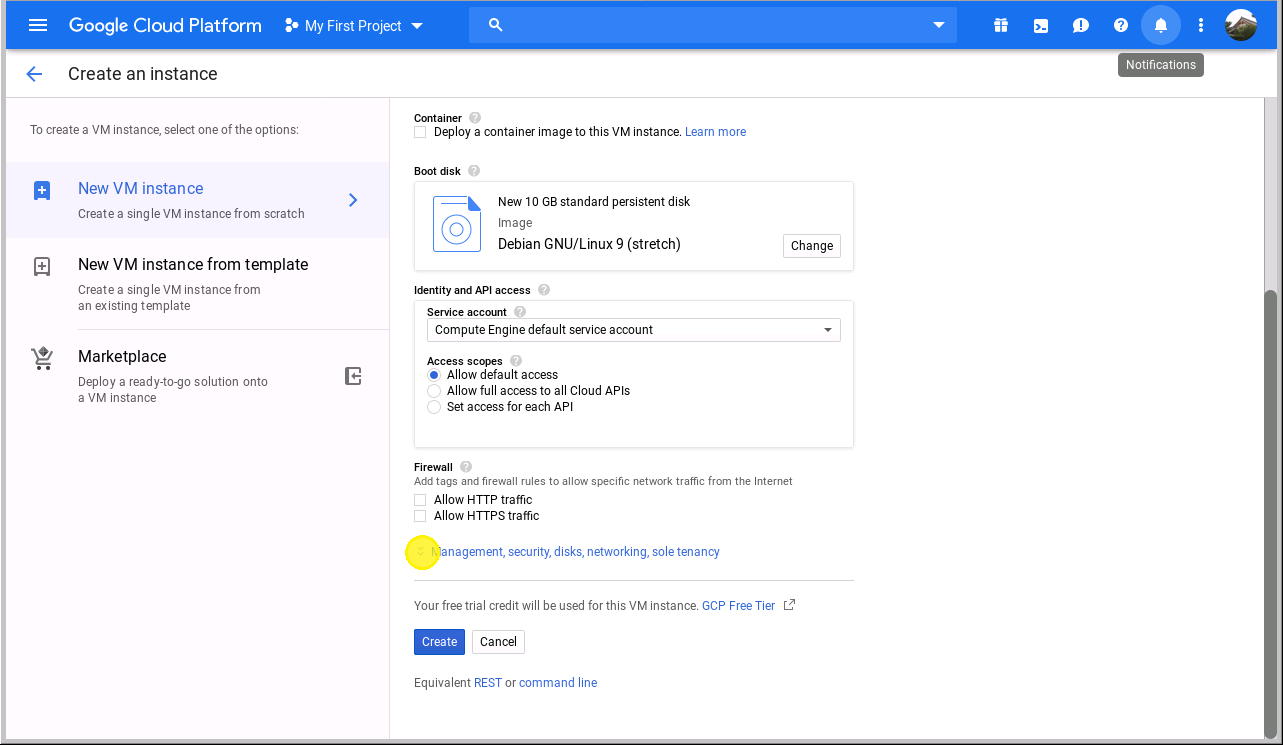
图 17:设置 SSH 密钥
点击 标签,复制并粘贴 SSH 公共密钥:
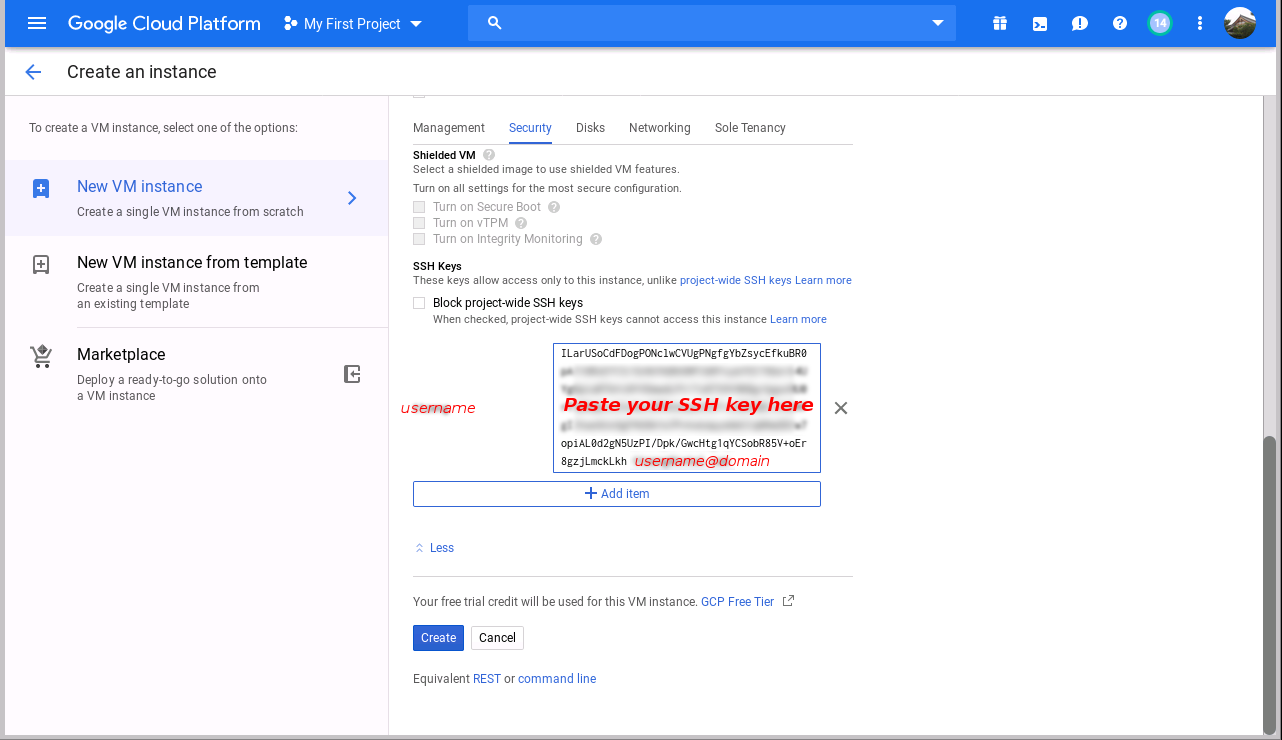
图 18:设置 SSH 密钥进行远程登录
警告
分配的用户名来自电子邮件地址
@前面的字符,包含在 SSH 密钥中。不允许使用符号 “.”,因为在 Clear Linux OS 中创建用户帐户时它是无效字符。点击 Create 按钮创建 Clear Linux OS 虚拟机。
Clear Linux 虚拟机实例已创建并分配了一个公共 IP 地址:
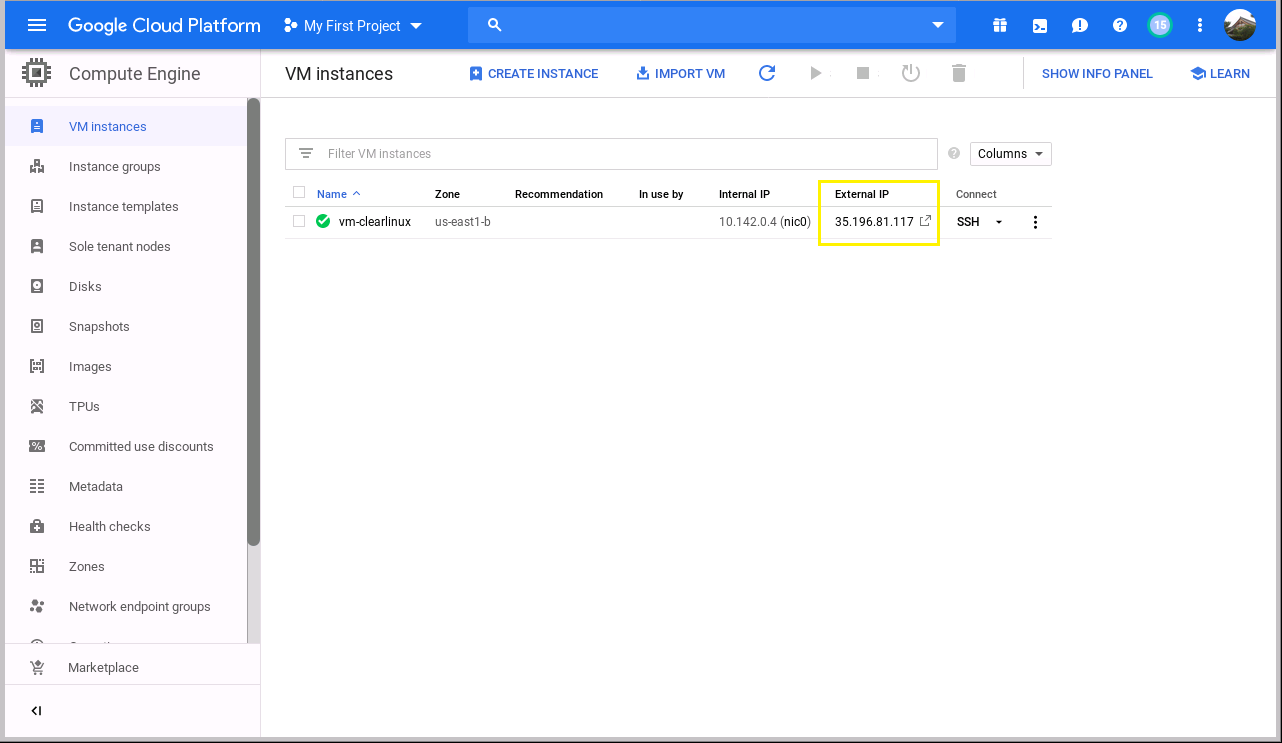
图 19:Clear Linux 虚拟机实例已创建并启动
利用上一步获得的 IP 地址以及与 SSH 公共密钥相关联的用户名,您现在可以通过 SSH 登录虚拟机:
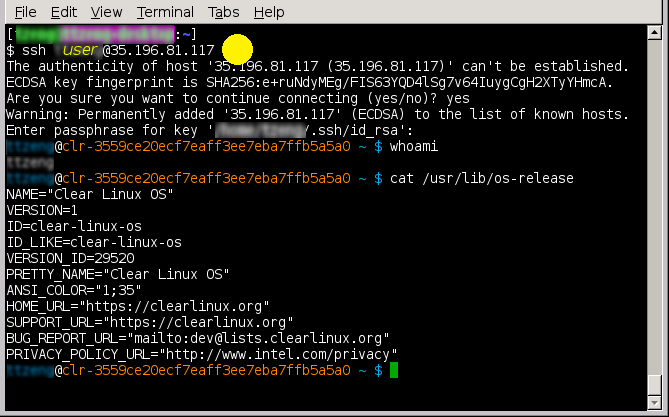
图 20:SSH 登录 Clear Linux 虚拟机