Deep Learning Reference Stack
This guide gives examples for using the Deep Learning Reference stack to run real-world usecases, as well as benchmarking workloads for TensorFlow*, PyTorch*, and Kubeflow* in Clear Linux* OS.
- Overview
- TensorFlow single and multi-node benchmarks
- PyTorch single and multi-node benchmarks
- Kubeflow multi-node benchmarks
- TensorFlow Training (TFJob) with Kubeflow and DLRS
- PyTorch Training (PyTorch Job) with Kubeflow and DLRS
- Using Kubeflow Seldon and OpenVINO* with the Deep Learning Reference Stack
- Using the Intel® OpenVINO Model Optimizer
- Using the OpenVino Inference Engine
- Use Jupyter Notebook
- Uninstallation
- Compiling AIXPRT with OpenMP on DLRS
- Related topics
Overview
We created the Deep Learning Reference Stack to help AI developers deliver the best experience on Intel® Architecture. This stack reduces complexity common with deep learning software components, provides flexibility for customized solutions, and enables you to quickly prototype and deploy Deep Learning workloads. Use this guide to run benchmarking workloads on your solution.
The Deep Learning Reference Stack is available in the following versions:
- Intel MKL-DNN-VNNI, which is optimized using Intel® Math Kernel Library for Deep Neural Networks (Intel® MKL-DNN) primitives and introduces support for Intel® AVX-512 Vector Neural Network Instructions (VNNI).
- Intel MKL-DNN, which includes the TensorFlow framework optimized using Intel® Math Kernel Library for Deep Neural Networks (Intel® MKL-DNN) primitives.
- Eigen, which includes TensorFlow optimized for Intel® architecture.
- PyTorch with OpenBLAS, which includes PyTorch with OpenBlas.
- PyTorch with Intel MKL-DNN, which includes PyTorch optimized using Intel® Math Kernel Library (Intel® MKL) and Intel MKL-DNN.
重要
To take advantage of the Intel® AVX-512 and VNNI functionality (including the MKL-DNN releases) with the Deep Learning Reference Stack, you must use the following hardware:
- Intel® AVX-512 images require an Intel® Xeon® Scalable Platform
- VNNI requires a 2nd generation Intel® Xeon® Scalable Platform
Stack features
- DLRS V4.0 release announcement, including benchmark results.
- DLRS V3.0 release announcement.
- Deep Learning Reference Stack v2.0 including current PyTorch benchmark.
- Deep Learning Reference Stack v1.0 including current TensorFlow benchmark results.
- DLRS Release notes on Github* for the latest release of Deep Learning Reference Stack.
注解
The Deep Learning Reference Stack is a collective work, and each piece of software within the work has its own license. Please see the DLRS Terms of Use for more details about licensing and usage of the Deep Learning Reference Stack.
Prerequisites
- Install Clear Linux OS on your host system
- containers-basic bundle
- cloud-native-basic bundle
In Clear Linux OS, containers-basic includes Docker*, which is required for TensorFlow and PyTorch benchmarking. Use the swupd utility to check if containers-basic and cloud-native-basic are present:
sudo swupd bundle-list
To install the containers-basic or cloud-native-basic bundles, enter:
sudo swupd bundle-add containers-basic cloud-native-basic
Docker is not started upon installation of the containers-basic bundle. To start Docker, enter:
sudo systemctl start docker
To ensure that Kubernetes is correctly installed and configured, follow the instructions in Kubernetes*.
Version compatibility
We validated these steps against the following software package versions:
- Clear Linux OS 26240 (Minimum supported version)
- Docker 18.06.1
- Kubernetes 1.11.3
- Go 1.11.12
注解
The Deep Learning Reference Stack was developed to provide the best user experience when executed on a Clear Linux OS host. However, as the stack runs in a container environment, you should be able to complete the following sections of this guide on other Linux* distributions, provided they comply with the Docker*, Kubernetes* and Go* package versions listed above. Look for your distribution documentation on how to update packages and manage Docker services.
TensorFlow single and multi-node benchmarks
This section describes running the TensorFlow Benchmarks in single node. For multi-node testing, replicate these steps for each node. These steps provide a template to run other benchmarks, provided that they can invoke TensorFlow.
注解
Performance test results for the Deep Learning Reference Stack and for this guide were obtained using runc as the runtime.
Download either the Eigen or the Intel MKL-DNN Docker image from Docker Hub.
Run the image with Docker:
docker run --name <image name>  --rm -i -t <clearlinux/
stacks-dlrs-TYPE> bash
注解
Launching the Docker image with the -i argument starts interactive mode within the container. Enter the following commands in the running container.
Clone the benchmark repository in the container:
git clone http://github.com/tensorflow/benchmarks -b cnn_tf_v1.12_compatible
Execute the benchmark script:
python benchmarks/scripts/tf_cnn_benchmarks/tf_cnn_benchmarks.py --device=cpu --model=resnet50 --data_format=NHWC
注解
You can replace the model with one of your choice supported by the TensorFlow benchmarks.
If you are using an FP32 based model, it can be converted to an int8 model using Intel® quantization tools.
PyTorch single and multi-node benchmarks
This section describes running the PyTorch benchmarks for Caffe2 in single node.
Download either the PyTorch with OpenBLAS or the PyTorch with Intel MKL-DNN Docker image from Docker Hub.
Run the image with Docker:
docker run --name <image name> --rm -i -t <clearlinux/stacks-dlrs-TYPE> bash
注解
Launching the Docker image with the -i argument starts interactive mode within the container. Enter the following commands in the running container.
Clone the benchmark repository:
git clone https://github.com/pytorch/pytorch.git
Execute the benchmark script:
cd pytorch/caffe2/python
python convnet_benchmarks.py --batch_size 32 \
                      --cpu \
                      --model AlexNet
Kubeflow multi-node benchmarks
The benchmark workload runs in a Kubernetes cluster. The guide uses Kubeflow for the Machine Learning workload deployment on three nodes.
警告
If you choose the Intel® MKL-DNN or Intel® MKL-DNN-VNNI image, your platform must support the Intel® AVX-512 instruction set. Otherwise, an illegal instruction error may appear, and you won’t be able to complete this guide.
Kubernetes setup
Follow the instructions in the Kubernetes* tutorial to get set up on Clear Linux OS. The Kubernetes community also has instructions for creating a cluster, described in Creating a single control-plane cluster with kubeadm.
Kubernetes networking
We used flannel as the network provider for these tests. If you prefer a different network layer, refer to the Kubernetes network documentation described in Creating a single control-plane cluster with kubeadm for setup.
Kubectl
You can use kubectl to run commands against your Kubernetes cluster. Refer to the Overview of kubectl for details on syntax and operations. Once you have a working cluster on Kubernetes, use the following YAML script to start a pod with a simple shell script, and keep the pod open.
Copy this example.yaml script to your system:
apiVersion: v1
kind: Pod
metadata:
  name: example-pod
  labels:
    app: ex-pod
spec:
  containers:
  - name: ex-pod-container
    image: clearlinux/stacks-dlrs-mkl:latest
    command: ['/bin/bash', '-c', '--']
    args: [ "while true; do sleep 30; done" ]
Execute the script with kubectl:
kubectl apply –f <path-to-yaml-file>/example.yaml
This script opens a single pod. More robust solutions would create a deployment or inject a python script or larger shell script into the container.
Images
You must add launcher.py to the Docker image to include the Deep Learning Reference Stack and put the benchmarks repo in the correct location. Note that this guide uses Kubeflow v0.4.0, and cannot guarantee results if you use a different version.
From the Docker image, run the following:
mkdir -p /opt
git clone https://github.com/tensorflow/benchmarks.git /opt/tf-benchmarks
cp launcher.py /opt
chmod u+x /opt/*
Your entry point becomes: /opt/launcher.py.
This builds an image that can be consumed directly by TFJob from Kubeflow.
ksonnet*
Kubeflow uses ksonnet* to manage deployments, so you must install it before setting up Kubeflow.
ksonnet was added to the cloud-native-basic bundle in Clear Linux OS version 27550. If you are using an older Clear Linux OS version (not recommended), you must manually install ksonnet as described below.
On Clear Linux OS, follow these steps:
swupd bundle-add go-basic-dev
export GOPATH=$HOME/go
export PATH=$PATH:$GOPATH/bin
go get github.com/ksonnet/ksonnet
cd $GOPATH/src/github.com/ksonnet/ksonnet
make install
After the ksonnet installation is complete, ensure that binary ks is accessible across the environment.
Kubeflow
Once you have Kubernetes running on your nodes, set up Kubeflow by following these instructions from the Getting Started with Kubeflow guide.
export KUBEFLOW_SRC=$HOME/kflow
export KUBEFLOW_TAG="v0.4.1"
export KFAPP="kflow_app"
export K8S_NAMESPACE="kubeflow"

mkdir ${KUBEFLOW_SRC}
cd ${KUBEFLOW_SRC}
ks init ${KFAPP}
cd ${KFAPP}
ks registry add kubeflow github.com/kubeflow/kubeflow/tree/${KUBEFLOW_TAG}/kubeflow
ks pkg install kubeflow/common
ks pkg install kubeflow/tf-training
Next, deploy the primary package for our purposes: tf-job-operator.
ks env rm default
kubectl create namespace ${K8S_NAMESPACE}
ks env add default --namespace "${K8S_NAMESPACE}"
ks generate tf-job-operator tf-job-operator
ks apply default -c tf-job-operator
This creates the CustomResourceDefinition (CRD) endpoint to launch a TFJob.
Run a TFJob
Get the ksonnet registries for deploying TFJobs from dlrs-tfjob.
Install the TFJob components as follows:
ks registry add dlrs-tfjob github.com/clearlinux/dockerfiles/tree/master/stacks/dlrs/kubeflow/dlrs-tfjob

ks pkg install dlrs-tfjob/dlrs-bench
Export the image name to use for the deployment:
export DLRS_IMAGE=<docker_name>
注解
Replace <docker_name> with the image name you specified in previous steps.
Generate Kubernetes manifests for the workloads and apply them using these commands:
ks generate dlrs-resnet50 dlrsresnet50 --name=dlrsresnet50 --image=${DLRS_IMAGE}
ks generate dlrs-alexnet dlrsalexnet --name=dlrsalexnet --image=${DLRS_IMAGE}
ks apply default -c dlrsresnet50
ks apply default -c dlrsalexnet
This replicates and deploys three test setups in your Kubernetes cluster.
Results of running this section
You must parse the logs of the Kubernetes pod to retrieve performance data. The pods will still exist post-completion and will be in ‘Completed’ state. You can get the logs from any of the pods to inspect the benchmark results. More information about Kubernetes logging is available in the Kubernetes Logging Architecture documentation.
TensorFlow Training (TFJob) with Kubeflow and DLRS
A TFJob is Kubeflow’s custom resource used to run TensorFlow training jobs on Kubernetes. This example shows how to use a TFJob within the DLRS container.
Pre-requisites:
- A running Kubernetes* cluster
- Deploying Kubeflow with kfctl/kustomize in Clear Linux OS
注解
This example proposes a Kubeflow installation with the binary kfctl maintained by Arrikto. Please download the kfctl tarball to complete the following steps
Download, untar and add to your PATH if necessary
KFCTL_URL="https://github.com/kubeflow/kubeflow/releases/download/v0.6.1/kfctl_v0.6.1_linux.tar.gz"
wget -P ${KFCTL_URL} ${KFCTL_PATH}
tar -C ${KFCTL_PATH} -xvf ${KFCTL_PATH}/kfctl_v${kfctl_ver}_linux.tar.gz
export PATH=$PATH:${KFCTL_PATH}
Install MetalLB
kubectl apply -f https://raw.githubusercontent.com/google/metallb/v0.8.1/manifests/metallb.yaml
Install Kubeflow resource and TFJob operators
# Env variables needed for your deployment
export KFAPP="<your choice of application directory name>"
export CONFIG="https://raw.githubusercontent.com/kubeflow/kubeflow/master/bootstrap/config/kfctl_existing_arrikto.yaml"

kfctl init ${KFAPP} --config=${CONFIG} -V
cd ${KFAPP}

# deploy Kubeflow:
kfctl generate k8s -V
kfctl apply k8s -V
List the resources
Deployment takes around 15 minutes (or more depending on the hardware) to be ready to use. After that you can use kubectl to list all the Kubeflow resources deployed and monitor their status.
kubectl get pods -n kubeflow
Submitting TFJobs
We provide several DLRS TFJob examples that use the Deep Learning Reference Stack as the base image for creating the containers to run training workloads in your Kubernetes cluster.
Customizing a TFJob
A TFJob is a resource with a YAML representation like the one below. Edit to use the DLRS image containing the code to be executed and modify the command for your own training code.
If you’d like to modify the number and type of replicas, resources, persistent volumes and environment variables, please refer to the Kubeflow documentation
apiVersion: kubeflow.org/v1beta2
kind: TFJob
metadata:
  generateName: tfjob
  namespace: kubeflow
spec:
  tfReplicaSpecs:
    PS:
      replicas: 1
      restartPolicy: OnFailure
      template:
        spec:
          containers:
          - name: tensorflow
            image: dlrs-image
            command:
              - python
              - -m
              - trainer.task
              - --batch_size=32
              - --training_steps=1000
    Worker:
      replicas: 3
      restartPolicy: OnFailure
      template:
        spec:
          containers:
          - name: tensorflow
            image: dlrs-image
            command:
              - python
              - -m
              - trainer.task
              - --batch_size=32
              - --training_steps=1000
    Master:
          replicas: 1
          restartPolicy: OnFailure
          template:
            spec:
              containers:
              - name: tensorflow
                image: dlrs-image
                command:
                  - python
                  - -m
                  - trainer.task
                  - --batch_size=32
                  - --training_steps=1000
For more information, please refer to: * Distributed TensorFlow * TFJobs
PyTorch Training (PyTorch Job) with Kubeflow and DLRS
A PyTorch Job is Kubeflow’s custom resource used to run PyTorch training jobs on Kubernetes. This example builds on the framework set up in the previous example.
Pre-requisites:
- A running Kubernetes* cluster
- Please follow steps 1 - 5 of the previous example to set up your environment.
Submitting PyTorch Jobs
We provide several DLRS PytorchJob examples that use the Deep Learning Reference Stack as the base image for creating the container(s) that will run training workloads in your Kubernetes cluster. Select one form the list below:
Using Kubeflow Seldon and OpenVINO* with the Deep Learning Reference Stack
Seldon Core is an open source platform for deploying machine learning models on a Kubernetes cluster. Seldon Core is supported in the DLRS V4.0 release.
Pre-requisites
- A running Kubernetes* cluster
注解
Instead of using Arrikto’s configuration manifest as shown in the preceeding example, you should use the manifest provided by Istio, for this example, as Seldon deployments depend on it.
Install deployment tools
INSTALL_DIR=$HOME/install_dir
BIN_DIR=${INSTALL_DIR}/bin
SRC_DIR=${INSTALL_DIR}/source
export PATH=${BIN_DIR}:$PATH

mkdir -p ${BIN_DIR} && mkdir ${SRC_DIR}
cd ${SRC_DIR}
Install Helm*
wget https://get.helm.sh/helm-v2.14.3-linux-amd64.tar.gz && tar xf helm-v2.14.3-linux-amd64.tar.gz
mv linux-amd64/helm ${BIN_DIR}/helm
Clean the environment
rm -rf ${SRC_DIR}/*
Prepare the DLRS image
The DLRS base image needs to be rebuilt with the Dockerfile_openvino_base to add Seldon and the OpenVINO inference engine.
docker build -f Dockerfile_openvino_base -t dlrs_openvino_base:0.1 .
Mount pre-trained models into a persistent volume
This will also apply all PV manifests to the cluster
kubectl apply -f storage/pv-volume.yaml
kubectl apply -f storage/model-store-pvc.yaml
kubectl apply -f storage/pv-pod.yaml
Start a shell for the container used as pv:
kubectl exec -it hostpath-pvc -- /bin/bashSave pre-trained models
Now that you’re inside the running container, fetch your pre-trained models and save them at /opt/ml
root@hostpath-pvc:/# cd /opt/ml
root@hostpath-pvc:/# # Copy your models here
root@hostpath-pvc:/# # exit
Deploy the model server
Now you’re ready to deploy the model server using the Helm chart provided.
helm install -- name=seldonov-model-server \
   --namespace kubeflow \
   --set openvino.image=dlrs_openvino_base:0.1 \
   --set openvino.model.path=/opt/ml/<models_directory> \
   --set openvino.model.name=<model_name> \
   --set openvino.model.input=data \
   --set openvino.model.output=prob
   dlrs-seldon/helm/seldon-model-server
Using the Intel® OpenVINO Model Optimizer
The Intel OpenVINO toolkit has two primary tools for deep learning, the inference engine and the model optimizer. The inference engine is integrated into the Deep Learning Reference Stack. It is better to use the model optimizer after training the model, and before inference begins. This example will explain how to use the model optimizer by going through a test case with a pre-trained TensorFlow model.
This example uses resources found in the following OpenVino Toolkit documentation.
Converting TensorFlow Object Detection API Models
In this example, you will:
- Download a TensorFlow model
- Clone the Model Optimizer
- Install Prerequisites
- Run the Model Optimizer
Download a TensorFlow model
We will be using an OpenVINO supported topology with the Model Optimizer. We will use a TensorFlow Inception V2 frozen model.
Navigate to the OpenVINO TensorFlow Model page. Then scroll down to the second section titled “Supported Frozen Topologies from TensorFlow Object Detection Models Zoo” and download “SSD Inception V2 COCO.”
Unpack the file into your chosen working directory. For example, if the tar file is in your Downloads folder and you have navigated to the directory you want to extract it into, run:
tar -xvf ~/Downloads/ssd_inception_v2_coco_2018_01_28.tar.gz
Clone the Model Optimizer
Next we need the model optimizer directory, named dldt. This example assumes the parent directory is on the same level as the model directory, ie:
+--Working_Directory
   +-- ssd_inception_v2_coco_2018_01_28
   +-- dldt
To clone the Model Optimizer, run this from inside the working directory:
git clone https://github.com/opencv/dldt.git
If you explore the
dldtdirectory, you’ll see both the inference engine and the model optimizer. We are only concerned with the model optimizer at this stage. Navigating into the model optimizer folder you’ll find several python scripts and text files. These are the scripts you call to run the model optimizer.Install Prerequisites for Model Optimizer
Install the Python packages required to run the model optimizer by running the script dldt/model-optimizer/install_prerequisites/install_prerequisites_tf.sh.
cd dldt/model-optimizer/install_prerequisites/
./install_prerequisites_tf.sh
cd ../../..
Run the Model Optimizer
Running the model optimizer is as simple as calling the appropriate script, however there are many configuration options that are explainedin the documentation
python dldt/model-optimizer/mo_tf.py \
--input_model=ssd_inception_v2_coco_2018_01_28/frozen_inference_graph.pb \
--tensorflow_use_custom_operations_config dldt/model-optimizer/extensions/front/tf/ssd_v2_support.json \
--tensorflow_object_detection_api_pipeline_config ssd_inception_v2_coco_2018_01_28/pipeline.config \
--reverse_input_channels
You should now see three files in your working directory,
frozen_inference_graph.bin,frozen_inference_graph.mapping, andfrozen_inference_graph.xml. These are your new models in the Intermediate Representation (IR) format and they are ready for use in the OpenVINO Inference Engine.
Using the OpenVino Inference Engine
This example walks through the basic instructions for using the inference engine.
Starting the Model Server
The process is similar to how we start Jupter notebooks on our containers
Run this command to spin up a OpenVino model fetched from GCP
docker run -p 8000:8000 stacks-tensorflow-mkl:latest bash -c ". /workspace/scripts/serve.sh && ie_serving model --model_name resnet --model_path gs://intelai_public_models/resnet_50_i8 --port 8000"
Once the server is setup, use a grpc client to communicate with served model:
git clone https://github.com/IntelAI/OpenVINO-model-server.git
cd OpenVINO-model-server
pip install -q -r OpenVINO-model-server/example_client/client_requirements.txt
pip install --user -q -r OpenVINO-model-server/example_client/client_requirements.txt
cat OpenVINO-model-server/example_client/client_requirements.txt
cd OpenVINO-model-server/example_client

python jpeg_classification.py --images_list input_images.txt --grpc_address localhost --grpc_port 8000 --input_name data --output_name prob --size 224 --model_name resnet
The results of these commands will look like this:
start processing:
       Model name: resnet
       Images list file: input_images.txt
images/airliner.jpeg (1, 3, 224, 224) ; data range: 0.0 : 255.0
Processing time: 97.00 ms; speed 2.00 fps 10.35
Detected: 404  Should be: 404
images/arctic-fox.jpeg (1, 3, 224, 224) ; data range: 0.0 : 255.0
Processing time: 16.00 ms; speed 2.00 fps 63.89
Detected: 279  Should be: 279
images/bee.jpeg (1, 3, 224, 224) ; data range: 0.0 : 255.0
Processing time: 14.00 ms; speed 2.00 fps 69.82
Detected: 309  Should be: 309
images/golden_retriever.jpeg (1, 3, 224, 224) ; data range: 0.0 : 255.0
Processing time: 13.00 ms; speed 2.00 fps 75.22
Detected: 207  Should be: 207
images/gorilla.jpeg (1, 3, 224, 224) ; data range: 0.0 : 255.0
Processing time: 11.00 ms; speed 2.00 fps 87.24
Detected: 366  Should be: 366
images/magnetic_compass.jpeg (1, 3, 224, 224) ; data range: 0.0 : 247.0
Processing time: 11.00 ms; speed 2.00 fps 91.07
Detected: 635  Should be: 635
images/peacock.jpeg (1, 3, 224, 224) ; data range: 0.0 : 255.0
Processing time: 9.00 ms; speed 2.00 fps 110.1
Detected: 84  Should be: 84
images/pelican.jpeg (1, 3, 224, 224) ; data range: 0.0 : 255.0
Processing time: 10.00 ms; speed 2.00 fps 103.63
Detected: 144  Should be: 144
images/snail.jpeg (1, 3, 224, 224) ; data range: 0.0 : 248.0
Processing time: 10.00 ms; speed 2.00 fps 104.33
Detected: 113  Should be: 113
images/zebra.jpeg (1, 3, 224, 224) ; data range: 0.0 : 255.0
Processing time: 12.00 ms; speed 2.00 fps 83.04
Detected: 340  Should be: 340
Overall accuracy= 100.0 %
Average latency= 19.8 ms
Use Jupyter Notebook
This example uses the PyTorch with OpenBLAS container image. After it is downloaded, run the Docker image with -p to specify the shared port between the container and the host. This example uses port 8888.
docker run --name pytorchtest --rm -i -t -p 8888:8888 clearlinux/stacks-pytorch-oss bash
After you start the container, launch the Jupyter Notebook. This command is executed inside the container image.
jupyter notebook --ip 0.0.0.0 --no-browser --allow-root
After the notebook has loaded, you will see output similar to the following:
To access the notebook, open this file in a browser: file:///.local/share/jupyter/runtime/nbserver-16-open.html
Or copy and paste one of these URLs:
http://(846e526765e3 or 127.0.0.1):8888/?token=6357dbd072bea7287c5f0b85d31d70df344f5d8843fbfa09
From your host system, or any system that can access the host’s IP address, start a web browser with the following. If you are not running the browser on the host system, replace 127.0.0.1 with the IP address of the host.
http://127.0.0.1:8888/?token=6357dbd072bea7287c5f0b85d31d70df344f5d8843fbfa09
Your browser displays the following:

Figure 1: Jupyter Notebook
To create a new notebook, click New and select Python 3.
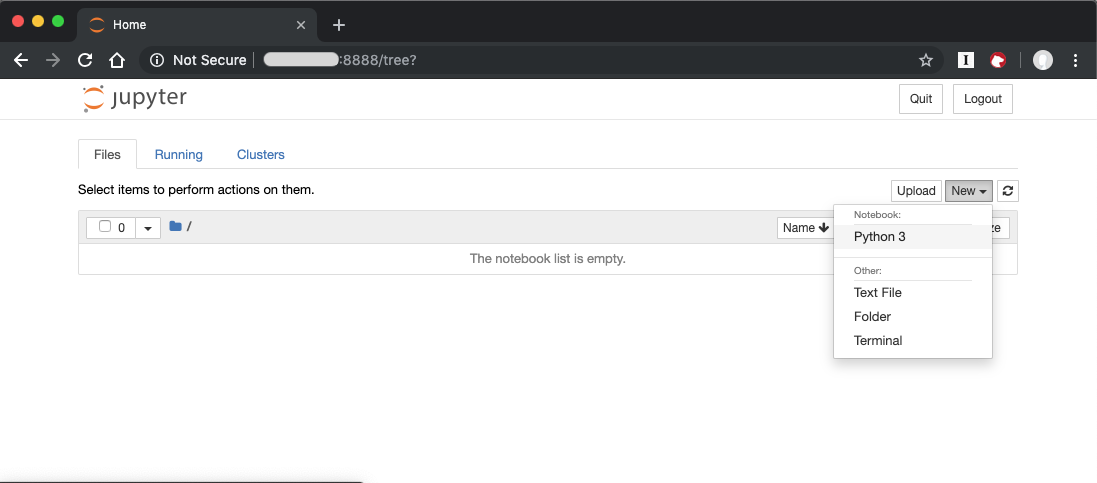
Figure 2: Create a new notebook
A new, blank notebook is displayed, with a cell ready for input.
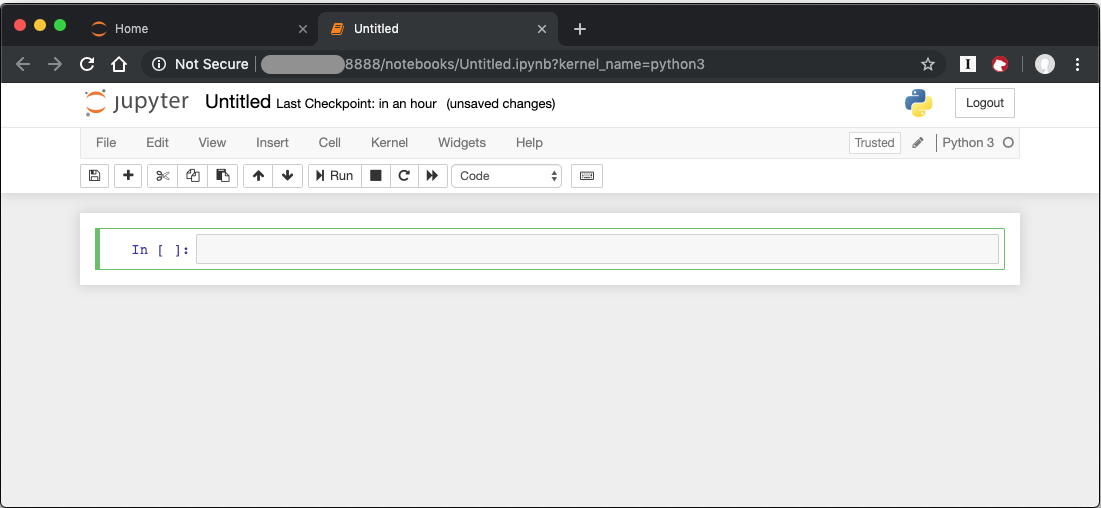
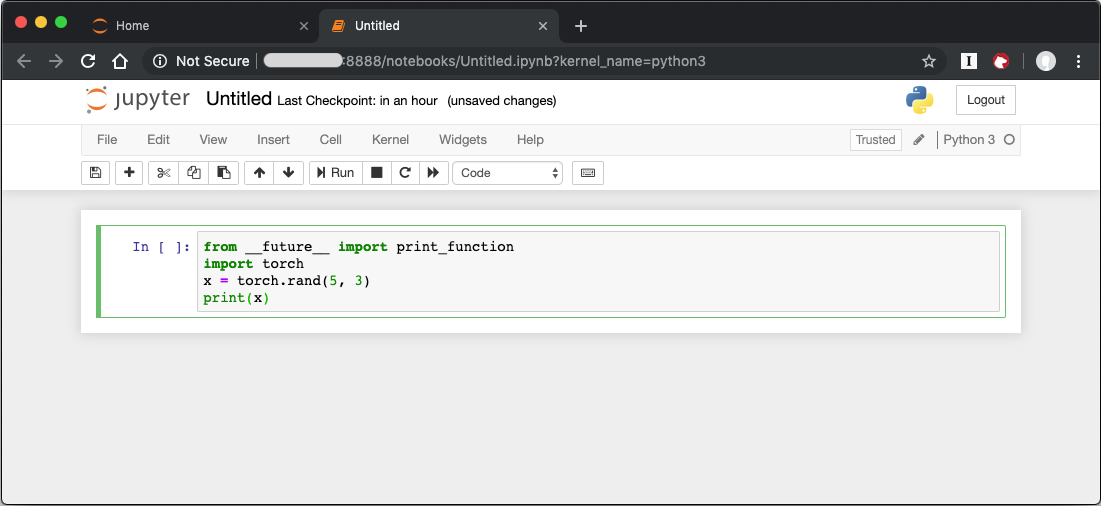
To verify that PyTorch is working, copy the following snippet into the blank cell, and run the cell.
from __future__ import print_function
import torch
x = torch.rand(5, 3)
print(x)
When you run the cell, your output will look something like this:
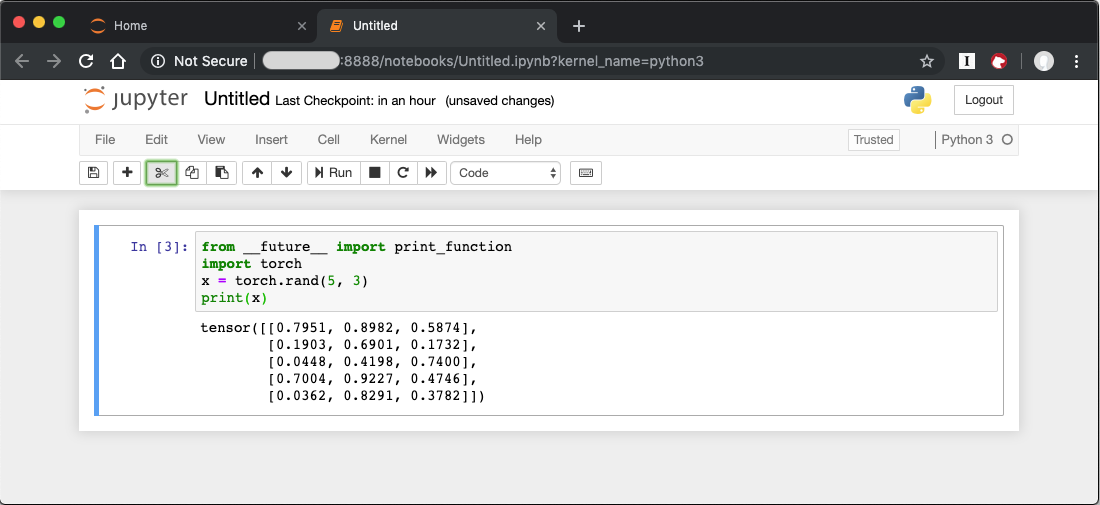
You can continue working in this notebook, or you can download existing notebooks to take advantage of the Deep Learning Reference Stack’s optimized deep learning frameworks. Refer to Jupyter Notebook for details.
Uninstallation
To uninstall the Deep Learning Reference Stack, you can choose to stop the container so that it is not using system resources, or you can stop the container and delete it to free storage space.
To stop the container, execute the following from your host system:
Find the container’s ID
docker container ls
This will result in output similar to the following:
CONTAINER ID        IMAGE                        COMMAND               CREATED             STATUS              PORTS               NAMES
e131dc71d339        clearlinux/stacks-dlrs-oss   "/bin/sh -c 'bash'"   23 seconds ago      Up 21 seconds                           oss
You can then use the ID or container name to stop the container. This example uses the name “oss”:
docker container stop oss
Verify that the container is not running
docker container ls
To delete the container from your system you need to know the Image ID:
docker images
This command results in output similar to the following:
REPOSITORY                   TAG                 IMAGE ID            CREATED             SIZE
clearlinux/stacks-dlrs-oss   latest              82757ec1648a        4 weeks ago         3.43GB
clearlinux/stacks-dlrs-mkl   latest              61c178102228        4 weeks ago         2.76GB
To remove an image use the image ID:
docker rmi 82757ec1648a
# docker rmi 827
Untagged: clearlinux/stacks-dlrs-oss:latest
Untagged: clearlinux/stacks-dlrs-oss@sha256:381f4b604537b2cb7fb5b583a8a847a50c4ed776f8e677e2354932eb82f18898
Deleted: sha256:82757ec1648a906c504e50e43df74ad5fc333deee043dbfe6559c86908fac15e
Deleted: sha256:e47ecc039d48409b1c62e5ba874921d7f640243a4c3115bb41b3e1009ecb48e4
Deleted: sha256:50c212235d3c33a3c035e586ff14359d03895c7bc701bb5dfd62dbe0e91fb486
Note that you can execute the docker rmi command using only the first few characters of the image ID, provided they are unique on the system.
Once you have removed the image, you can verify it has been deleted with:
docker images
Compiling AIXPRT with OpenMP on DLRS
To compile AIXPRT for DLRS, you will have to get the community edition of AIXPRT and update the compile_AIXPRT_source.sh file.AIXPRT utilizes build configuration files, so to build AIXPRT on the image, copy, the build files from the base image, this can be done by adding these commands to the end of the stacks-tensorflow-mkl dockerfile:
COPY --from=base /dldt/inference-engine/bin/intel64/Release/ /usr/local/lib/openvino/tools/
COPY --from=base /dldt/ /dldt/
COPY ./airxprt/ /workspace/aixprt/
RUN ./aixprt/install_deps.sh
RUN ./aixprt/install_aixprt.sh
AIXPRT requires OpenCV. On Clear Linux OS, the OpenCV bundle also installs the DLDT components. To use AIXPRT in the DLRS environment you need to either remove the shared libraries for DLDT from /usr/lib64 before you run the tests, or ensure that the DLDT components in the /usr/local/lib are being used for AIXPRT. This can be achieved using adding LD_LIBRARY_PATH environment variable before testing.
export LD_LIBRARY_PATH=/usr/local/lib
The updates to the AIXPRT community edition have been captured in the diff file compile_AIXPRT_source.sh.patch. The core of these changes relate to the version of model files(2019_R1) we download from the OpenCV open model zoo and location of the build files, which in our case is /dldt. Please refer to the patch files and make changes as necessary to the compile_AIXPRT_source.sh file as required for your environment.