Clear Linux* OS on Amazon Web Services*
This tutorial explains how to create and launch a Clear Linux OS AMI instance from the AWS* console and complete the following tasks:
Locate and select the Clear Linux OS OS Basic AMI in the AWS Marketplace.
Create a new public and private key pair to allow you to connect to your Clear Linux OS instance securely.
Launch the new Clear Linux OS instance and connect to it.
Update your instance of Clear Linux OS using the swupd command.
Stop the Clear Linux OS instance.
Prerequisites
This tutorial assumes the following statements are true:
You are using a linux-based system to access AWS and can run SSH to access the remote Clear Linux OS AWS image.
Your browser puts downloaded files in the
$HOME/Downloadsdirectory.You have already set up an AWS user account and logged into the AWS console.
Note
This tutorial uses a Clear Linux OS AMI t2.micro instance that is eligible for the AWS free tier. To learn more about AWS and setting up an account, visit the AWS website at http://aws.amazon.com.
Locate, select, and launch the Clear Linux OS Basic AMI
Start from your main AWS services console menu in your browser and select the EC2 text as shown in Figure 1:
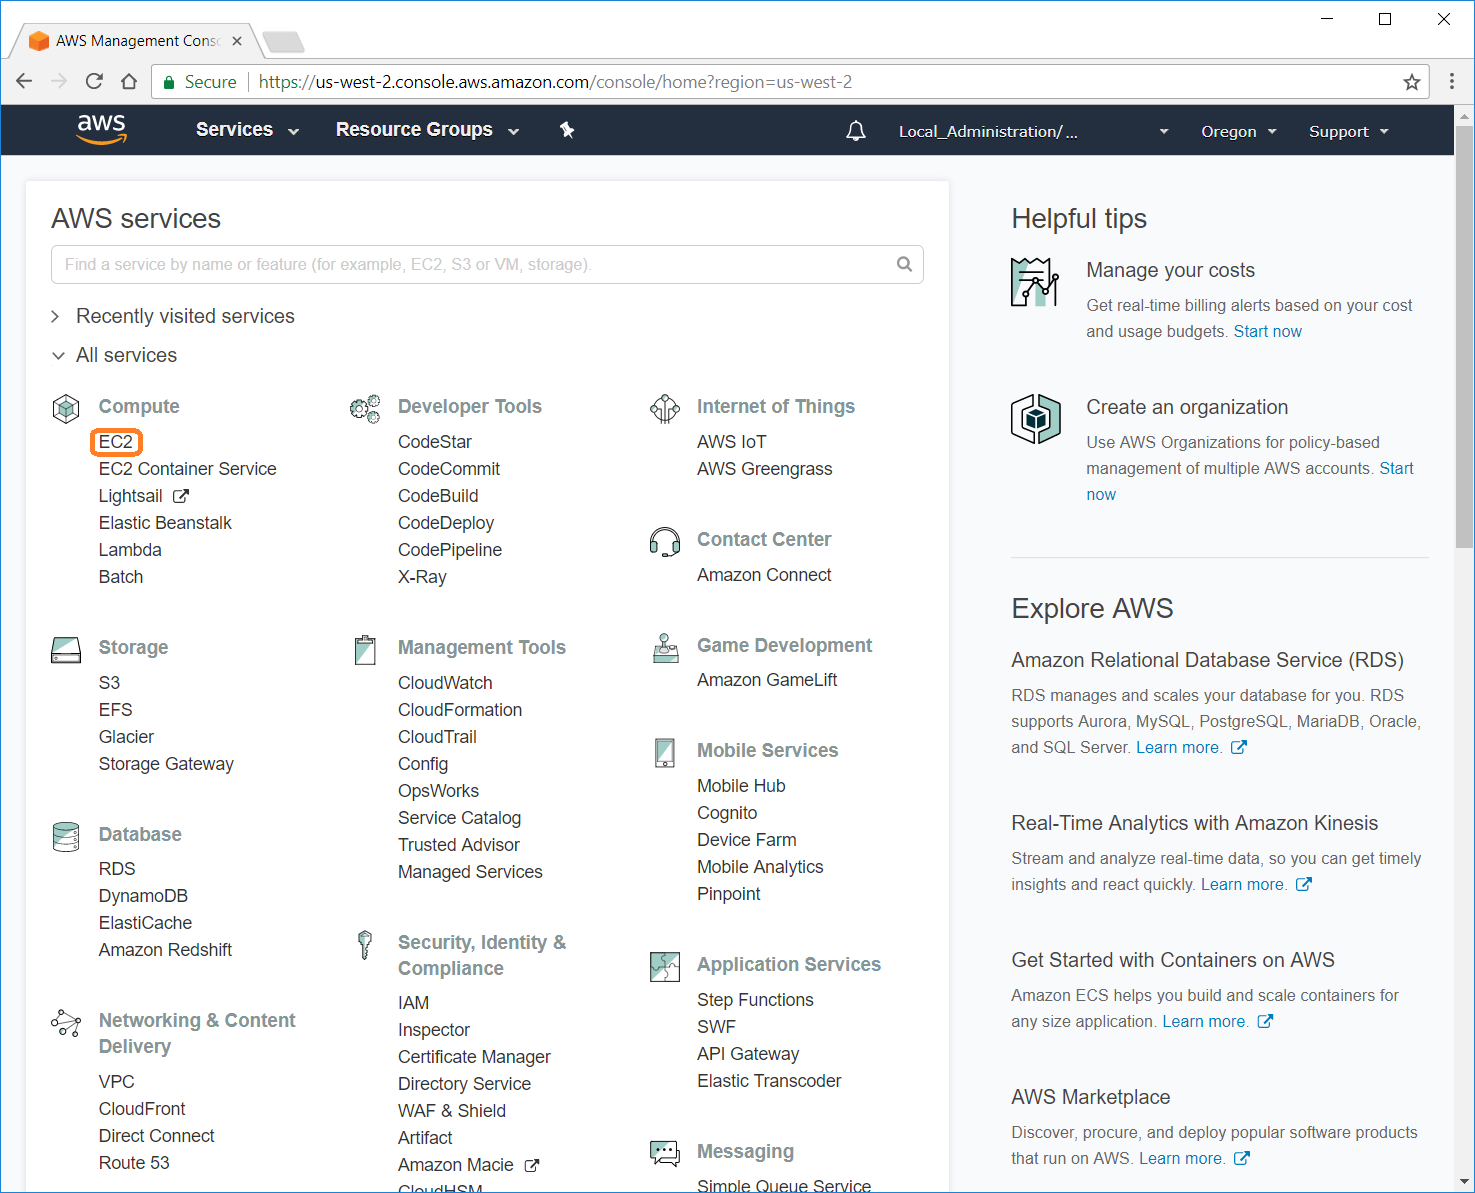
Figure 1: AWS Console
This selection brings up your EC2 Dashboard menu.
To create a new Clear Linux OS instance from the EC2 Dashboard menu, select the Launch Instance button as shown in Figure 2:
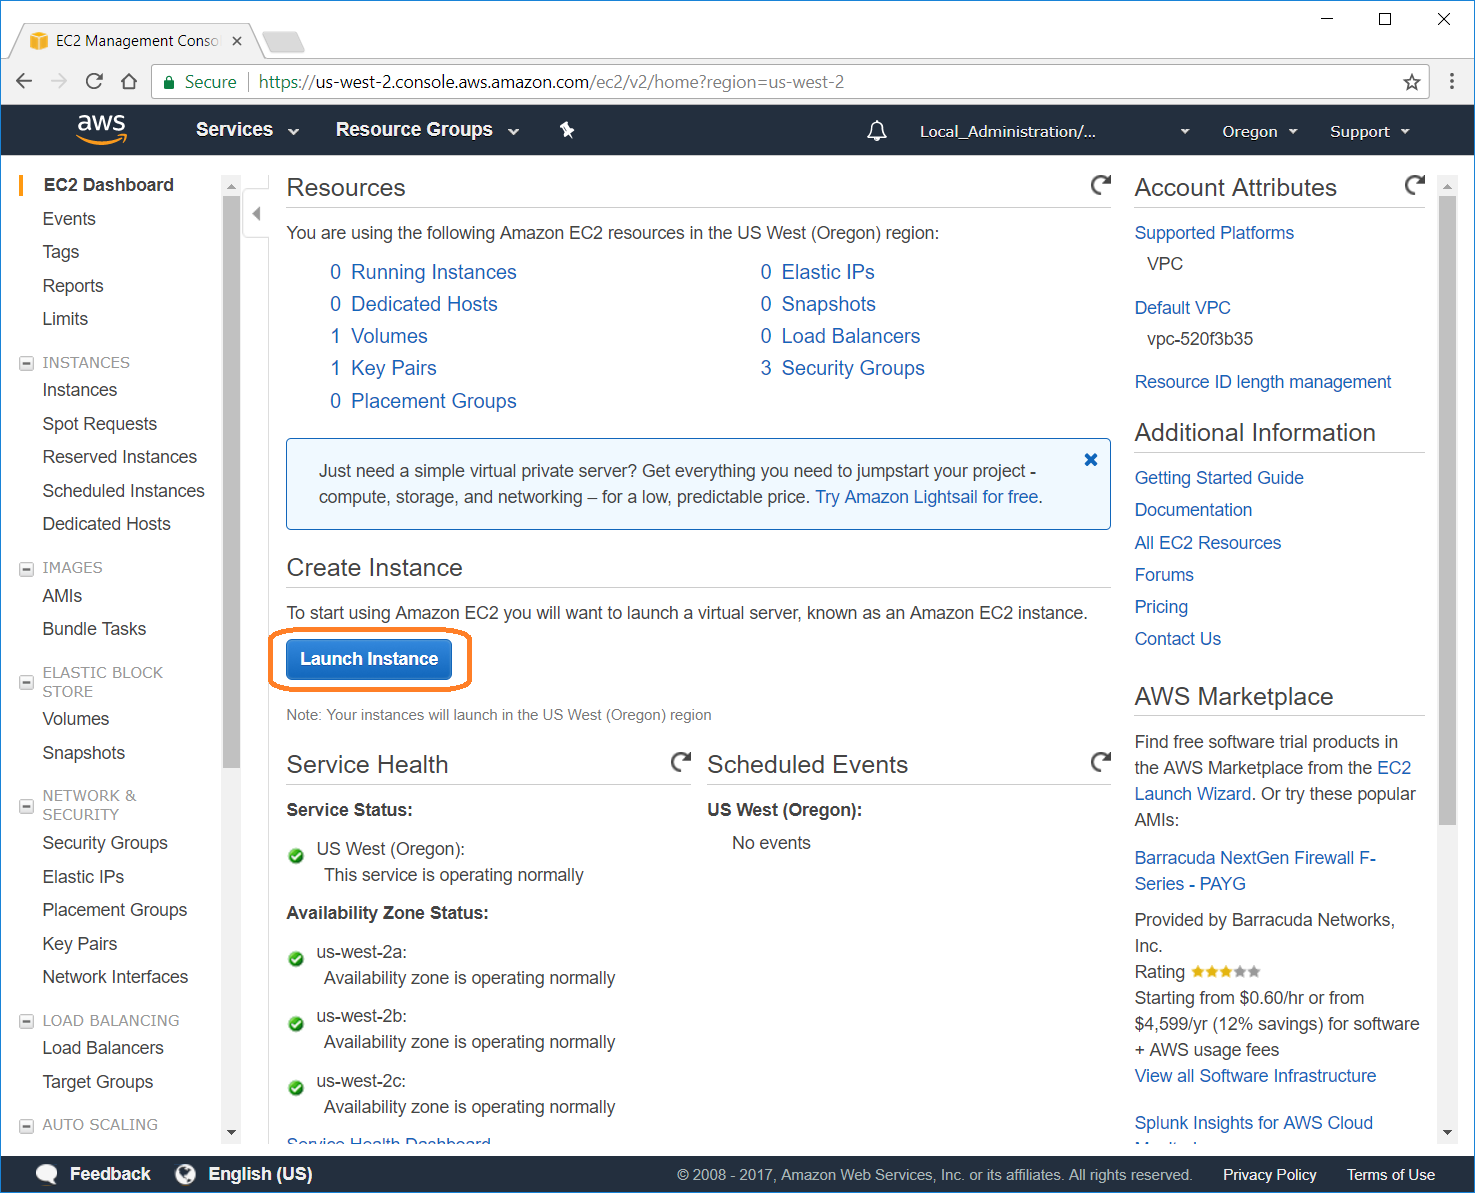
Figure 2: EC2 Dashboard
This selection takes you to the Step 1: Choose an Amazon Machine Image (AMI) menu.
To find the Clear Linux OS Basic AMI in the Step 1: Choose an Amazon Machine Image (AMI) menu, do the following:
In the lefthand navigation window, select the AWS Marketplace menu item to bring up the search bar to Search AWS Marketplace Products.
In the search bar, type “clear linux os” and press the Enter key to search for and locate the Clear Linux OS Basic AMI.
Select the Clear Linux OS Basic AMI by clicking the Select button as shown in Figure 3:
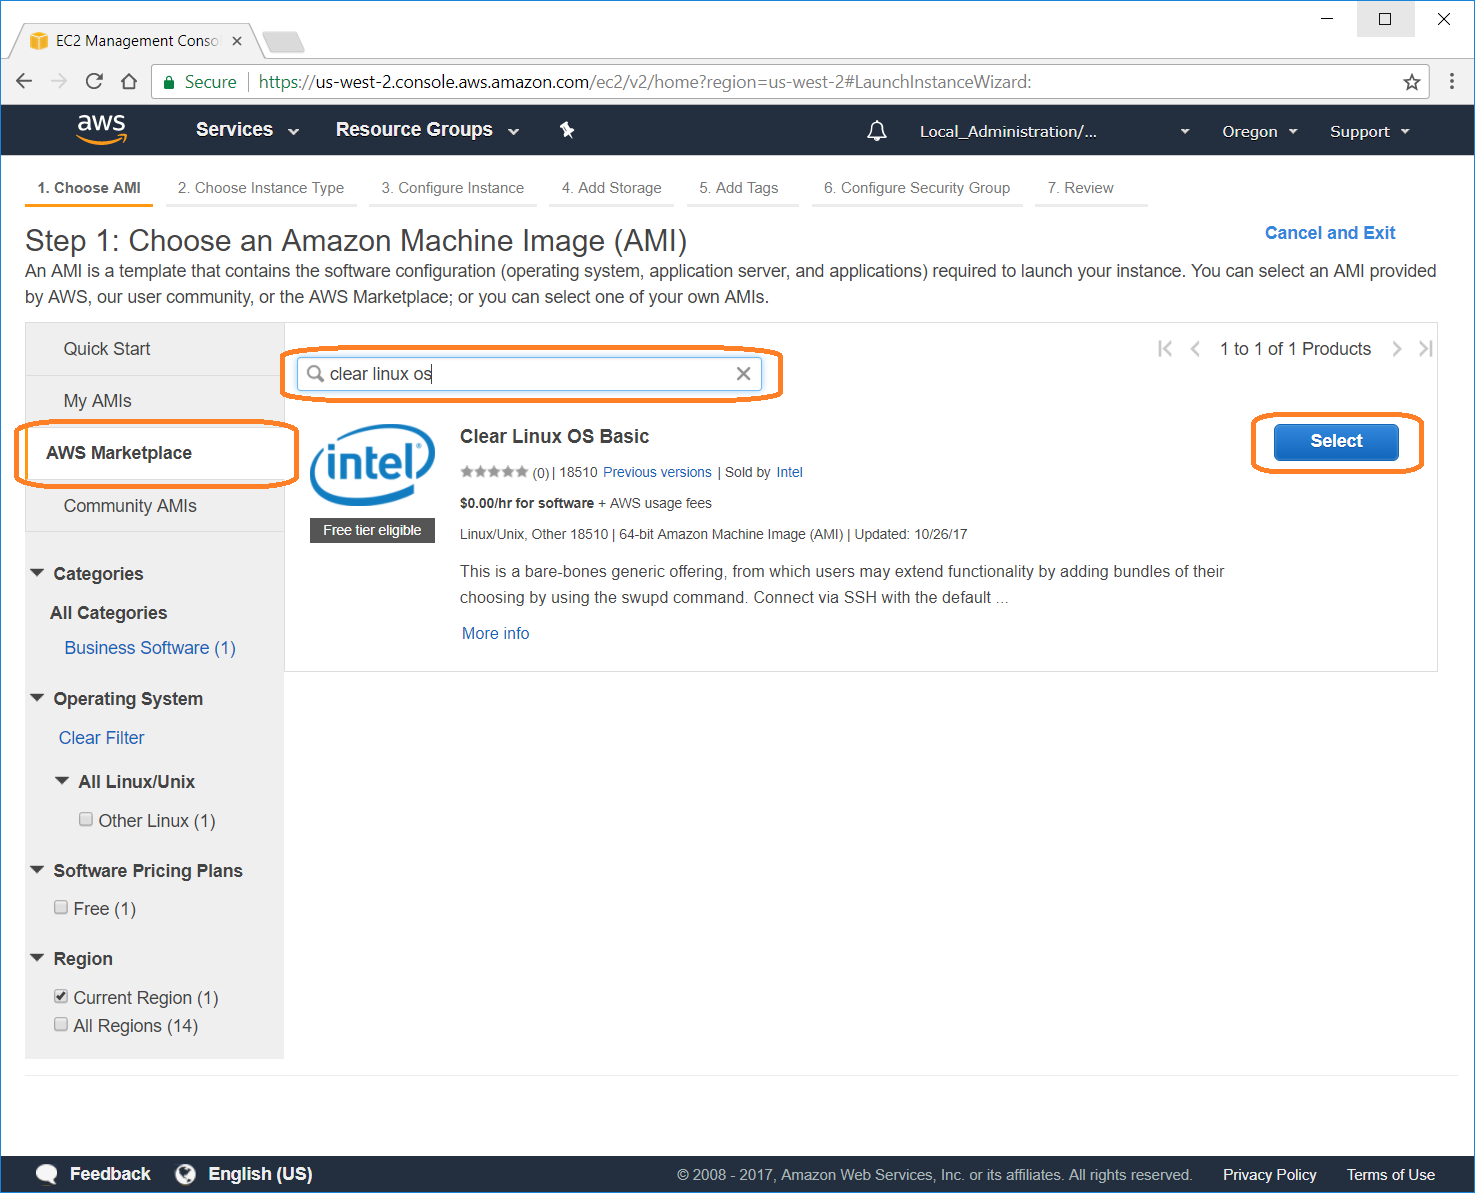
Figure 3: Step 1: Choose AMI
A pop-up dialog box appears showing you more information about the Clear Linux OS Basic AMI along with the pricing details for running Clear Linux OS on different platform configurations as shown in Figure 4. Select the Continue button.
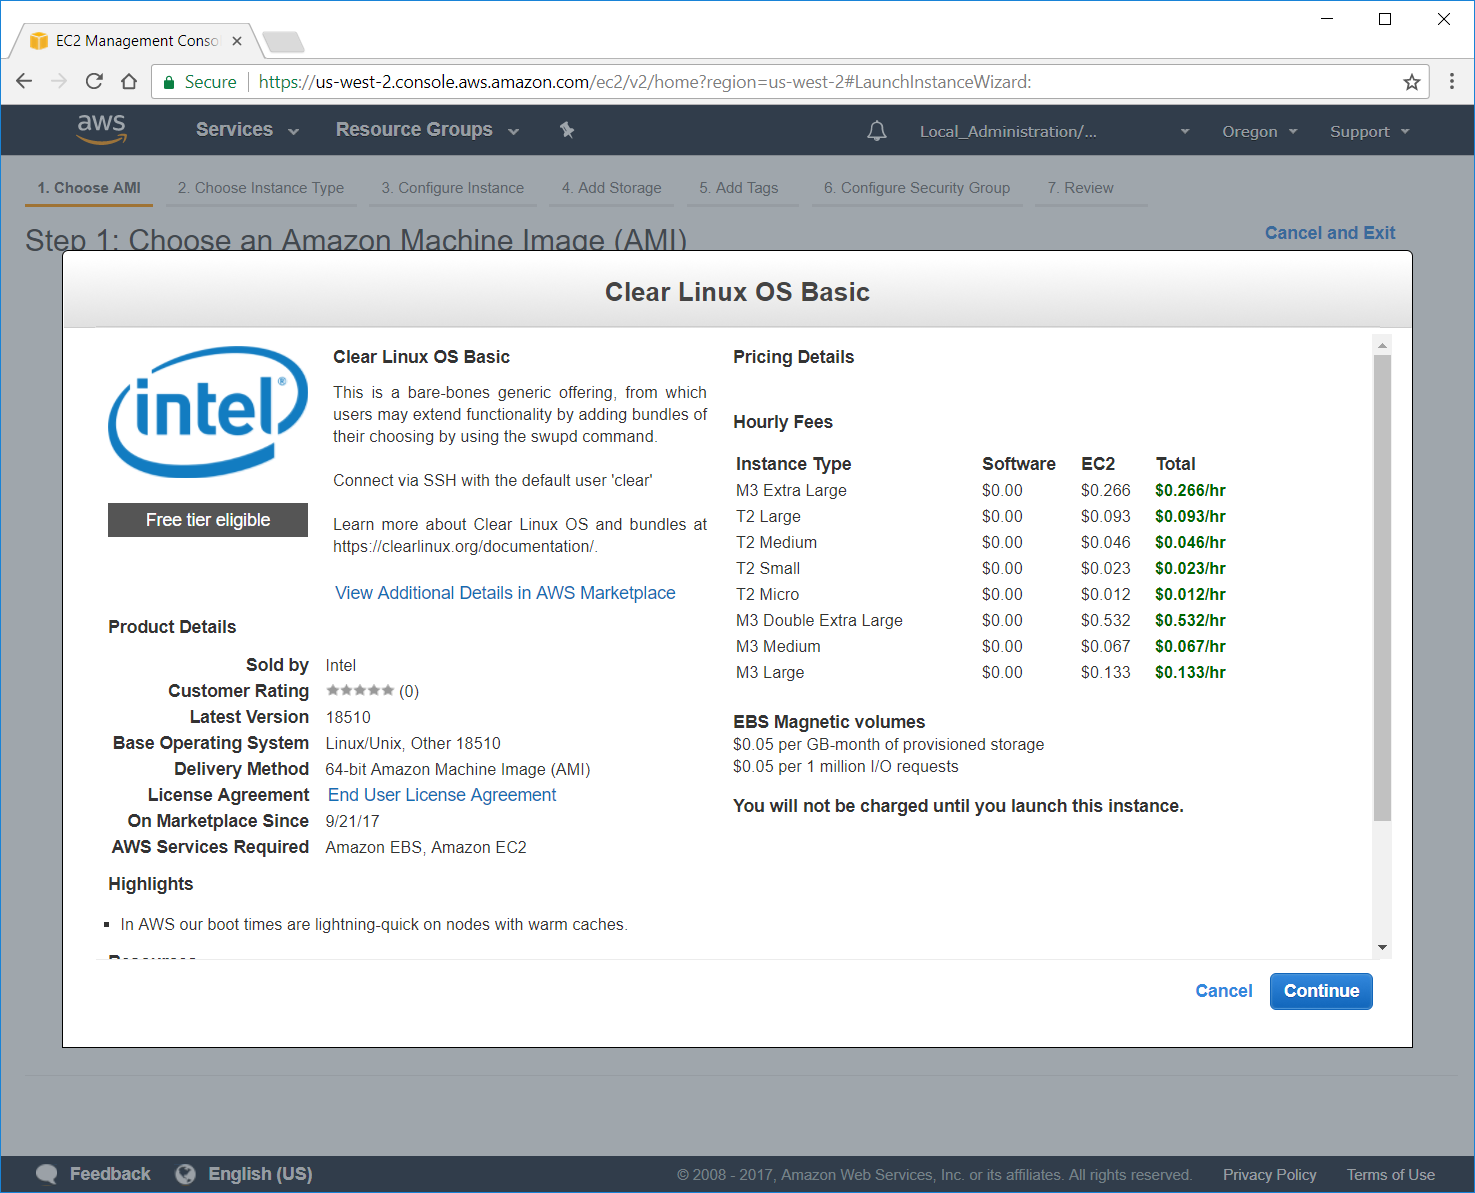
Figure 4: Clear Linux OS Basic
The Choose Instance Type menu appears as shown in Figure 5.
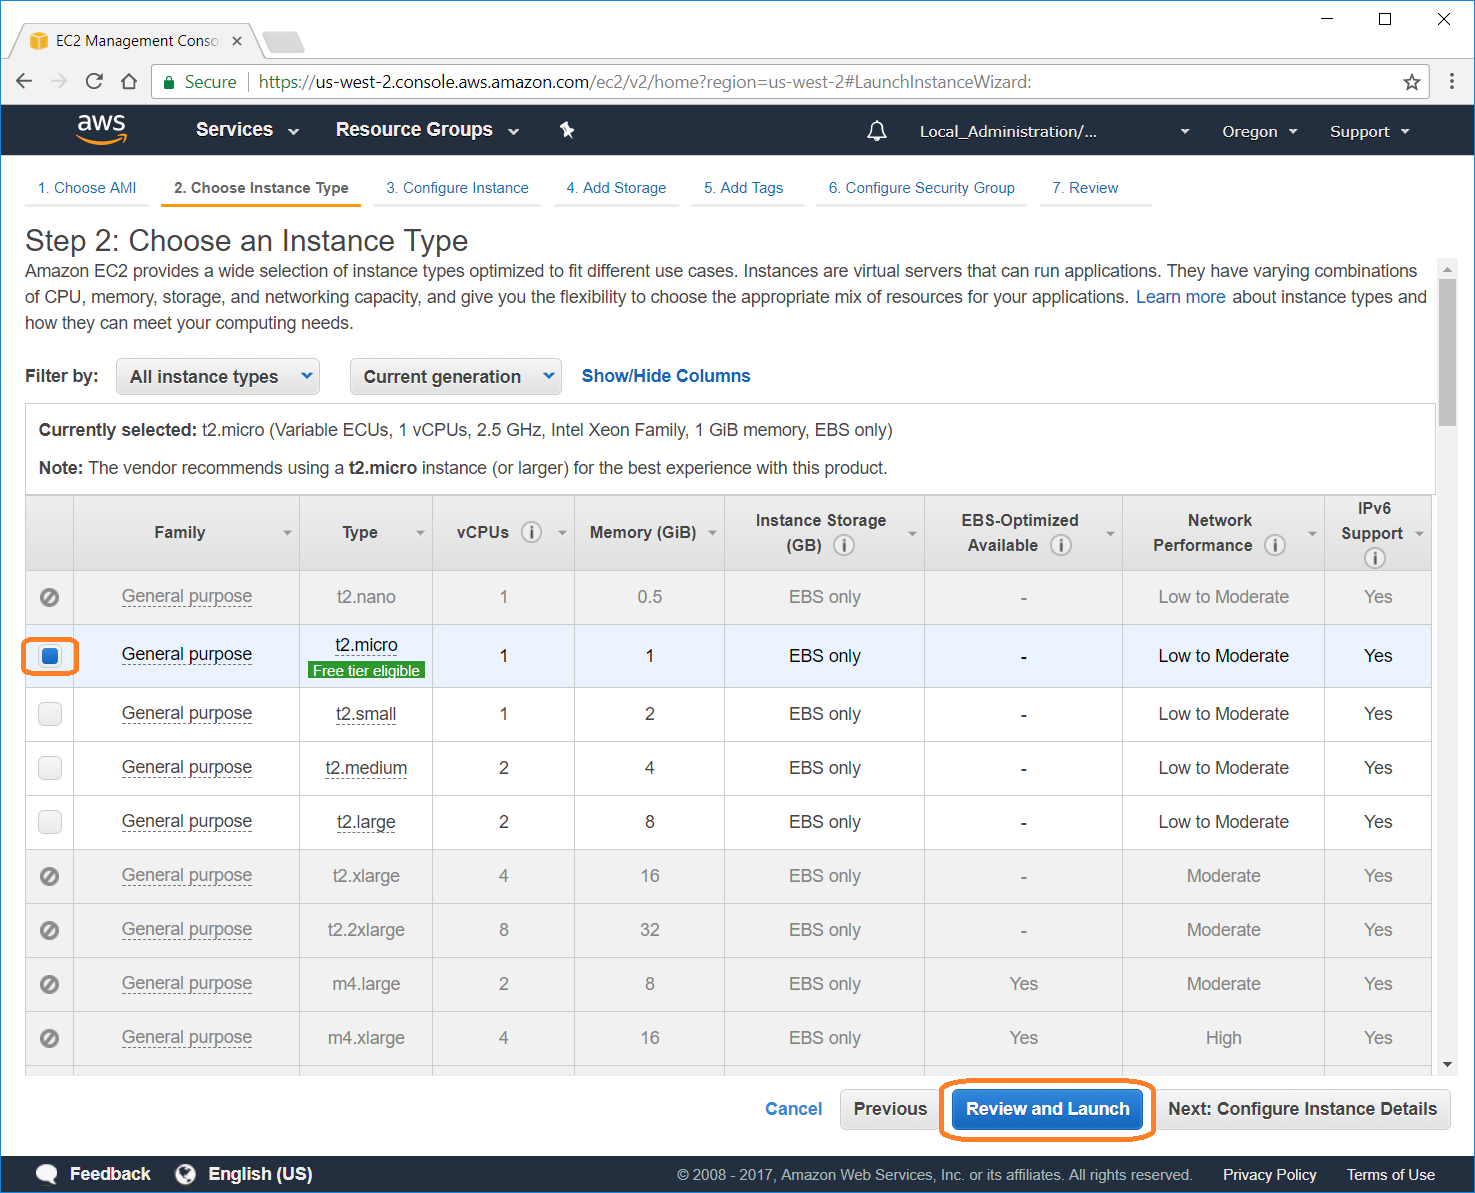
Figure 5: Choose an Instance Type
Select the t2.micro type by clicking the box on the left side of the instance and then select the Review and Launch button to move to the Step 7: Review the Instance Launch menu.
Note
You can configure the instance details, add additional storage, add tags, and configure the security group before selecting the Review and Launch button if you want to further customize this Clear Linux OS instance.
The Step 7: Review the Instance Launch menu, shown in Figure 6, allows you to Cancel the process, return to the Previous screen to change the configuration or Launch the instance defined.
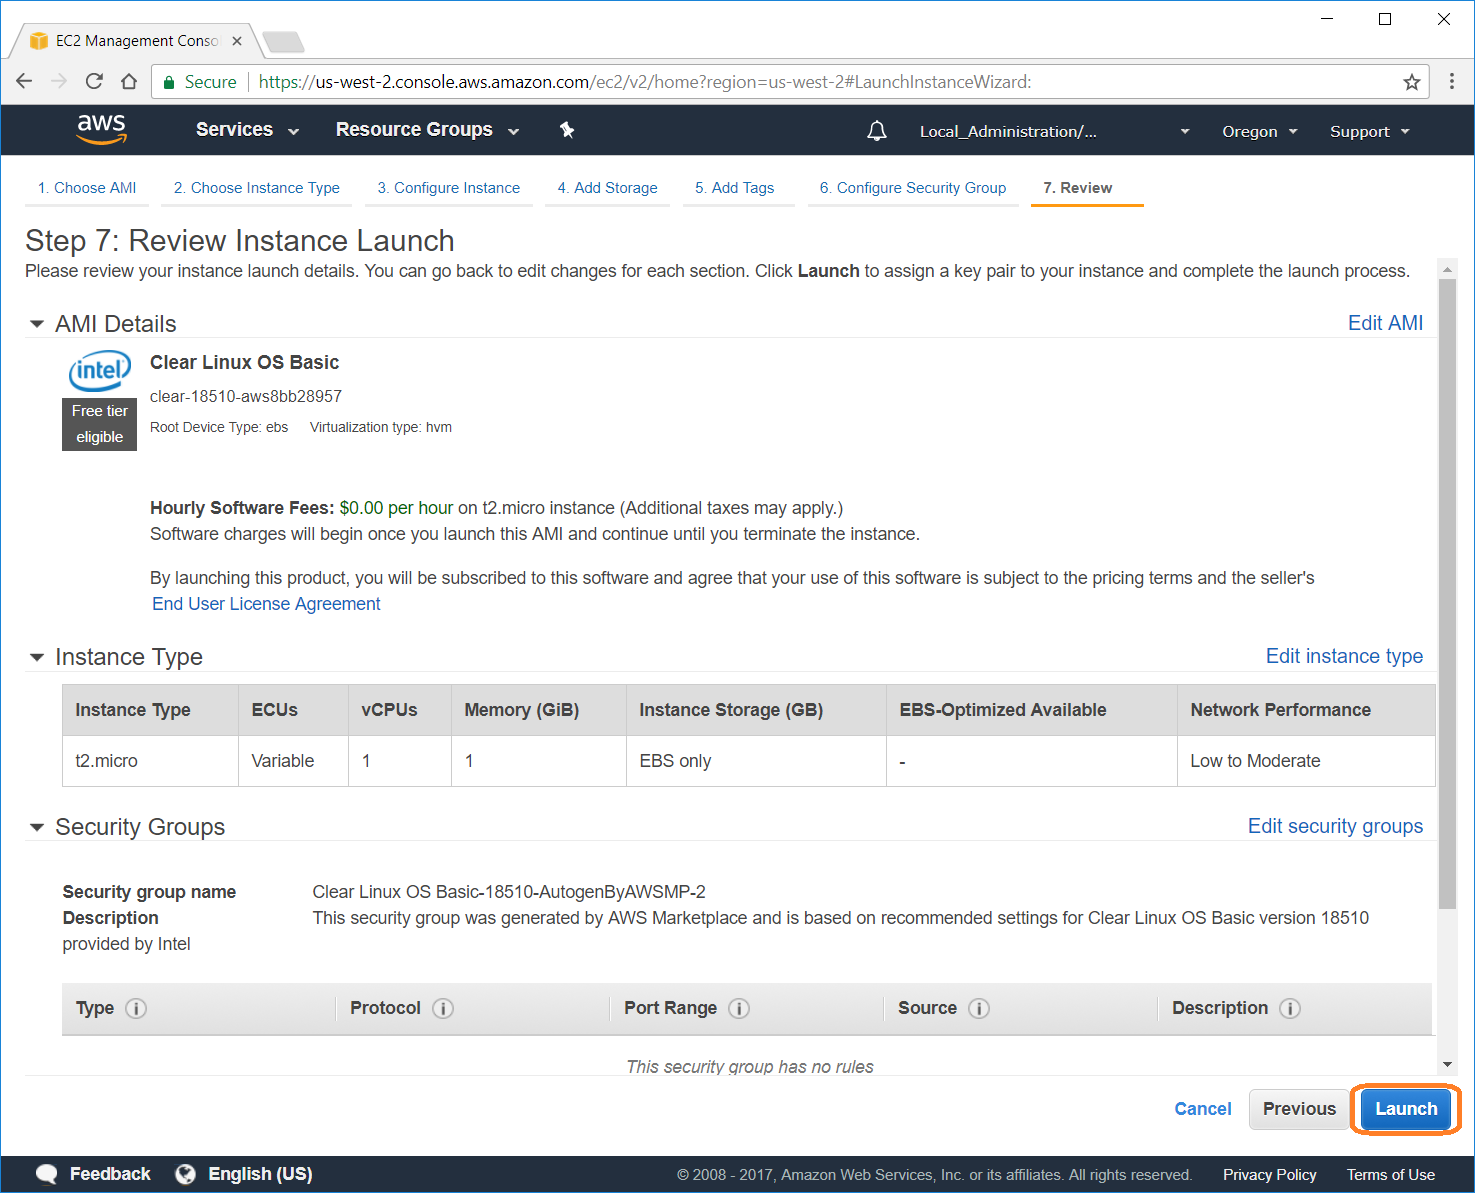
Figure 6: Step 7: Review the Instance Launch
Select the Launch button. A dialog box appears, as shown in Figure 7, asking you to Select an existing key pair or create a new pair.
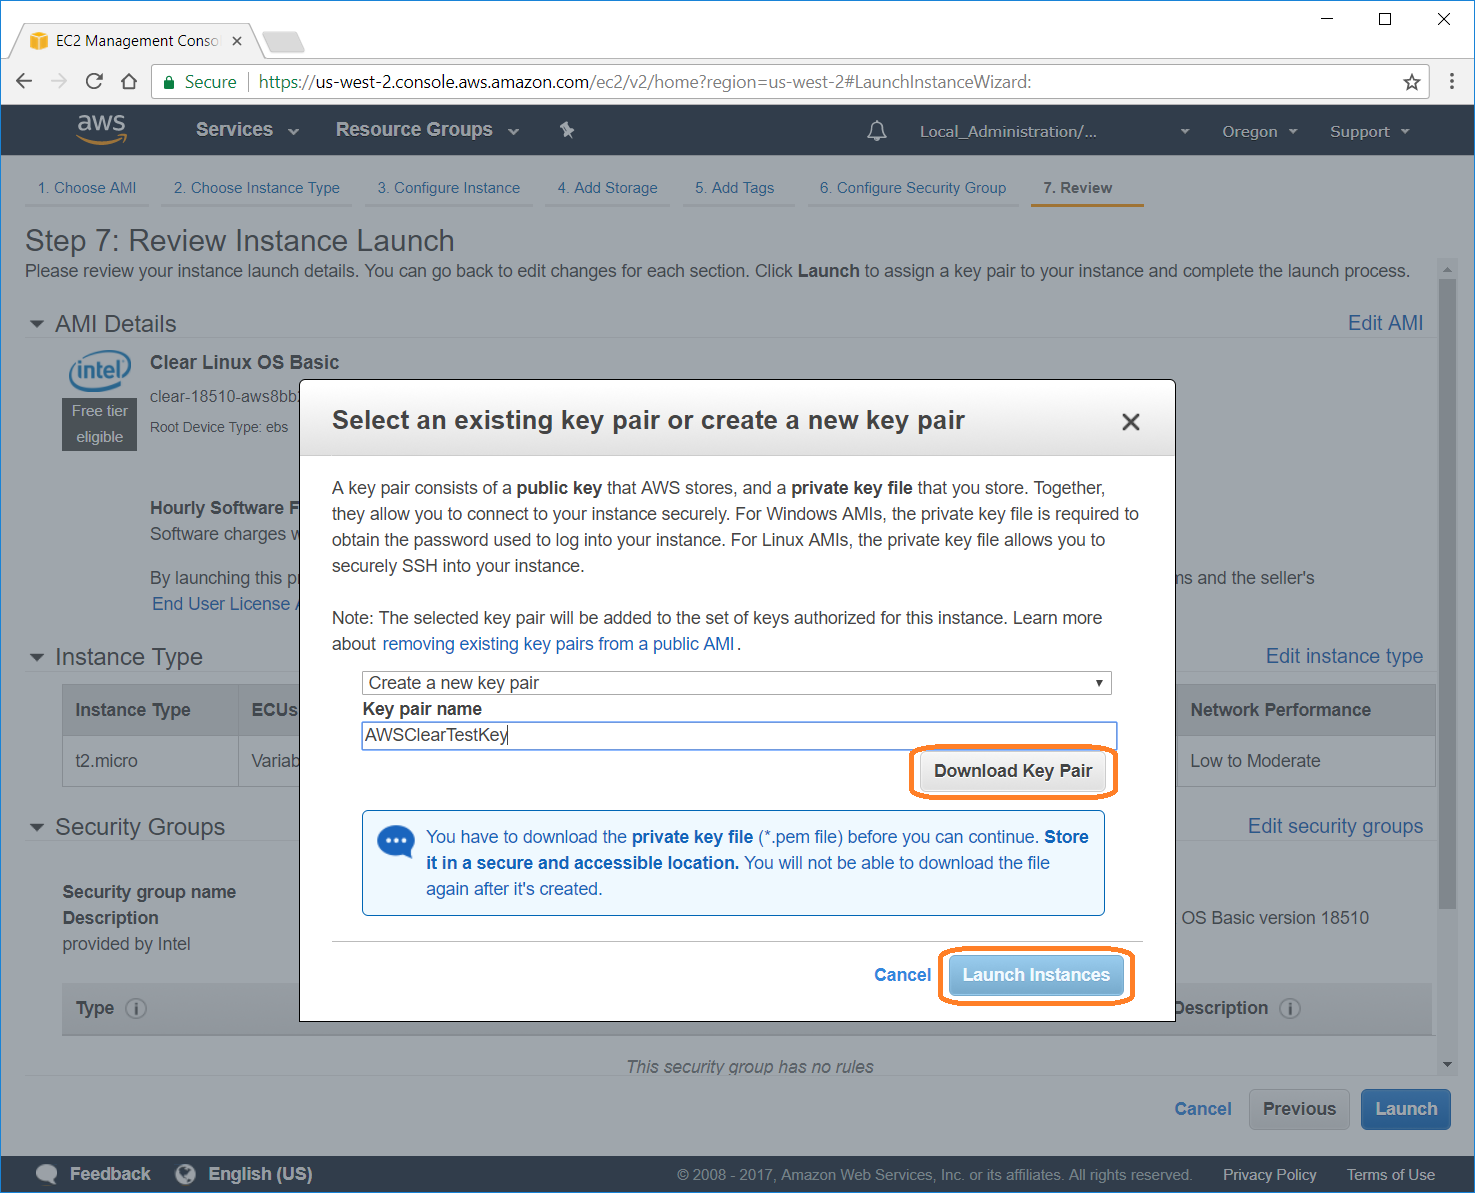
Figure 7: Select an existing key pair or create a new pair
Select the Create a new key pair option.
For the Key pair name field, enter AWSClearTestKey.
Select the Download Key Pair button to download the
AWSClearTestKey.pemto your browser’s definedDownloadsdirectory.When the file finishes downloading, select the Launch Instances button to proceed to the Launch Status menu shown in Figure 8.
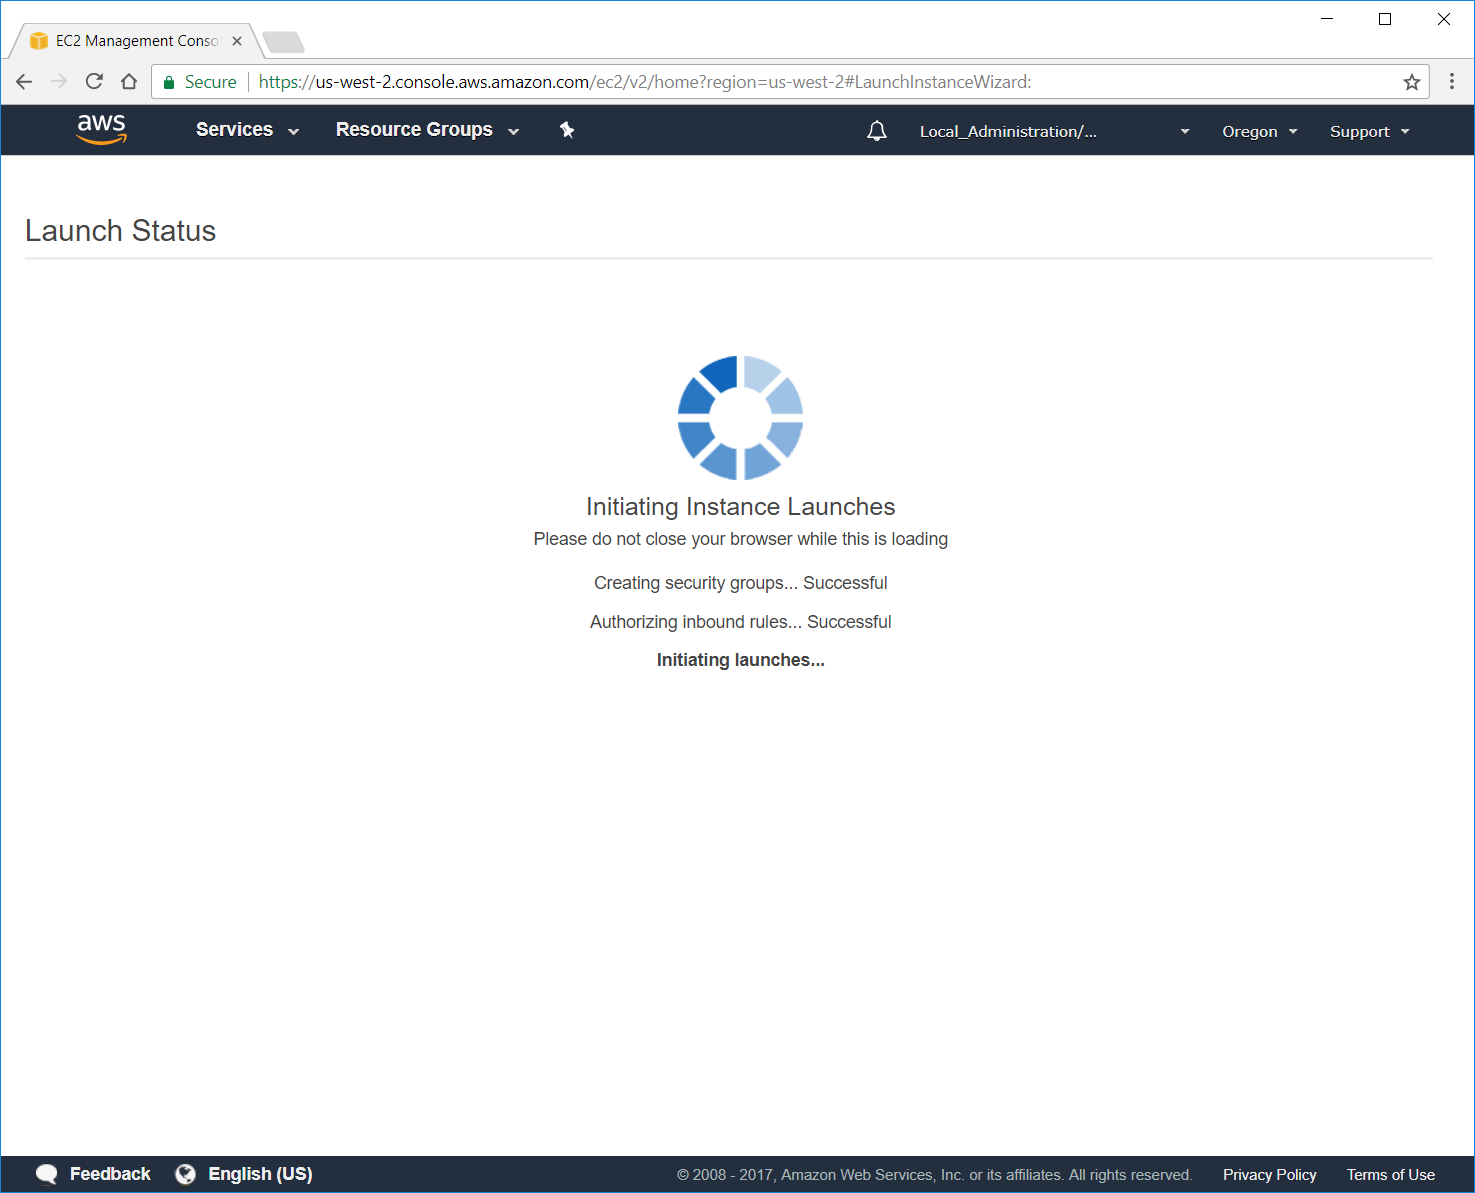
Figure 8: Launch Status
Once the Launch Status page changes to what is shown in Figure 9, select the View Instances button to view your Instances dashboard.

Figure 9: View Instance
Connect to your Clear Linux OS basic instance
Your Instances Dashboard is shown in Figure 10 with the new Clear Linux OS OS basic instance already selected and in the running state. If there are other instances available, they are also listed but not selected.
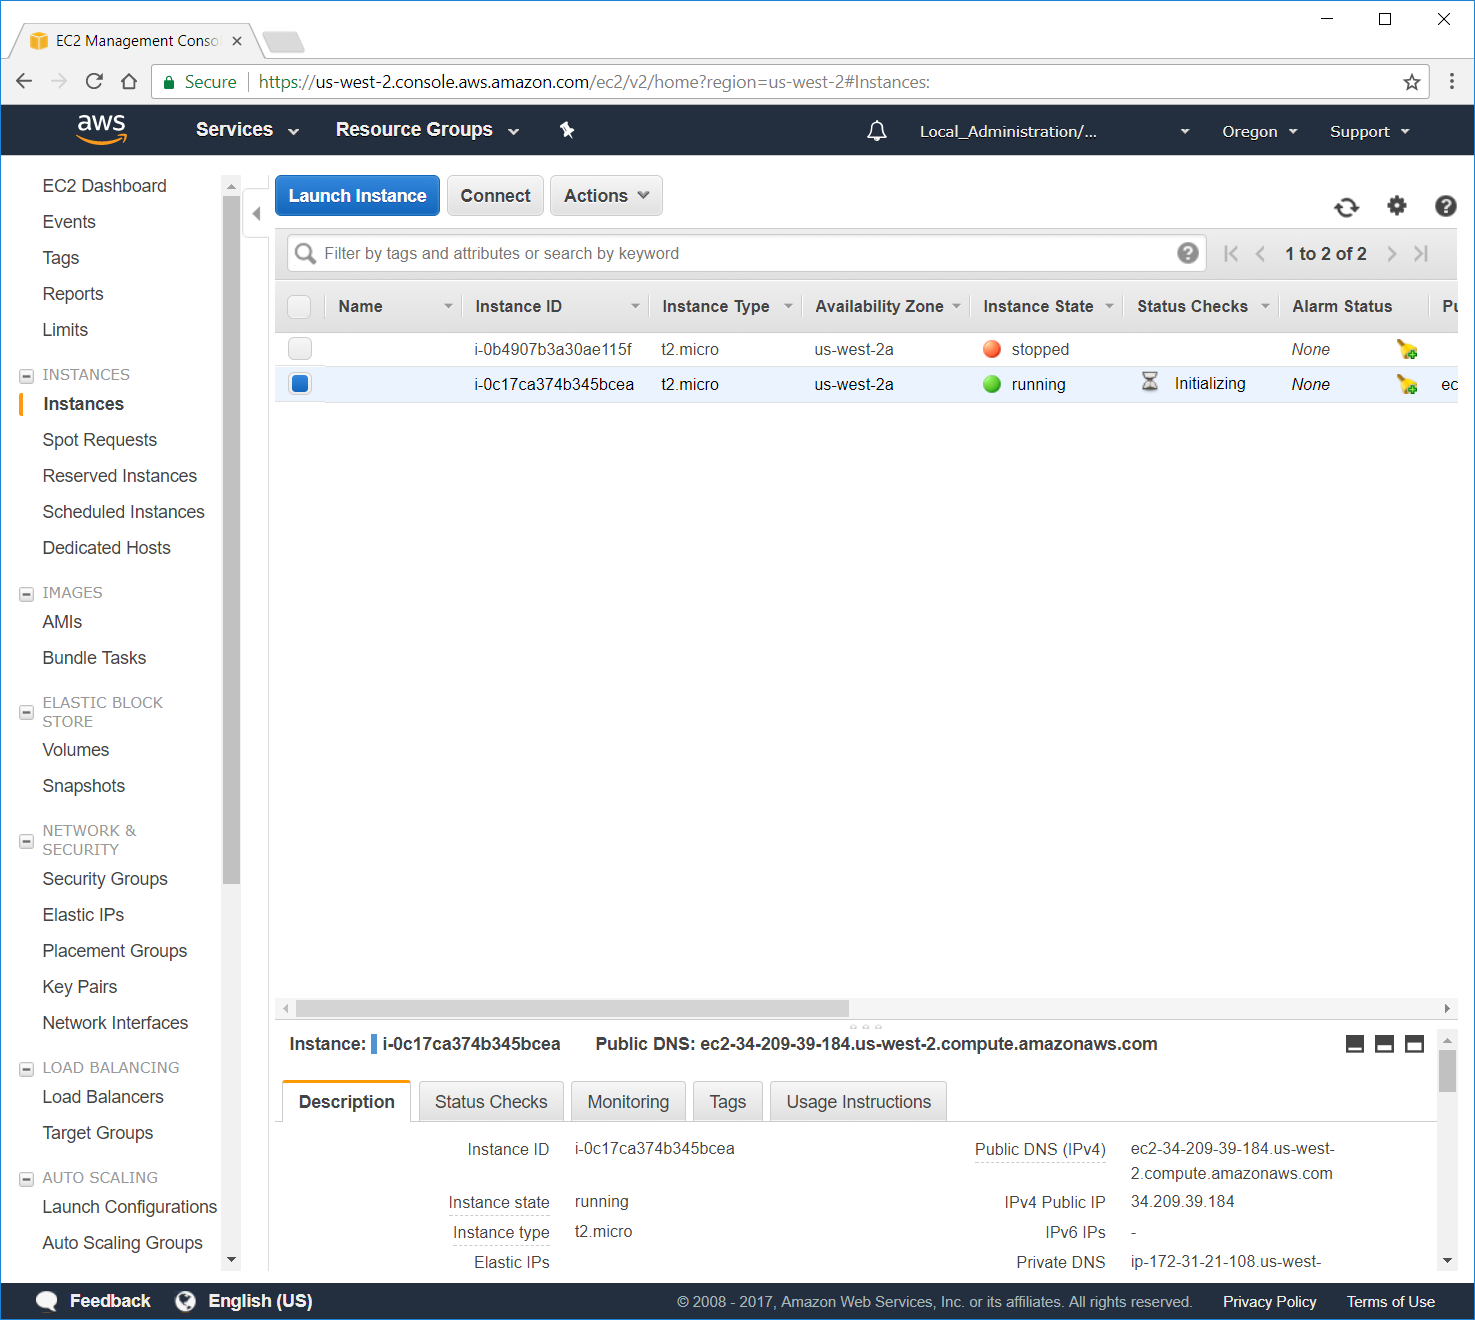
Figure 10: Instance Dashboard
To connect to your running instance, click the Connect button located at the top of your dashboard. AWS brings up the pop-up dialog box shown in Figure 11 describing how to connect to your running instance.
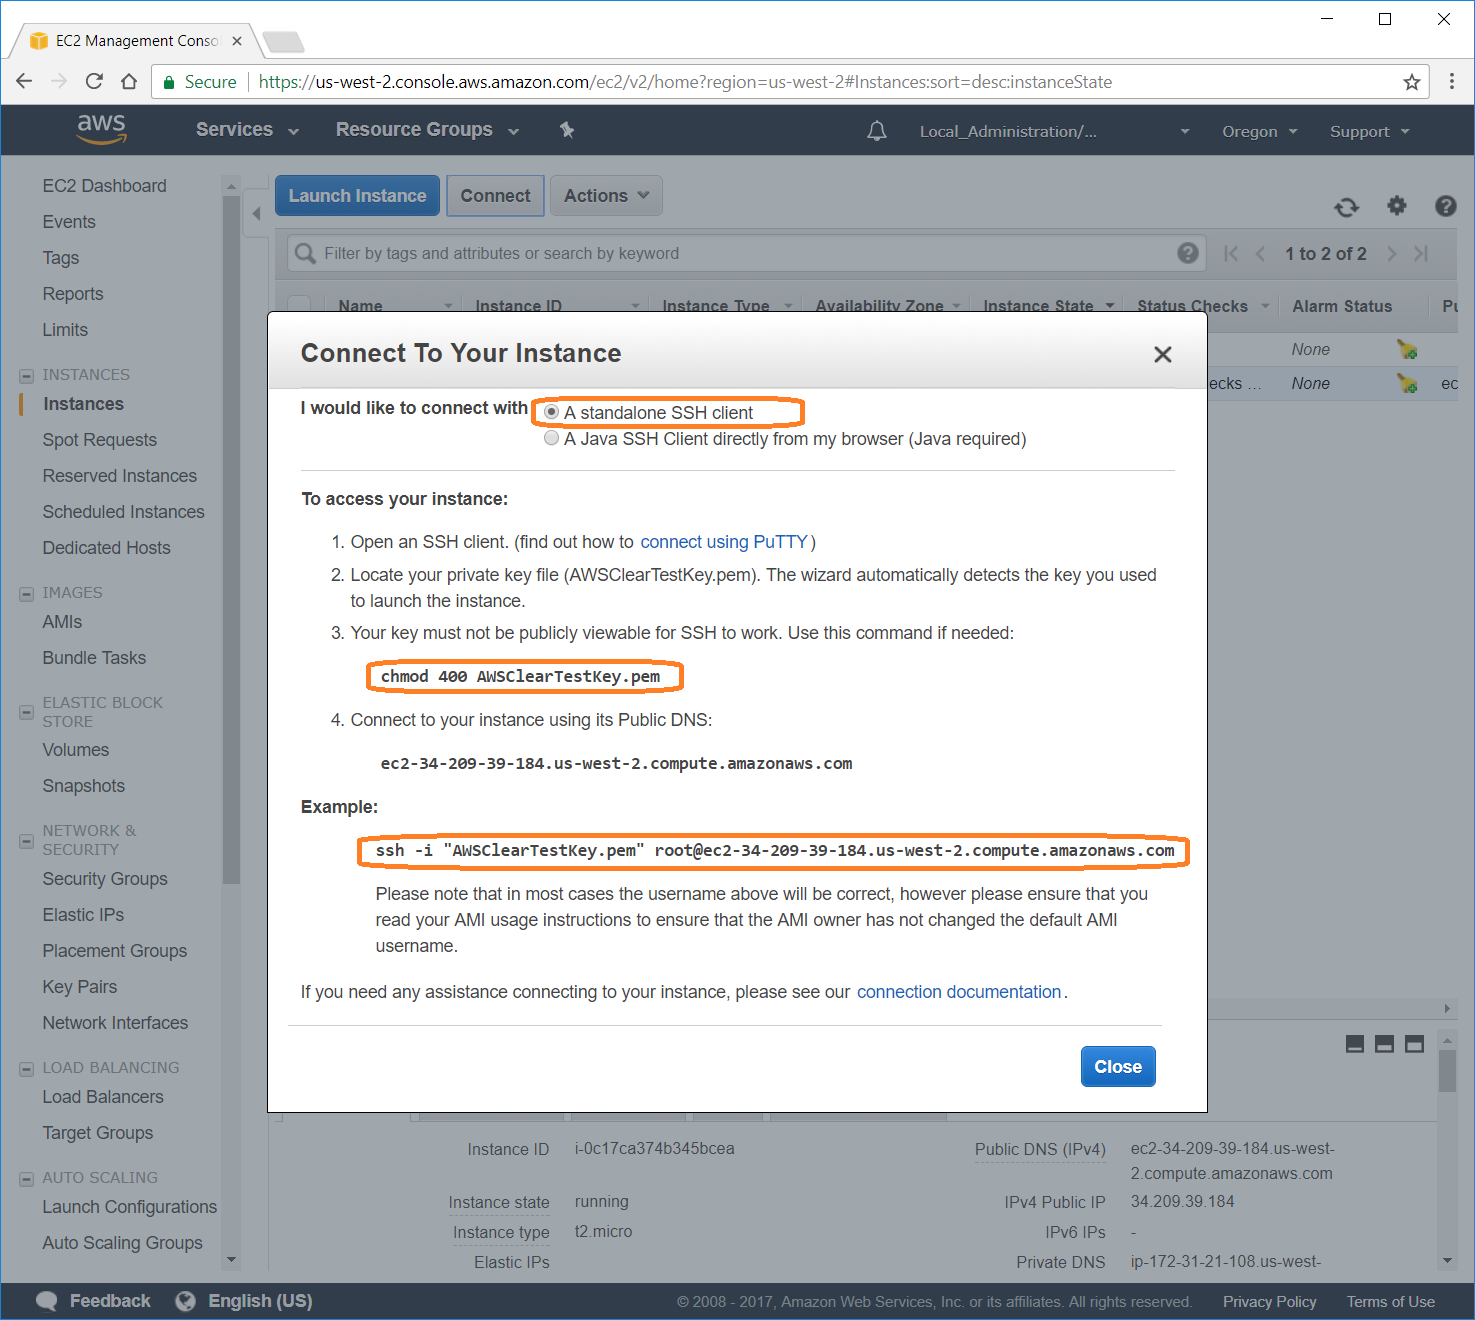
Figure 11: Connect to Your Instance
Open a terminal on your system. You should be in your
$HOMEdirectory.Copy the previously downloaded keyfile from the
Downloadsdirectory to the current directory.cp Downloads/AWSClearTestKey.pem .Change the attributes of the
AWSClearTestKey.pemusing the chmod command as instructed in the dialog box shown in Figure 11.chmod 400 AWSClearTestKey.pemCopy the text highlighted in the Example: section that is shown in figure 11. Paste the copied text into your terminal, change the text before the @ sign to the username clear, and press the Enter key to execute the command.
ssh -i "AWSClearTestKey.pem" clear@ec2-34-209-39-184.us-west-2.compute.amazonaws.comA message appears on the terminal stating the authenticity of the host can’t be established and prompts you with the message:
The authenticity of host 'ec2-34-209-39-184.us-west-2.compute.amazonaws.com (34.209.39.184)' can't be established.
ECDSA key fingerprint is SHA256:LrziT5Ar66iBTfia8qmiIsrfBUm/UGam76U8bDR6yJc.
Are you sure you want to continue connecting (yes/no)?
Type yes and press the Enter key. Another warning is printed to the terminal and you are now at the command prompt of your new Clear Linux OS instance.
Warning: Permanently added 'ec2-34-209-39-184.us-west-2.compute.amazonaws.com,34.209.39.184' (ECDSA) to the list of known hosts.
clear@clr-96a8565d0ca54b0c80364a1e5e7b0f88 ~ $
Update the Clear Linux OS instance
Run the sudo swupd update command to update the operating system as shown in Figure 12:
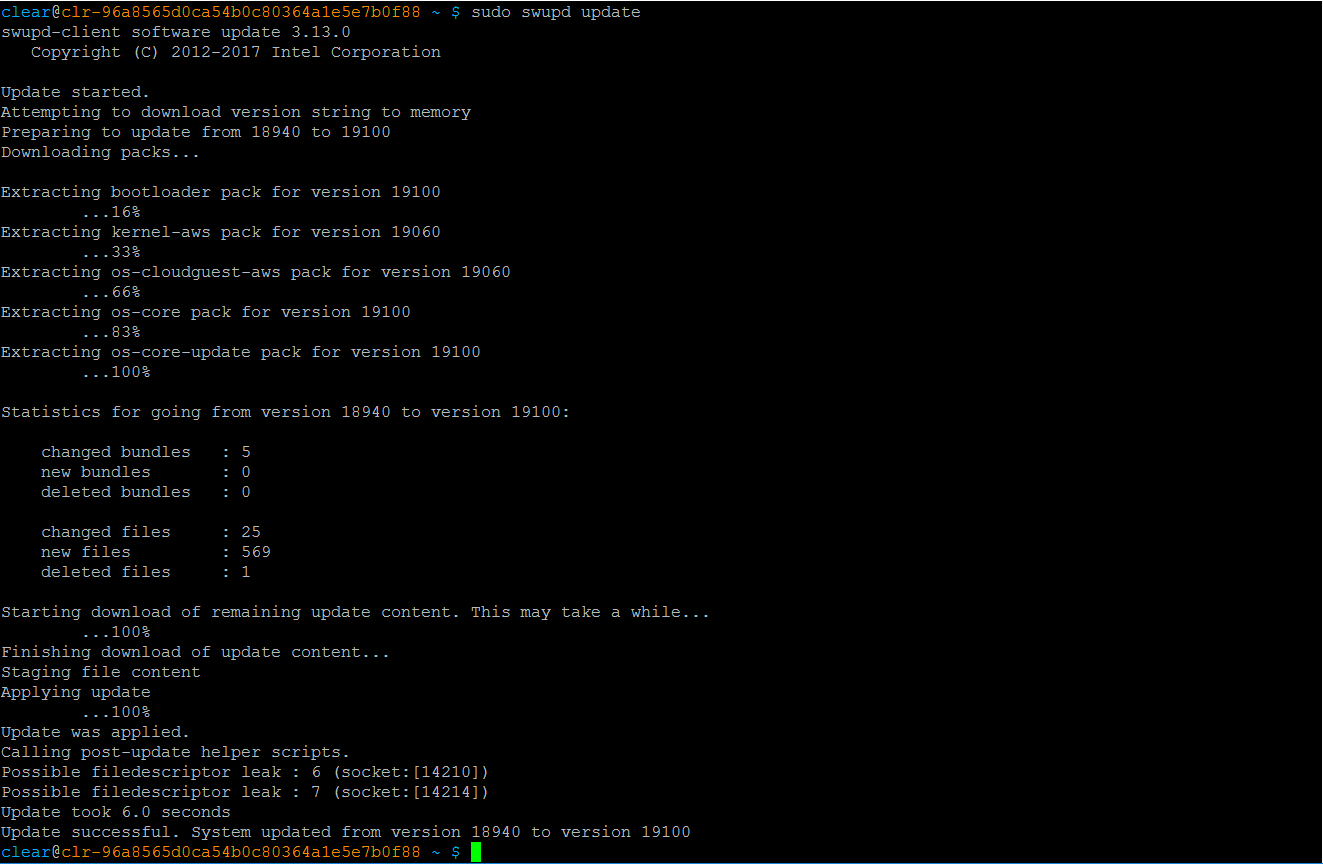
Figure 12: sudo swupd update
In this example, we updated from version 18940 to 19100.
Stop the Clear Linux OS instance
When you are finished using your AWS Clear Linux OS instance, you must stop it using the Instances dashboard to stop accruing charges. Complete the following steps from the Instances dashboard to stop your AWS Clear Linux OS instance from running.
Select the Actions button to bring up a pull-down menu.
Select the Instance State menu item to expand the options.
Select Stop menu item to shut down the running instance.
Figure 13 illustrates these steps.
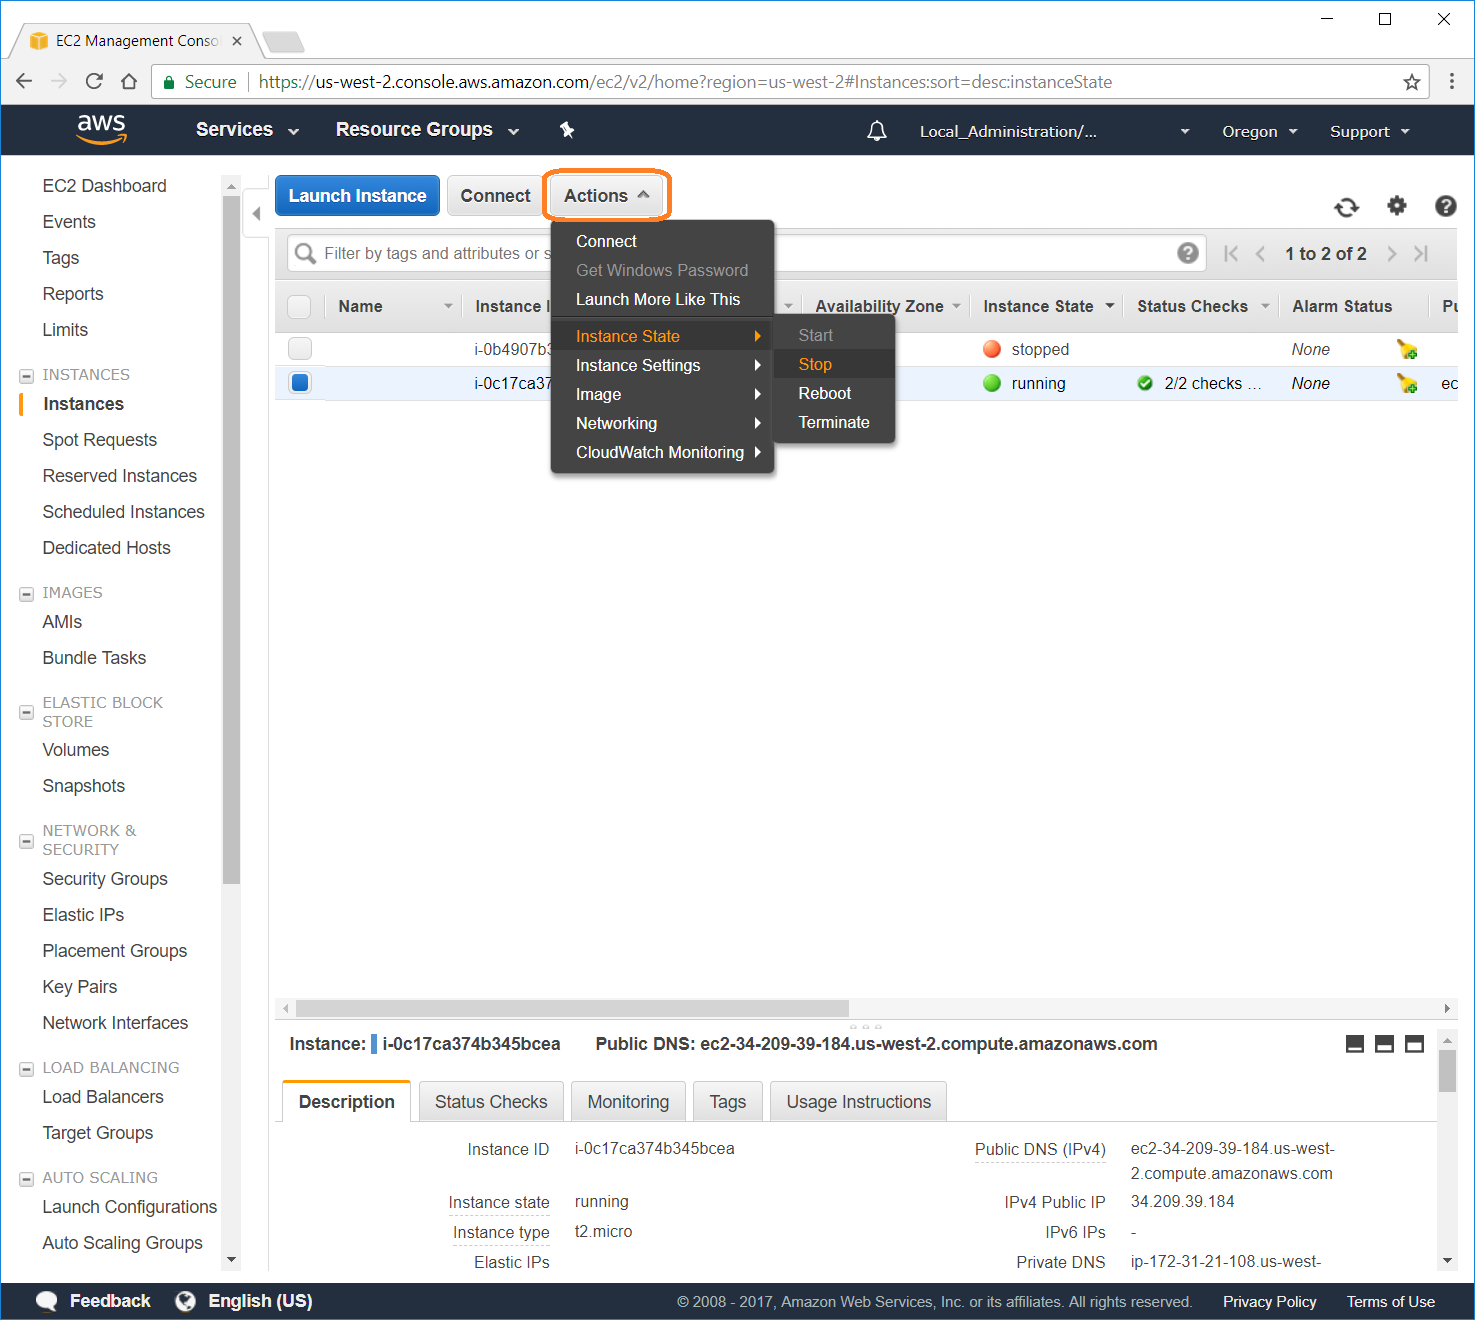
Figure 13: Stop Instance
A pop-up dialog box appears warning you that any ephemeral storage of your instance will be lost. Select the Yes, Stop button to stop your Clear Linux OS instance.
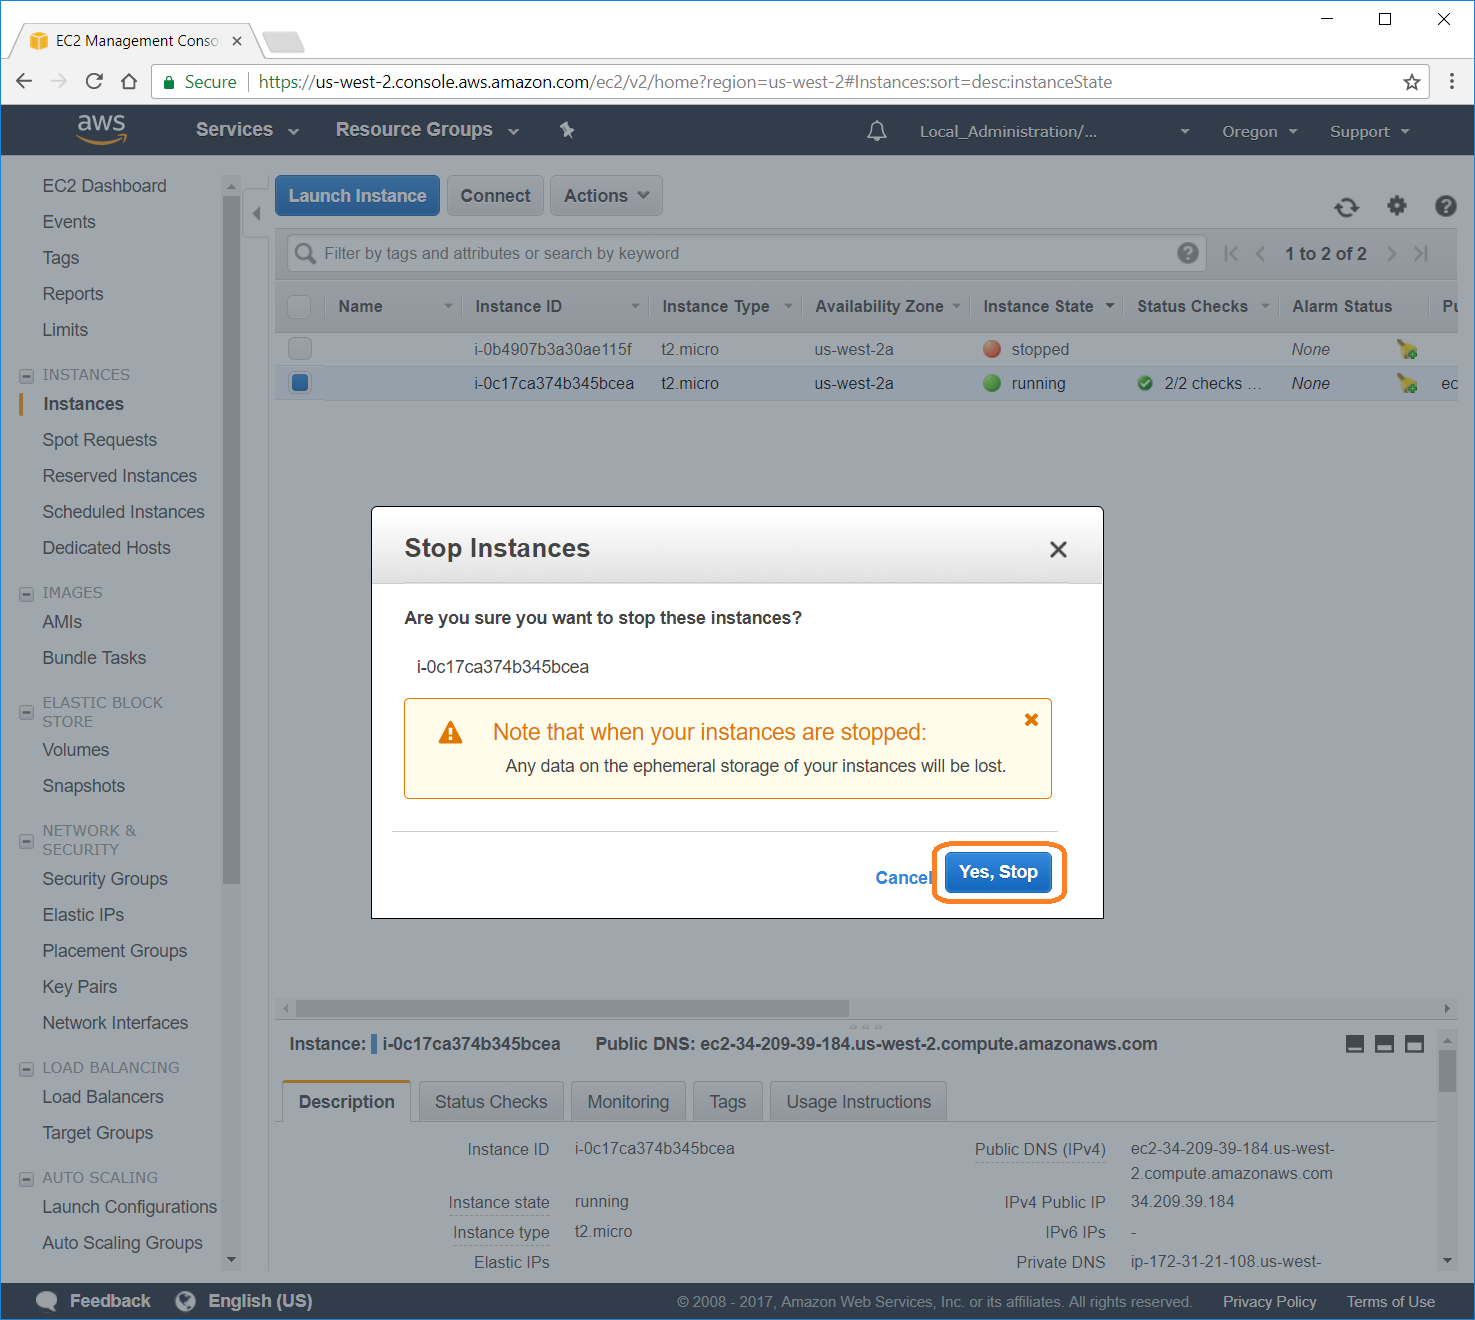
Figure 14: Stop Instances
Congratulations! You are up and running with Clear Linux OS on AWS. To see what you can do with your Clear Linux OS instance, visit our tutorials section for examples on using your Clear Linux OS system.
