Configure Wi-Fi
We recommend using NetworkManager to manage wireless network connections. If you choose to connect to Wi-Fi while using the live installer image, your Wi-Fi settings will be added to your system during the installation process.
NetworkManager provides three simple methods for configuring Wi-Fi: Desktop, CLI, and TUI. NetworkManager uses wpa_supplicant, which can also be used on its own for a more lightweight installation.
Using Network Manager
Desktop GUI (Graphical User Interface)
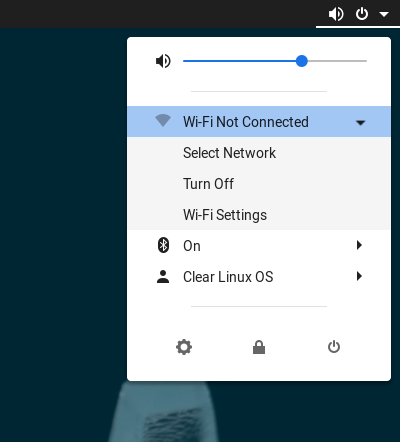
Click anywhere on the icons at the right side of the top of the screen to bring up a menu and click on Wi-Fi Not Connected then choose Select Network.
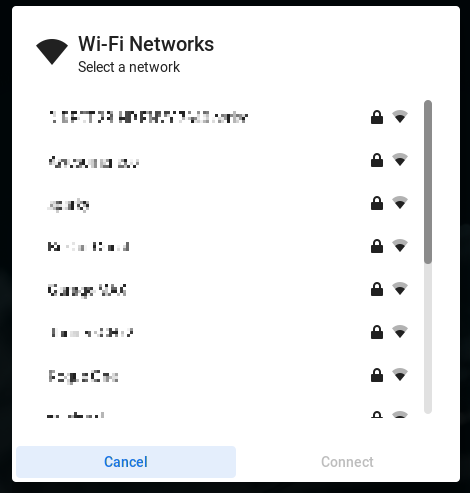
Scroll through the list and select the network you’d like to connect to and click Connect.
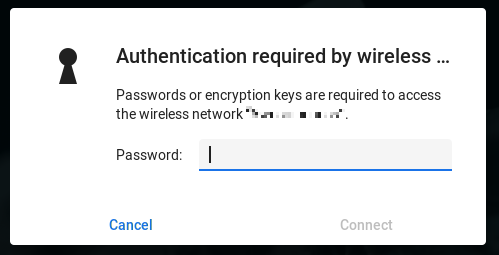
Enter the password and click Connect.
The Wi-Fi icon should now show the signal strength of the connection.

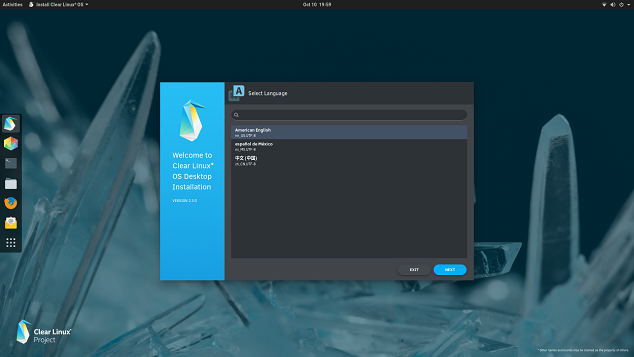
If you are installing using the live image, resume the installation process now. Your Wi-Fi configuration will automatically be included in the install.
CLI (Command Line Interface)
List the available Wi-Fi networks
nmcli device wifi list
IN-USE  SSID                           MODE   CHAN  RATE        SIGNAL  BARS  SECURITY
        1st Network                    Infra  1     54 Mbit/s   65      ▂▄▆_  --
        2nd Network                    Infra  1     130 Mbit/s  52      ▂▄__  --
        3rd Network                    Infra  10    195 Mbit/s  29      ▂___  WPA2
Join the network.
nmcli device wifi connect $SSID password $password
Device 'wlp1s0' successfully activated with 'f2501e67-27a3-4cf2-a8d9-cce3d029b788'.
Note
To avoid having the Wi-Fi password stored in bash history, consider using the TUI.
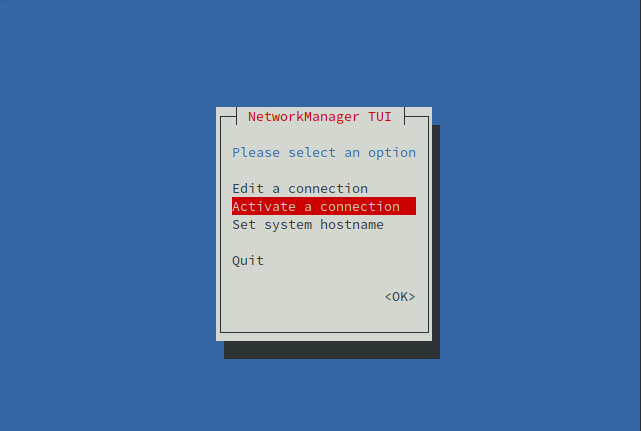
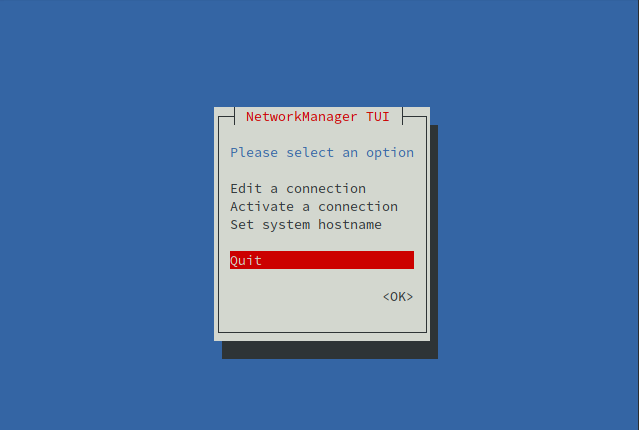
TUI (Text-based User Interface)
Launch the NetworkManager Text User Interface
nmtui
Select Activate a connection and hit return.
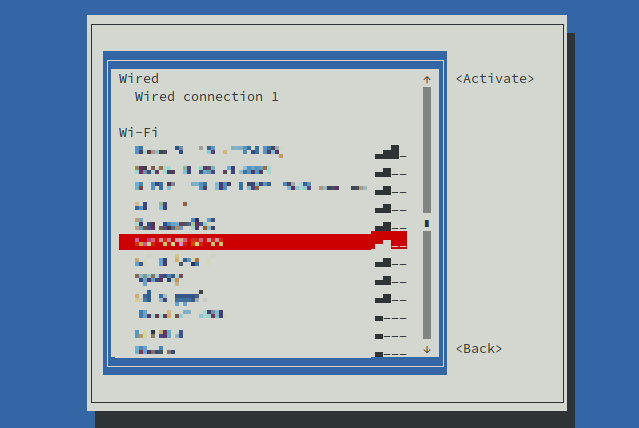
Use the arrow keys to select your network and then select Activate and hit return.
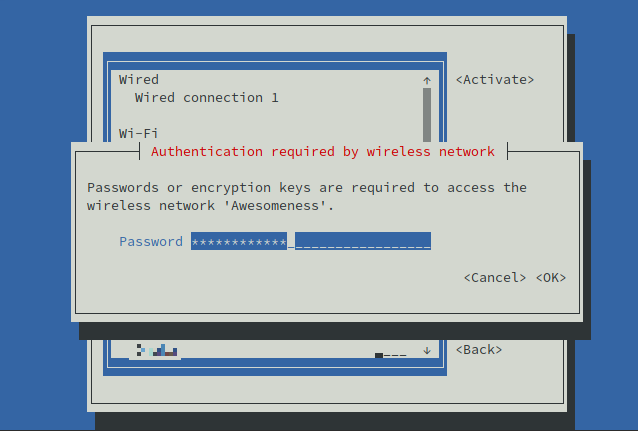
Enter your password and hit return to select OK.
Select Back and hit return.
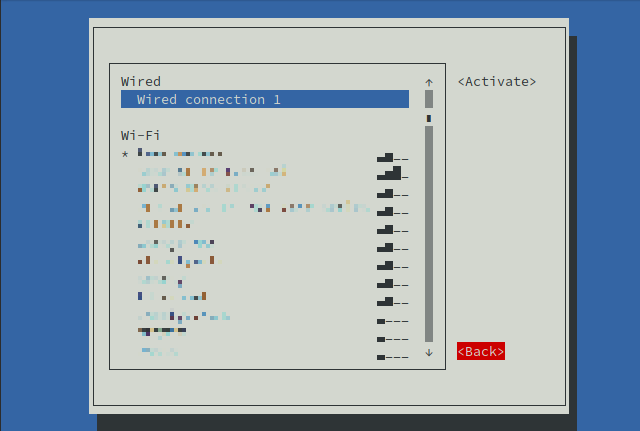
Select Quit and hit return to exit.
Using wpa_supplicant
wpa_suppliant can be used directly, without NetworkManager, to associate a wireless adapter with an access point. After association is established, an IP address needs to be assigned or obtained.
Associate with a wireless access point
Make sure NetworkManager is stopped and disabled by masking the service.
sudo systemctl stop NetworkManager.service
sudo systemctl mask NetworkManager.service
Stop the wpa_supplicant.service, which may have been started by NetworkManager.
sudo systemctl stop wpa_supplicant.service
Create a
wpa_supplicantconfiguration directory.sudo mkdir -p /etc/wpa_supplicant
Determine your wireless interface name.
iw devUse the name following “Interface” on the first line (eg. wlp1s0)
 Interface wlp1s0
    ifindex 3
    wdev 0x1
    addr 00:xx:xx:38:34:7a
    type managed
    txpower 0.00 dBm
Set the $INTERFACE_NAME environment variable to take advantage of copying and pasting commands.
export INTERFACE_NAME=wlp1s0
Create a minimal configuration file called
/etc/wpa_supplicant/wpa_supplicant-$INTERFACE_NAME.confand add the following:sudo tee /etc/wpa_supplicant/wpa_supplicant-$INTERFACE_NAME.conf > /dev/null <<'EOF' ctrl_interface_group=wheel ctrl_interface=/run/wpa_supplicant update_config=1 EOF
Start the wpa_supplicant service to complete the configuration process.
sudo systemctl start wpa_supplicant@$INTERFACE_NAME.service
Use wpa_cli (interactive mode) to scan for available networks. In this example, our network is named Network1.
sudo wpa_cli
> scan
OK
<3>CTRL-EVENT-SCAN-STARTED
<3>CTRL-EVENT-SCAN-RESULTS
> scan_results
bssid / frequency / signal level / flags / ssid
00:xx:xx:73:7b:46 5180 -55 [WPA2-PSK-CCMP][ESS] Network1
00:xx:xx:83:fa:70 5240 -76 [WPA2-EAP-CCMP][ESS] Network2
00:xx:xx:4f:e9:2c 2412 -67 [WPA2-PSK-CCMP][ESS][P2P] Printer
00:xx:xx:af:fe:3e 5765 -79 [WPA2-PSK-CCMP][ESS] Network3
00:xx:xx:e9:eb:29 2412 -76 [WPA2-PSK-CCMP][ESS] Network4
00:xx:xx:26:4a:b9 2412 -79 [WPA2-PSK-CCMP][ESS][P2P] Printer2
00:xx:xx:b9:0d:d4 2462 -79 [WPA2-PSK-CCMP][ESS] Network5
Set up your network connection replacing Network1 with your wireless SSID name and Network1Password with the password for your network.
> add_network
0
> set_network 0 ssid "Network1"
OK
> set_network 0 psk "Network1Password"
OK
> enable_network 0
OK
<3>CTRL-EVENT-SCAN-STARTED
<3>CTRL-EVENT-SCAN-RESULTS
<3>SME: Trying to authenticate with 00:xx:xx:5d:d9:26 (SSID='Network1' freq=5180 MHz)
<3>Trying to associate with 00:xx:xx:5d:d9:26 (SSID='Network1' freq=5180 MHz)
<3>Associated with 00:xx:xx:5d:d9:26
<3>CTRL-EVENT-SUBNET-STATUS-UPDATE status=0
<3>WPA: Key negotiation completed with 00:xx:xx:5d:d9:26 [PTK=CCMP GTK=CCMP]
<3>CTRL-EVENT-CONNECTED - Connection to 00:xx:xx:5d:d9:26 completed [id=0 id_str=]
Save the configuration and quit out of wpa_cli.
> save_config
OK
> quit
Note
The network password is saved as plaintext in
/etc/wpa_supplicant/wpa_supplicant-$INTERFACE_NAME.conf. Use
wpa_passphrase
for a more secure method.
Assign an IP address
After the wireless adapter has been associated with wireless access point, an IP address needs to be assigned for access to the network.
The example below uses systemd-networkd to request an IP address from the
access point via DHCP. Another network manager can be used if preferred. If
there is a static IP address you’d like to assign, see the
Assign a static IP address documentation.
Create the
/etc/systemd/networkdirectorysudo mkdir -p /etc/systemd/network
Create a
/etc/systemd/network/25-wireless-$INTERFACE_NAME.networkfile with a Match and Network section.printf "[Match]\nName=$INTERFACE_NAME\n\n[Network]\nDHCP=ipv4" | sudo tee /etc/systemd/network/25-wireless-$INTERFACE_NAME.network
Restart the
systemd-networkd.service.sudo systemctl restart systemd-networkd.service
Enable the
systemd-networkdandwpa_supplicantservices to start automatically on future boots.sudo systemctl enable --now systemd-networkd.service sudo systemctl enable --now wpa_supplicant@$INTERFACE_NAME.service
Other resources
NetworkManager CLI documentation.
Additional CLI examples.
wpa_supplicant advanced usage documentation
