Clear Linux* OS using virt-manager
This page explains how to create a Clear Linux* OS virtual machine using the virt-mgr desktop application with Clear Linux OS as the guest operating system. These instructions support the Clear Linux OS live-server installer to create the Clear Linux OS VM.
Prerequisites
Enable virtualization, such as Intel® Virtualization Technology (Intel® VT), on the host system from the UEFI firmware setup.
Install the software bundles kvm-host and virt-manager-gui using swupd:
sudo swupd bundle-add kvm-host virt-manager-gui
Add your userid to the kvm and libvirt groups.
sudo usermod -G kvm -a $USER
sudo usermod -G libvirt -a $USER
Enable the libvirtd daemon and reboot the system to complete the process.
sudo systemctl enable libvirtd
sudo reboot
Download the Clear Linux OS installer ISO
There are several options available to set up and use a Clear Linux OS VM with virt-manager. You can either download the KVM image and run it as-is or download the installer ISO and run it to create a new installation of Clear Linux OS.
This example uses the live-server-installer ISO to create a new installation.
Download the Clear Linux* OS Server from the Downloads page.
(Optional) Validate the integrity of the downloaded image by checking the file hash and signatures. Refer to Validate signatures for detailed steps.
Launch and set up virt-manager
Virt-manager is a GUI-based virtual machine manager that runs in your desktop environment. This example uses the Gnome* desktop.
Launch the Virtual Machine Manager from the applications window. The application window opens as shown in Figure 1.
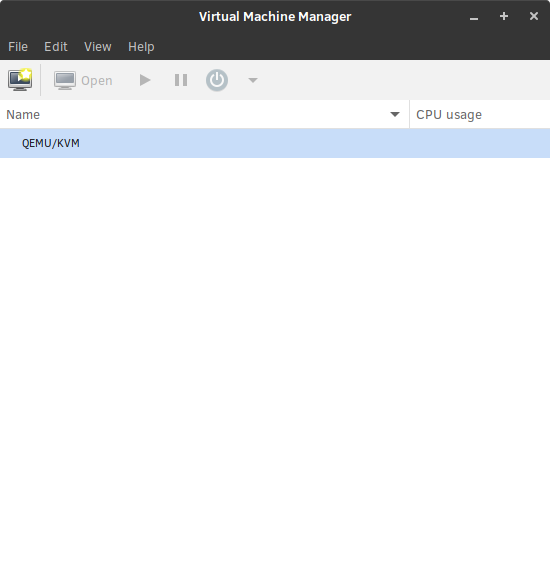
Figure 1: Virtual Machine Manager
In the Name field, select and highlight the QEMU/KVM item, then select . A dialog box with QEMU/KVM Connection Details opens as shown in Figure 2.

Figure 2: QEMU/KVM Connection Details
On the Overview tab, check the Autoconnect field. Select the Virtual Networks tab and in the lower left of the dialog window, select the + key to add a new network connection. The Create a new virtual network dialog window opens as shown in Figure 3. To accept the default values, select the Finish button.
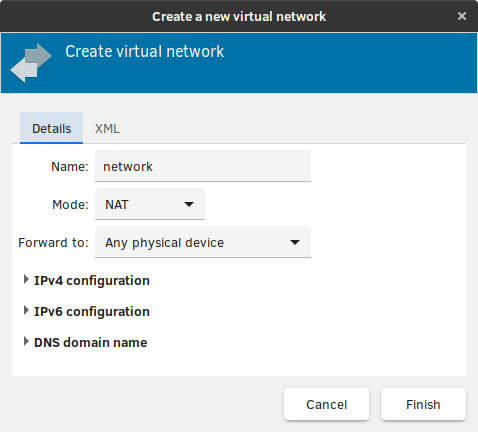
Figure 3: Create a new virtual network
Close the QEMU/KVM Connection details dialog box and return to the Virtual Machine Manager main console. You are ready to create your VM.
Create a new virt-manager virtual machine
In the Virtual Machine Manager main console, either select or click the Create a new virtual machine icon. This launches the New VM wizard, shown in Figure 4.
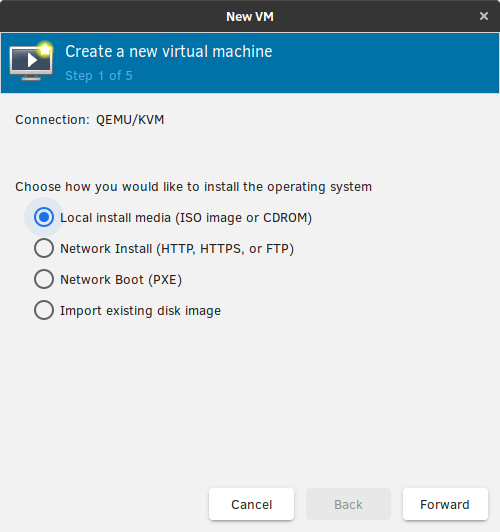
Figure 4: New VM dialog box, step 1
Select Local install media (ISO image or CDROM) and select the Forward button.
In step 2 of the New VM wizard, you can choose ISO or CDROM install media.
Uncheck Automatically detect from the installation media / source field and select the Browse… button as shown in Figure 5.
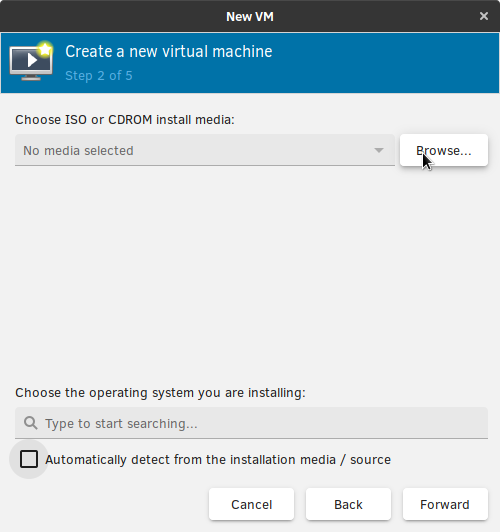
Figure 5: New VM dialog box, step 2: Choose media
In the Choose Storage Volume dialog, select the Browse Local button as shown in Figure 6. Browse to the ISO image that you downloaded earlier and open it.
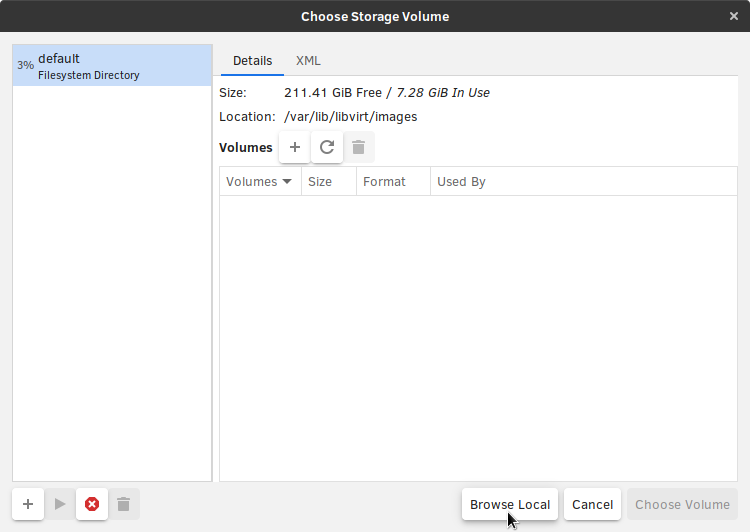
Figure 6: Choose storage volume dialog box
In the Choose the operating system you are installing search field, type generic and select the Generic default value when it is displayed. Select the Forward button as shown in Figure 7.
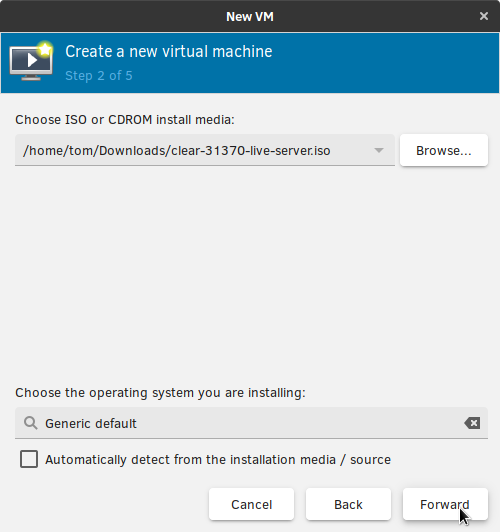
Figure 7: New VM dialog box, step 2: Choose operating system
Note
A message may be displayed that says the emulator does not have search permissions for the ISO image path. Select Yes to proceed to the next step.
Step 3 of the New VM wizard allocates the memory and CPUs for the new VM. Choose settings that are valid for the resources on your host system. This example sets Memory to 2048GB and CPUs to 1. Once complete, select the Forward button as shown in Figure 8.
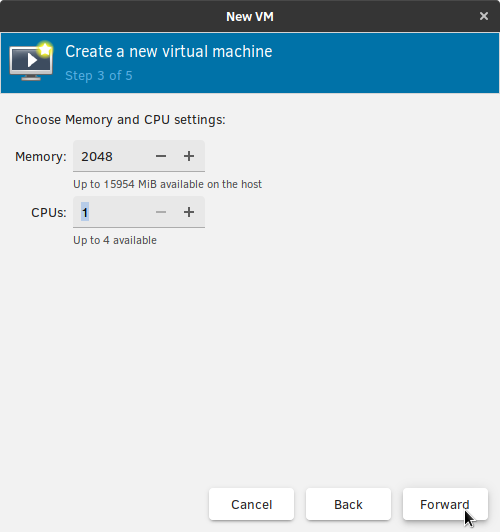
Figure 8: New VM dialog box, step 3: Choose Memory and CPU settings
Step 4 of the New VM wizard sets up the storage media for your VM. You can create a new disk image or use an existing image. This example selects Enable storage for this virtual machine and creates a 20GB image for it. Once complete, select the Forward button as shown in Figure 9.

Figure 9: New VM dialog box, step 4: Enable storage
Step 5 of the New VM wizard displays the selections you made and allows you to customize the configuration before running the installation. Select the Customize configuration before install checkbox and select the Finish button as shown in Figure 10.
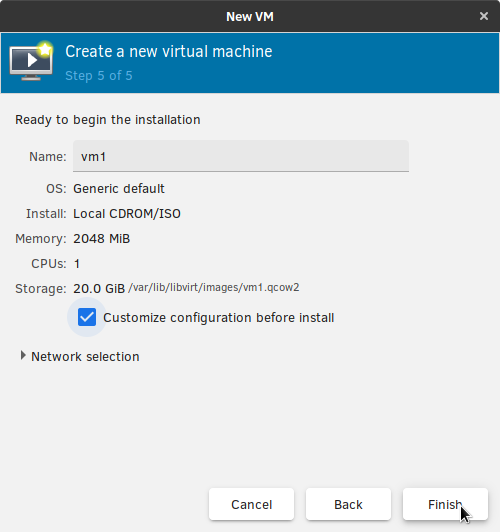
Figure 10: New VM dialog box, step 5: Ready to begin the installation
Customize the installation process by changing the firmware from BIOS to UEFI x86_64. Clear Linux OS requires UEFI firmware. In the Firmware field, select the
UEFI x86_64:/usr/share/qemu/OVMF.fdentry as shown in Figure 11 and select the Apply button.
Figure 11: vm1 on QEMU/KVM dialog box
Begin the installation by selecting the Begin Installation in the upper left corner of the vm1 on QEMU/KVM dialog box.
Install Clear Linux OS in the virt-manager VM
To install Clear Linux OS in your VM, follow the instructions in the getting started guide Install Clear Linux* OS from the live server.
Note
You do not need to set up the network as described in the installation guide, because you already downloaded the ISO image and connected to your VM. Your network will show up as a wired connection.
Congratulations! You have successfully installed Clear Linux OS in your new VM and can begin using it immediately. The virt-manager tool is maintained on GitHub* at virt-manager-github.
Intel and the Intel logo are trademarks of Intel Corporation or its subsidiaries.
