Clear Linux* OS on QingCloud*
This tutorial describes how to create and launch a Clear Linux OS instance from the QingCloud console.
Prerequisites
This tutorial assumes that you have completed the following configuration steps:
Your environment can run SSH to access remote Clear Linux OS virtual hosts.
You know the absolute path where the browser downloaded the file.
You have set up a user account for QingCloud and that the account is enabled and logged in to the QingCloud console. To learn more about QingCloud and setting up an account, please visit QingCloud’s official website.
Select and start Clear Linux OS virtual host with QingCloud console
Select 计算>主机 (Compute>Host) in the main menu of the QingCloud console and click the 创建 (Create) option.

On the host creation page, first click the 系统 (System) option, click the Clear Linux OS icon on the far right. Click the 下一步 (Next) button to continue.
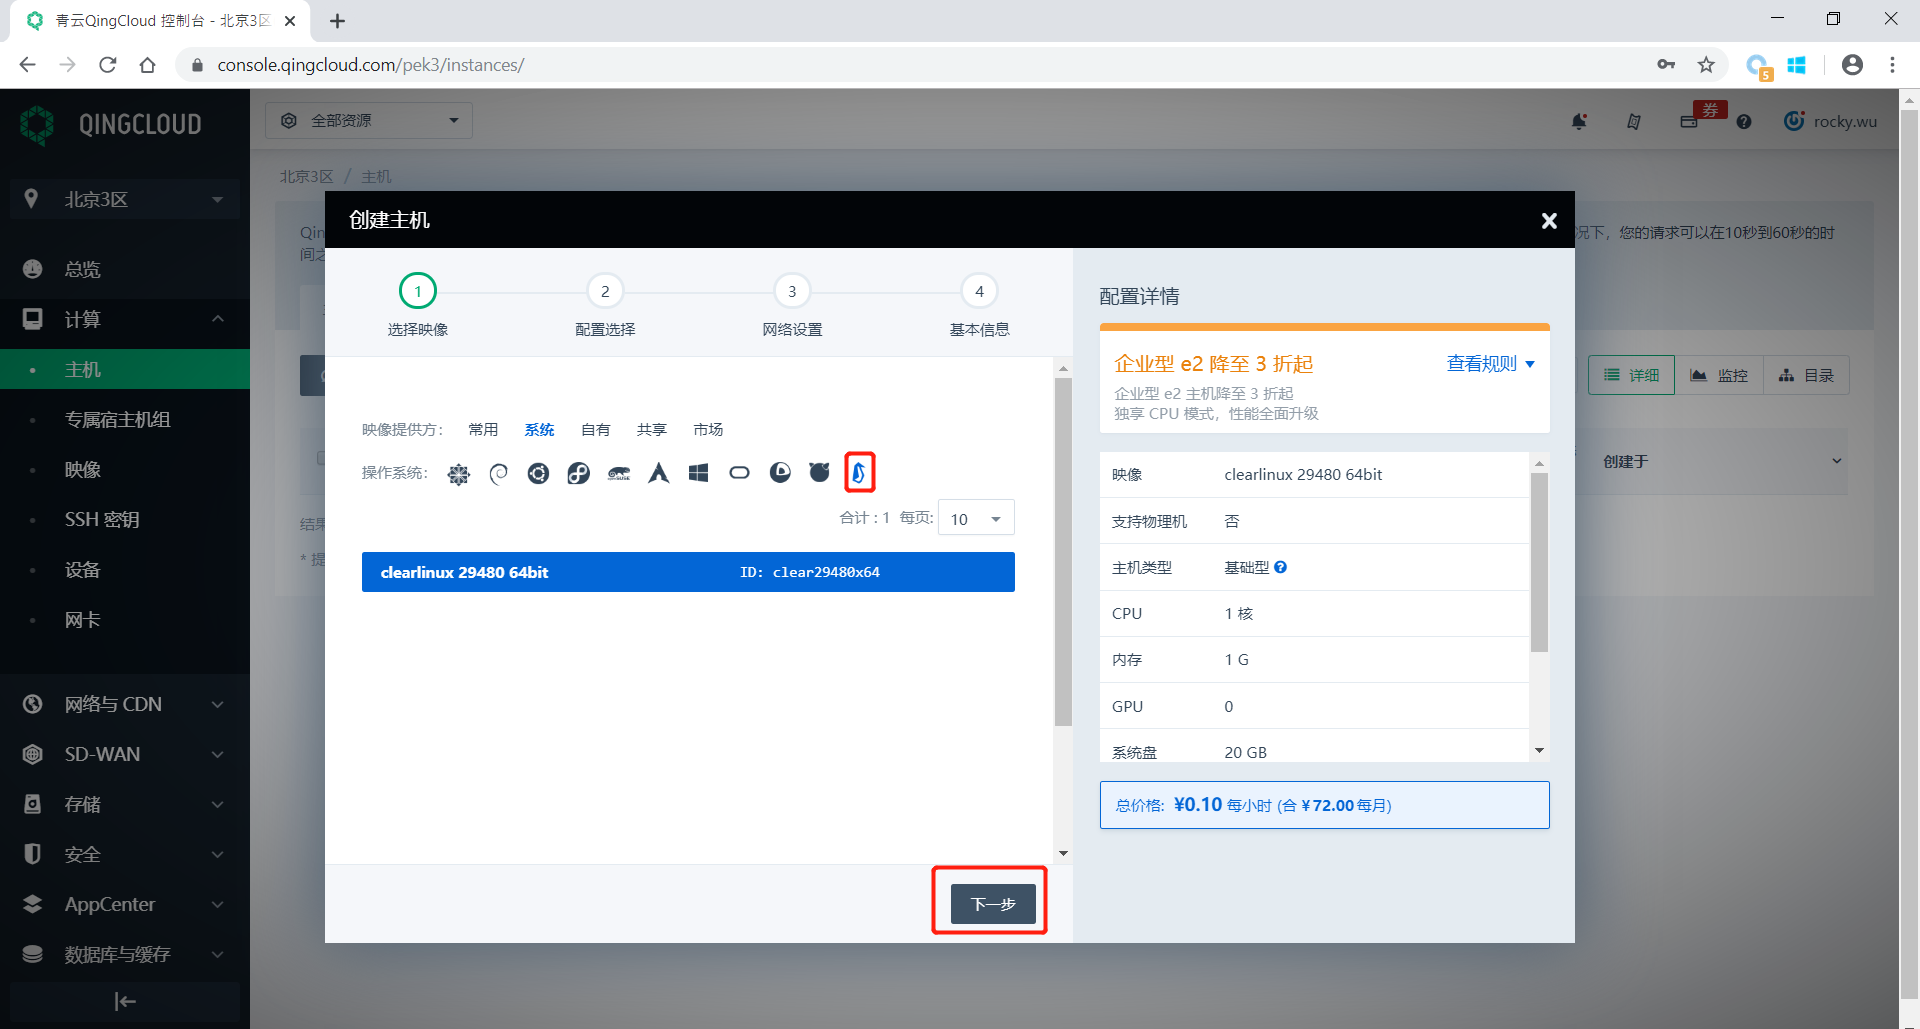
Select Clear Linux OS to create a virtual host
In the configuration selection interface, you can configure the number of CPU cores, memory size, and the storage backup method. For demonstration purposes, we will choose the default configuration. Click the 下一步 (Next) button to go to the network settings interface.
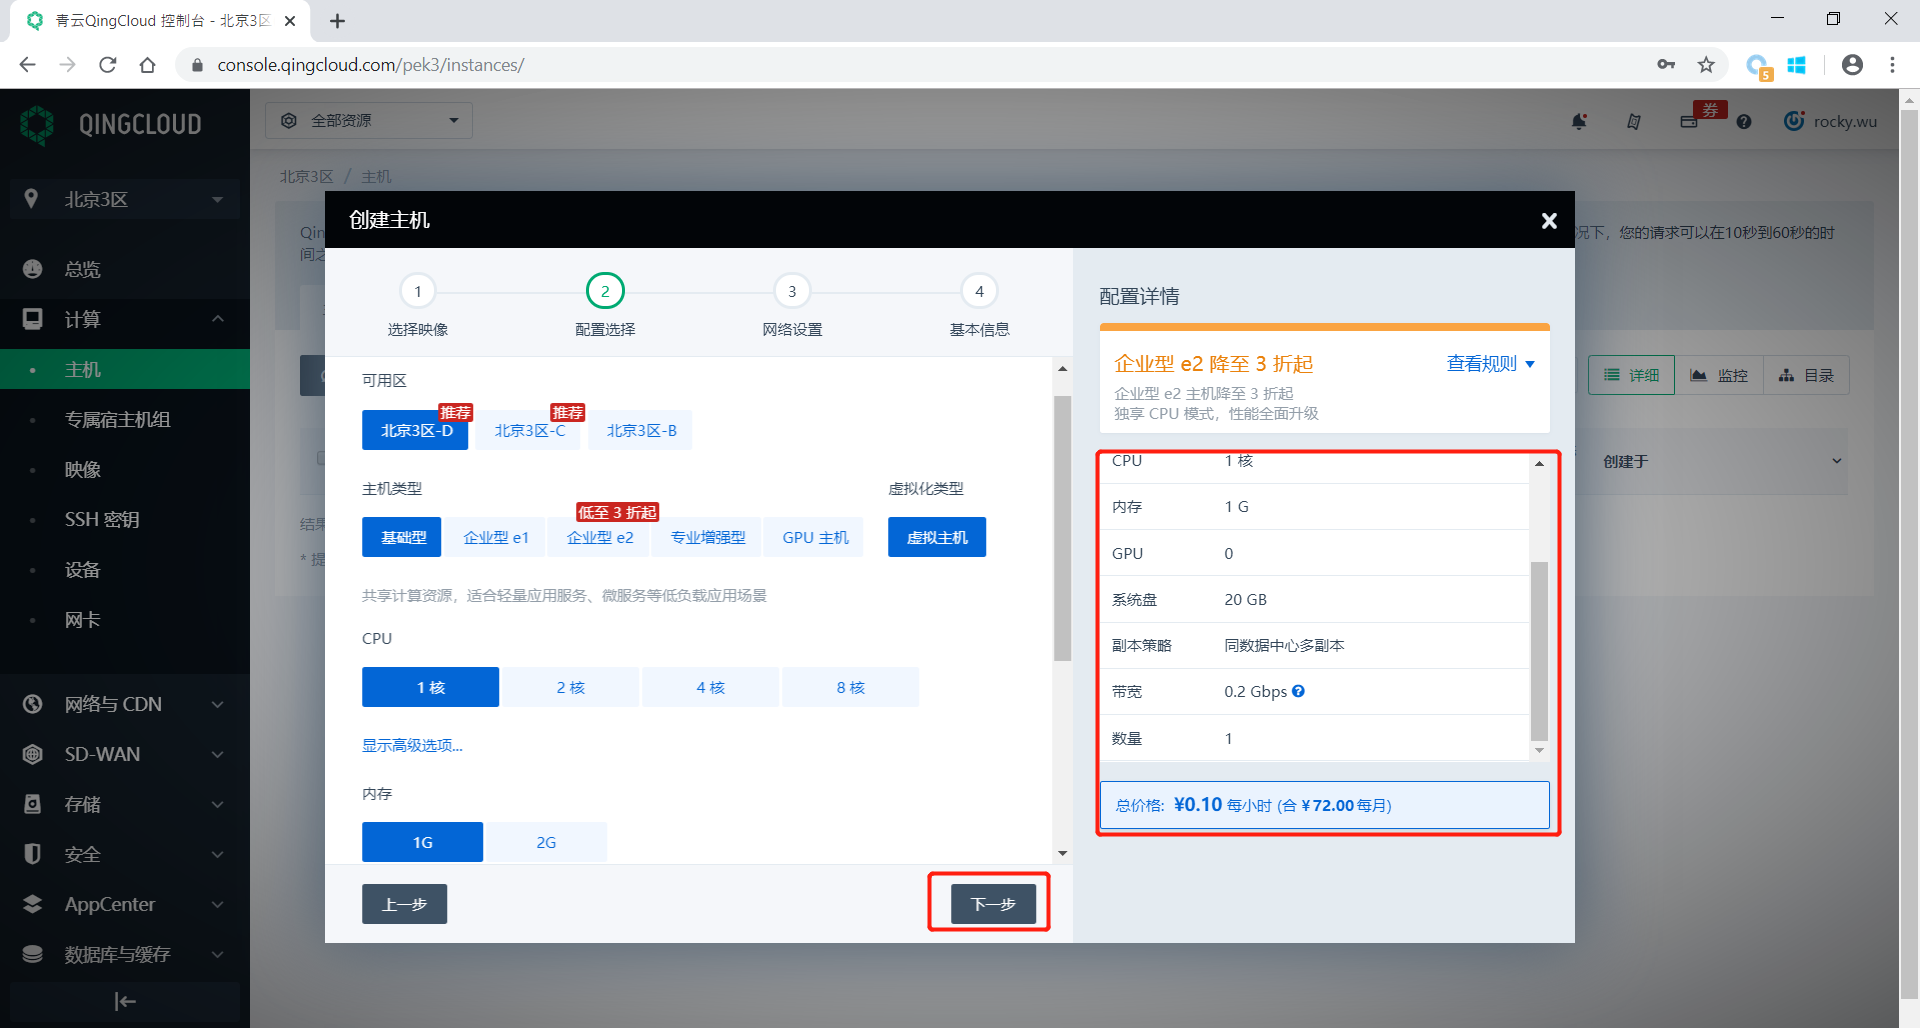
Configuration selection
Select 基础网络 (Basic Network) in the network settings interface.
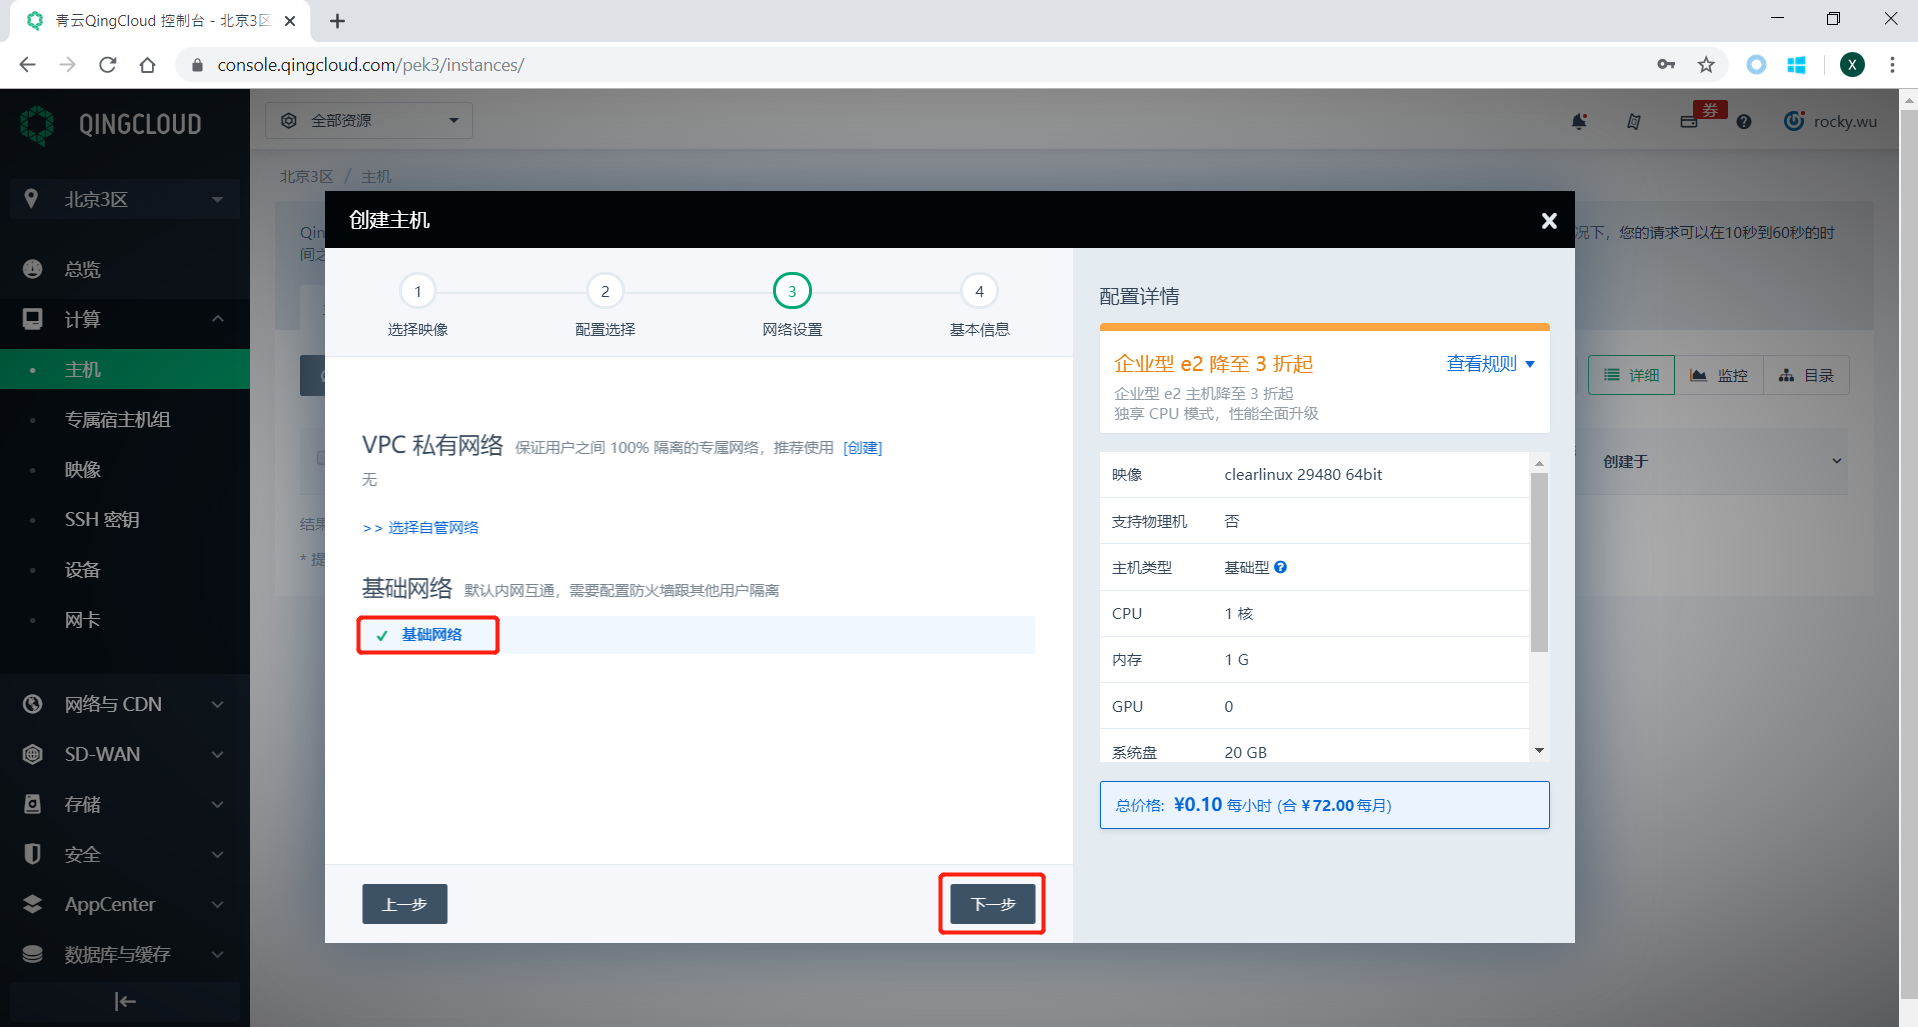
Network Settings
In the basic information setting interface, you need to enter the virtual host name and set the SSH key login method.
Create an SSH key (Optional)
If you haven’t created an SSH key before, click the 创建一个 (Create one) button to create an SSH key.
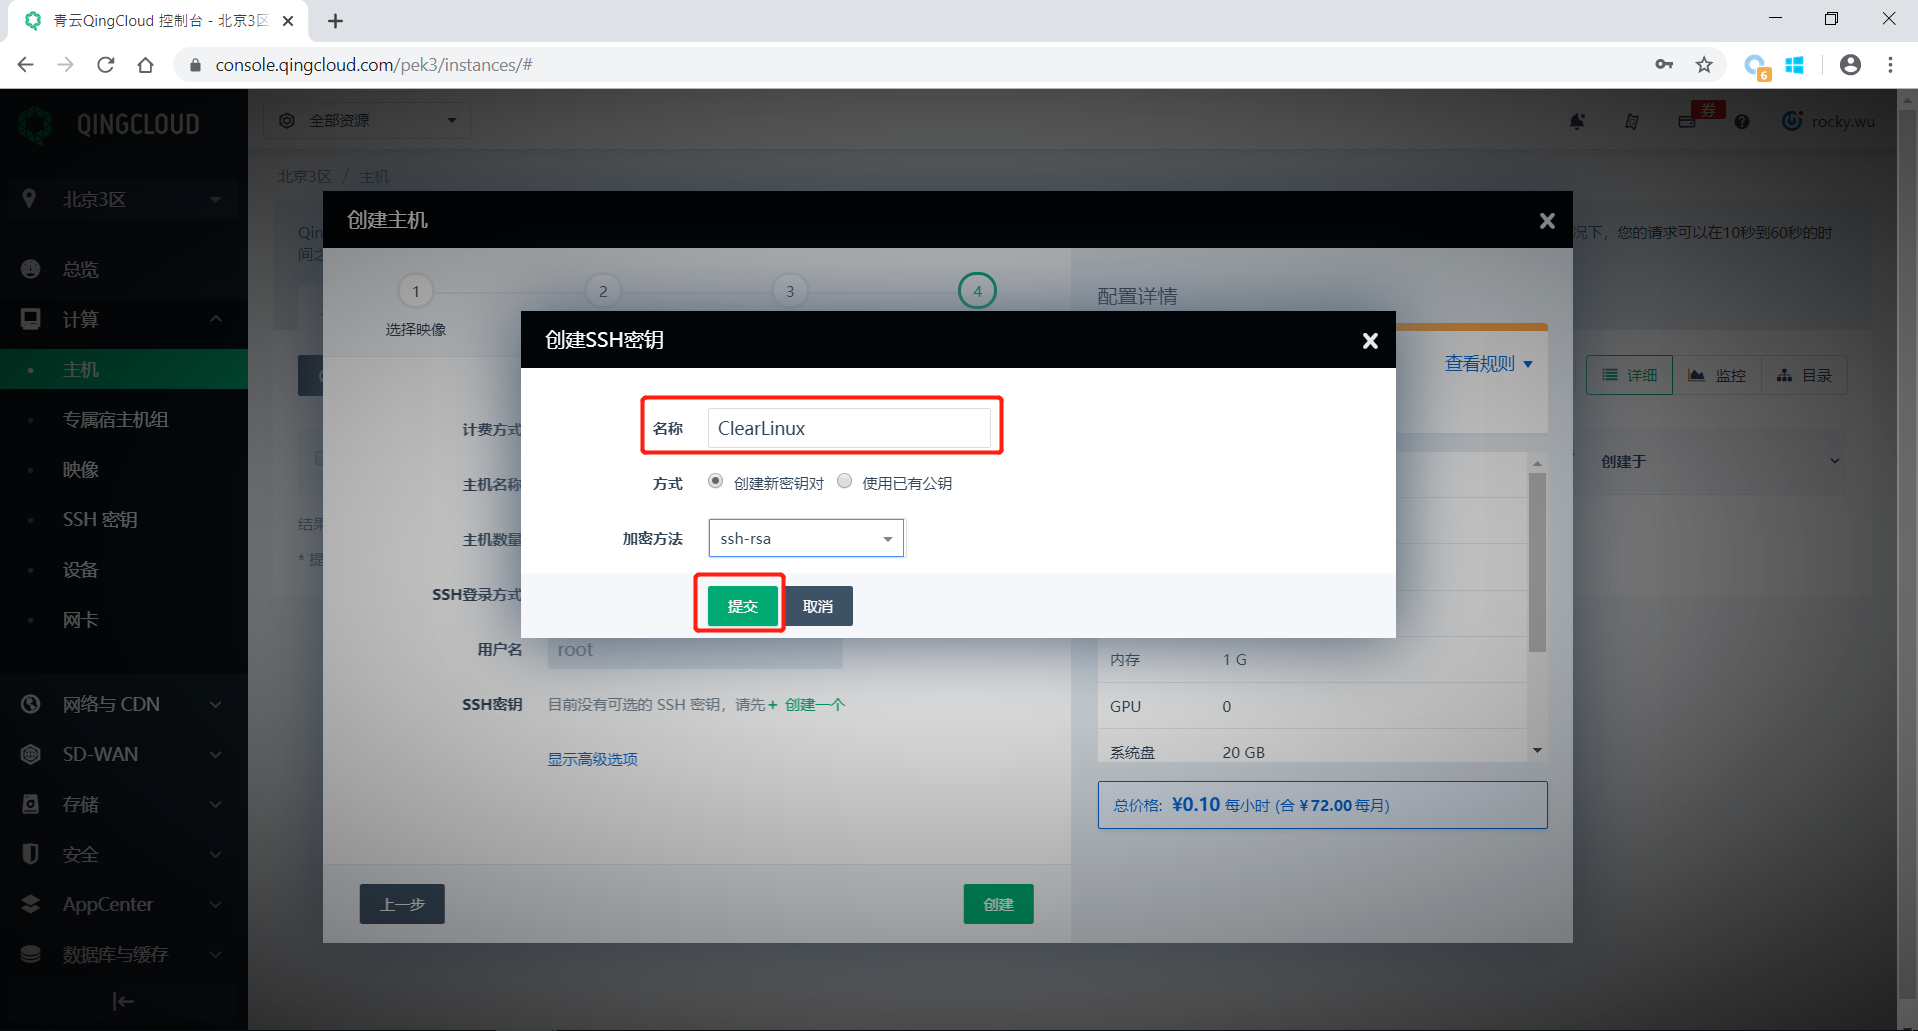
Create SSH Key
In the SSH key creation interface, you can fill in the key name, and select encryption method you prefer. After confirming that they are correct, click the 提交 (Submit) button.
New SSH Key
After the download button appears, please download the key within 10 minutes, and save the key locally for connecting to the virtual host later.
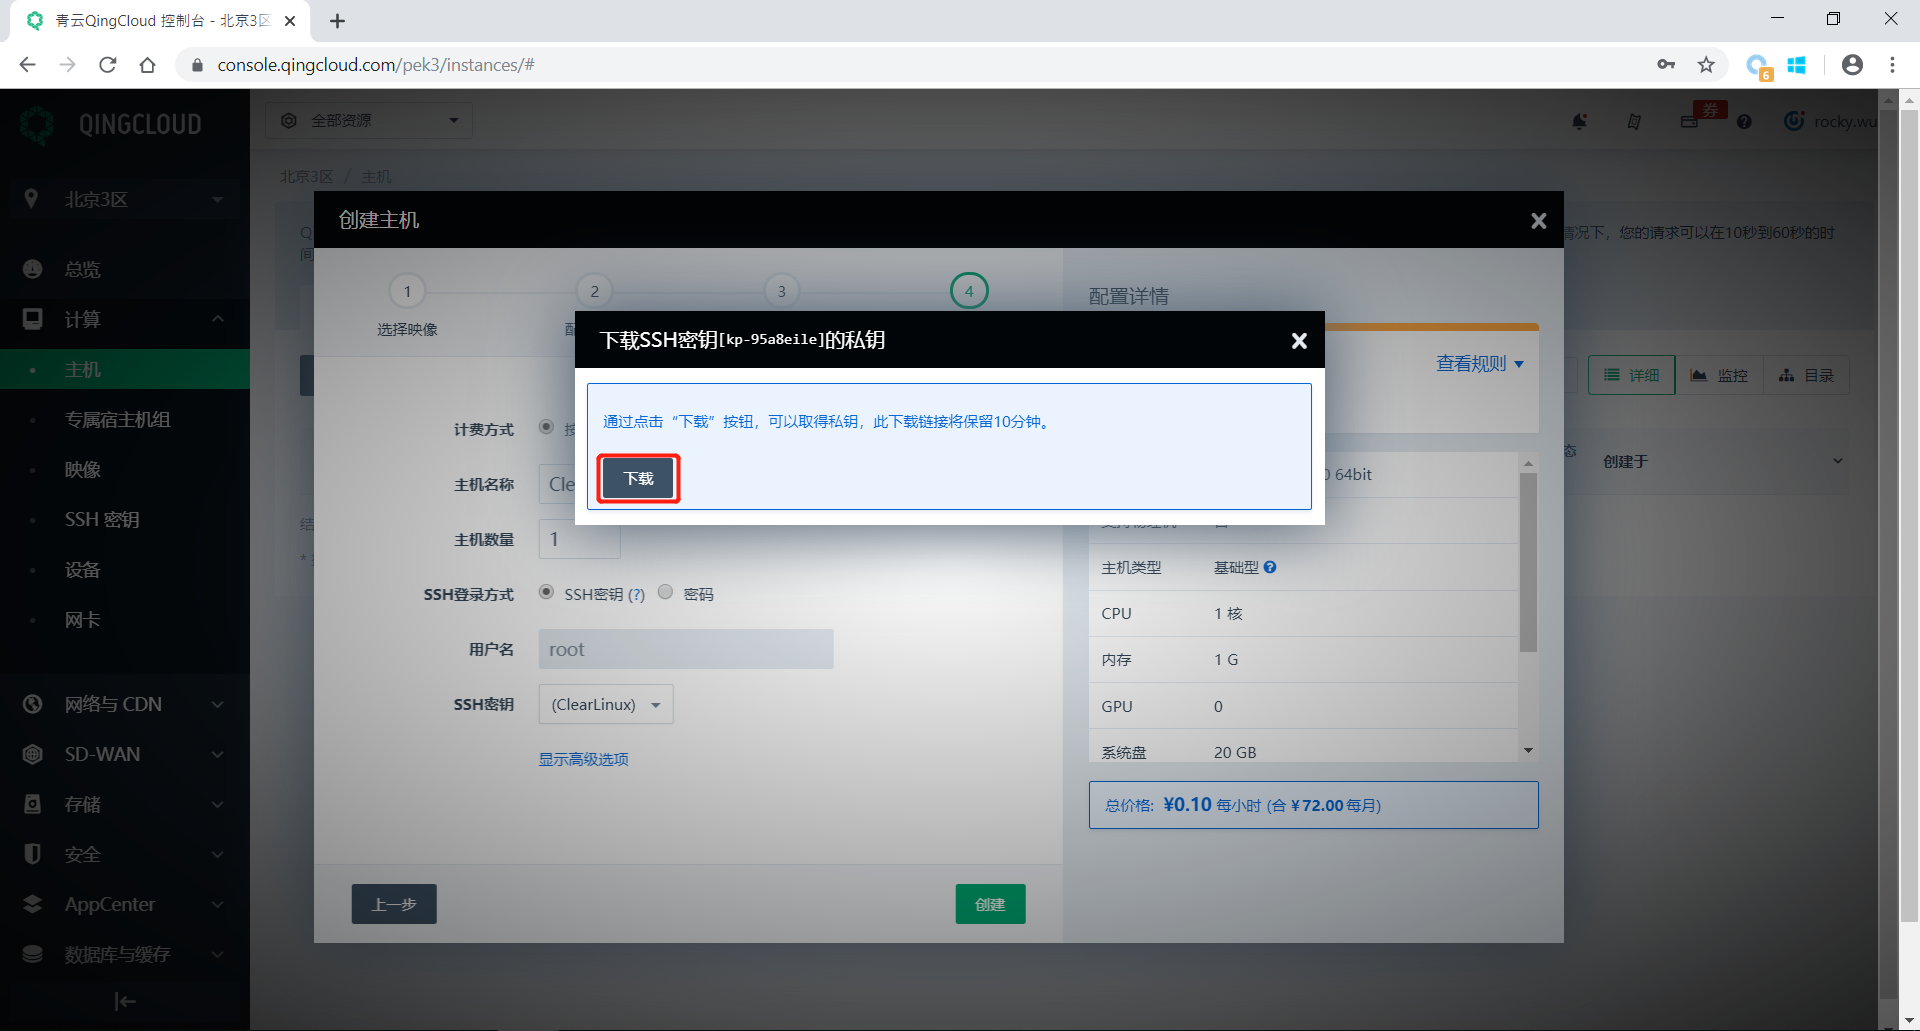
Download SSH Key
After ensuring that the SSH key has been properly downloaded and saved, check the basic information of the virtual host. After confirming that they are correct, click the 创建 (Create) button.

Confirm the information and create a virtual host
QingCloud will now create the Clear Linux OS virtual host. You can check the state of the virtual host in the new interface.
Apply for a public IP and add it to the virtual host
Since QingCloud does not automatically assign a public IP address to a virtual host created using the default network, we need to manually apply and add it to the virtual host. Click the 网络与CDN (Network and CDN) button on the left side of the navigation bar .
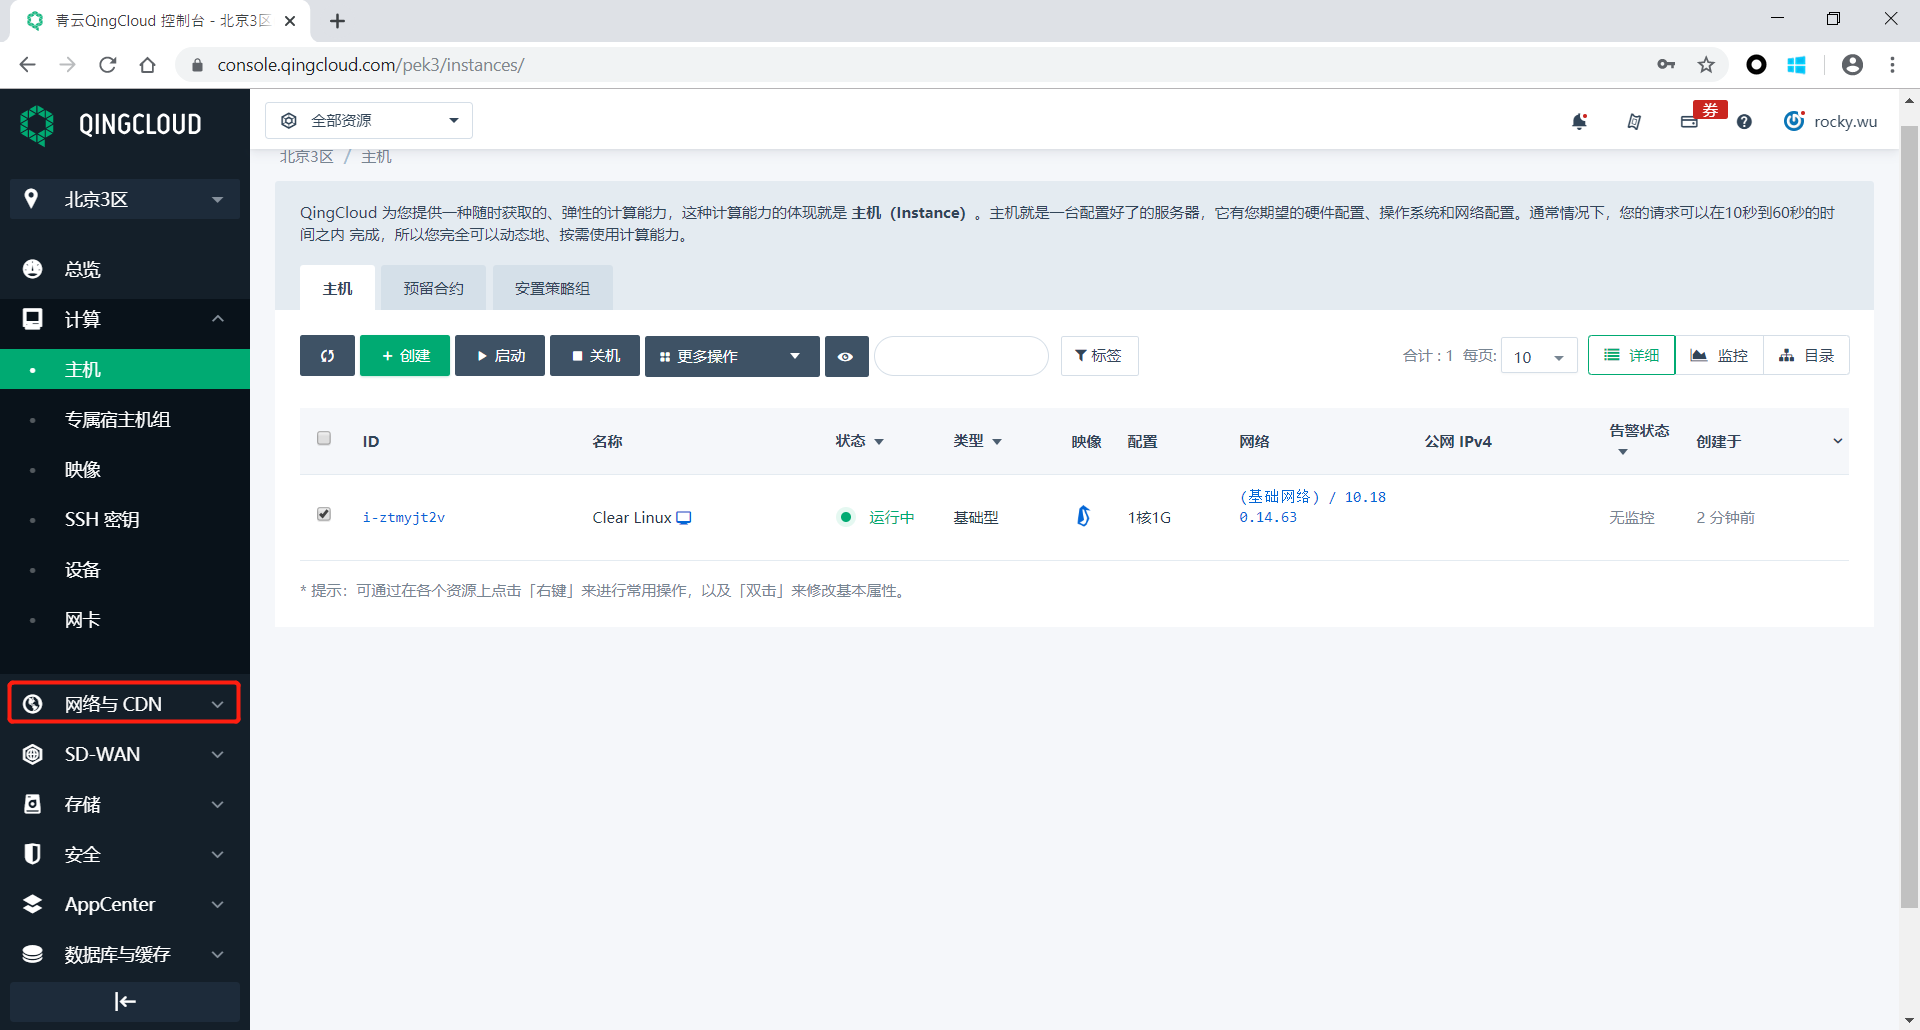
Network and CDN
In the network and CDN configuration interface, click the 公网IP (Public IP) button on the left , and click the 申请 (Apply) button in the middle to create a public IP.
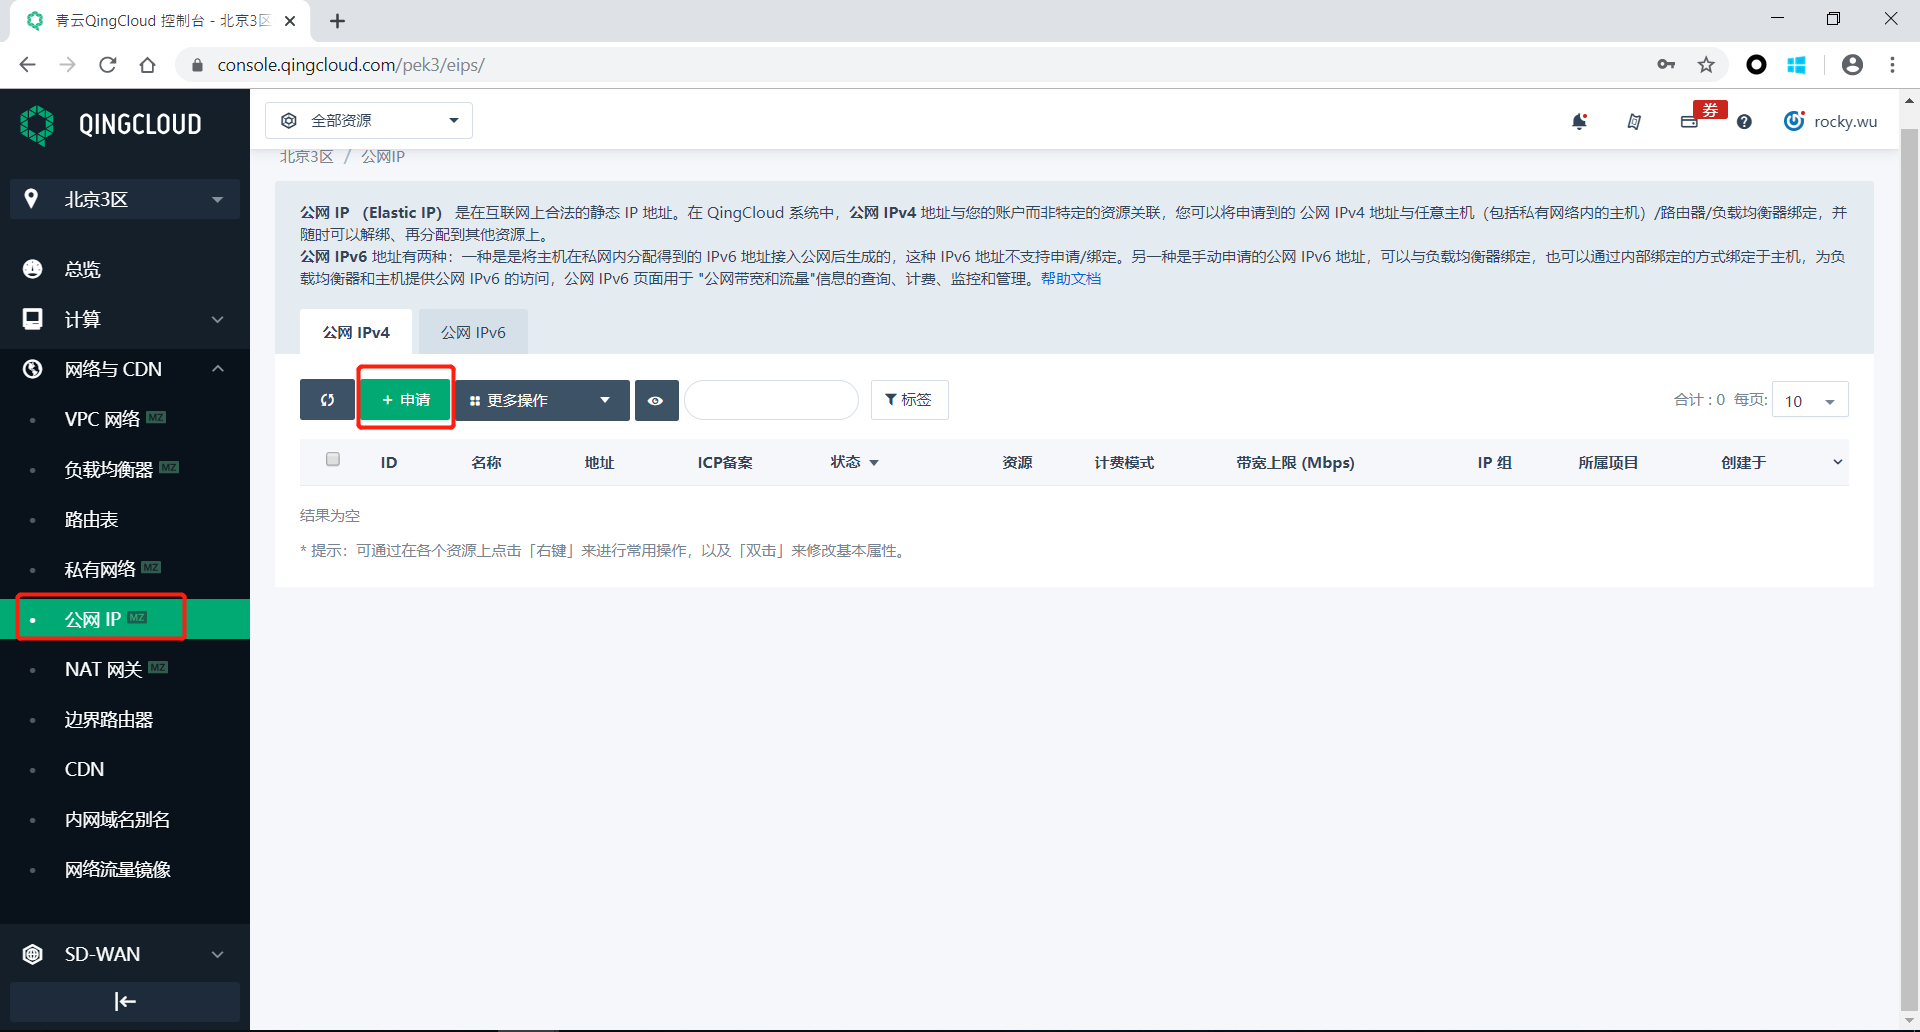
Apply for public IP
After clicking the apply button, a dialog will pop up. Read it carefully and click the 继续申请公网IP (Continue to apply for public IP) button.
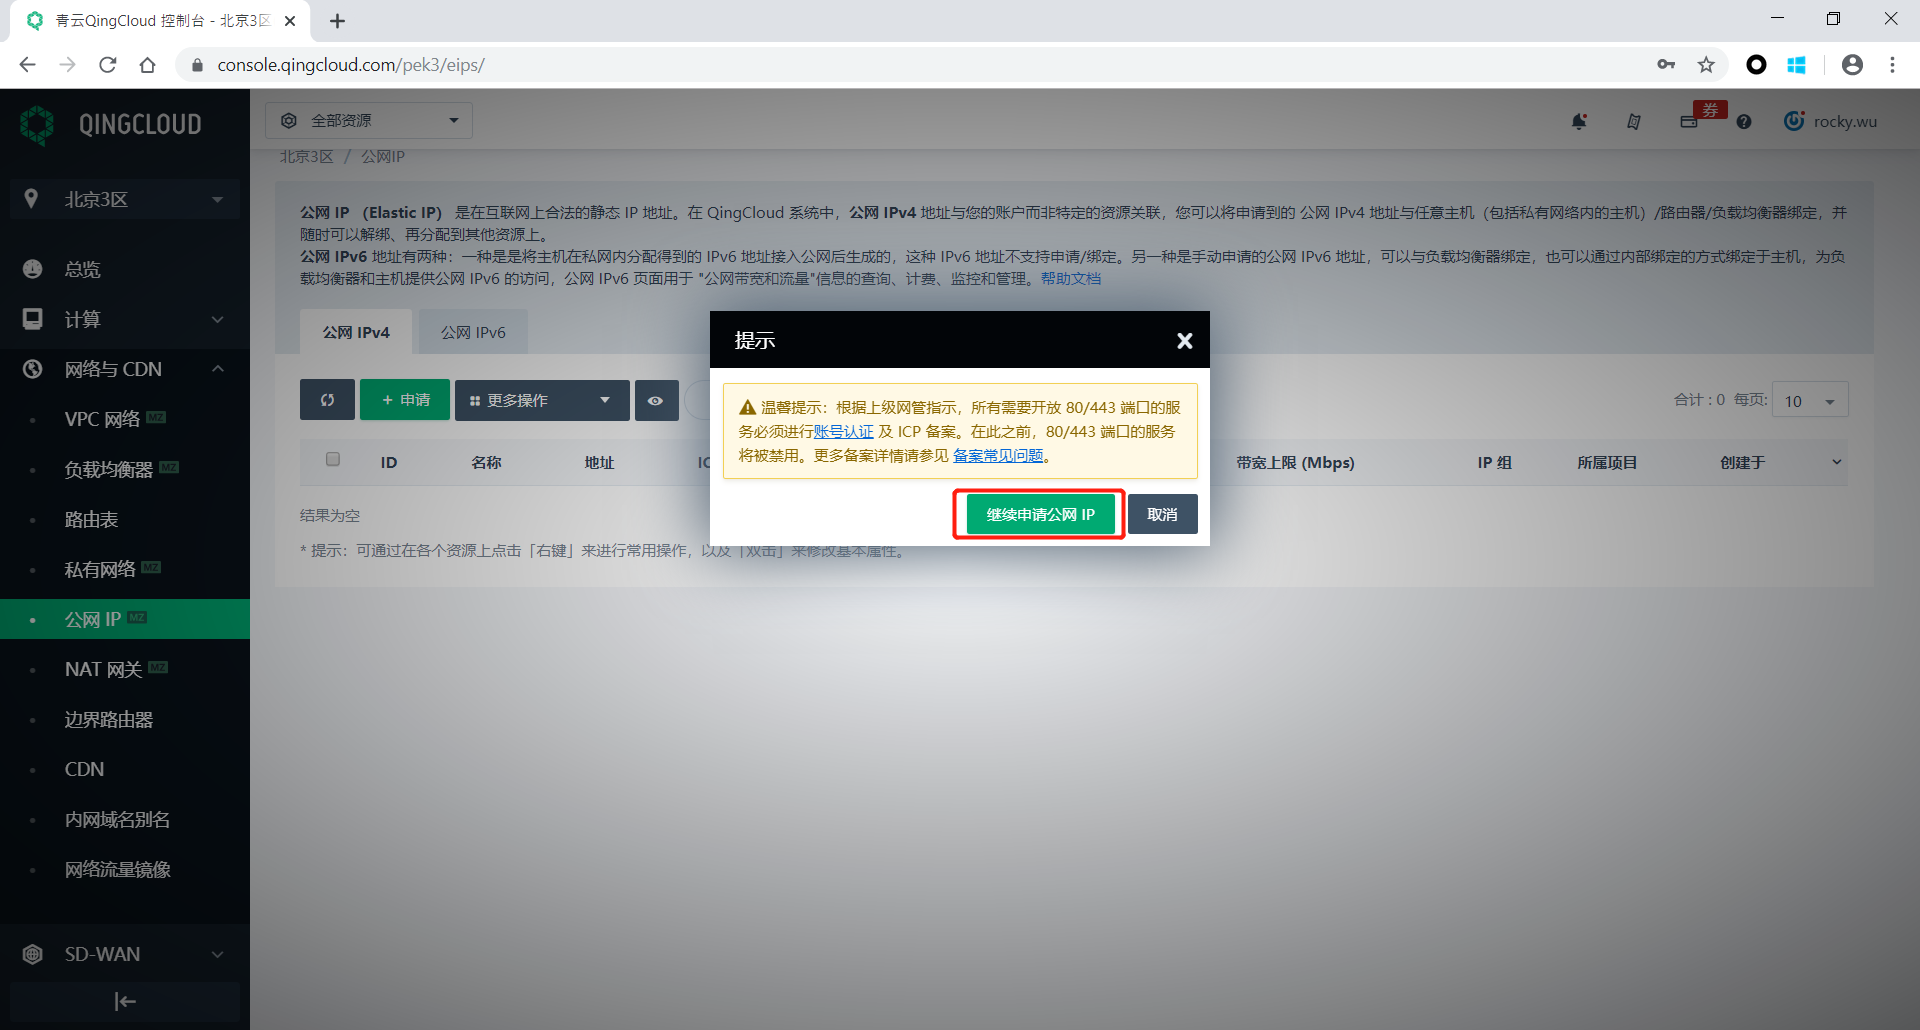
Confirmation dialog
On the public network IP application page, confirm and fill in the relevant information, including the charging mode and bandwidth upper limit (the charge-by-bandwidth mode is used in this tutorial and the 2Mbps bandwidth limit is set). After confirming that they are correct, click 提交 (Submit) button.

Confirmation of Public IP Application
After that, click the 计算>网卡 (Compute>Network Card) buttons in the navigation bar to come to the network card interface.
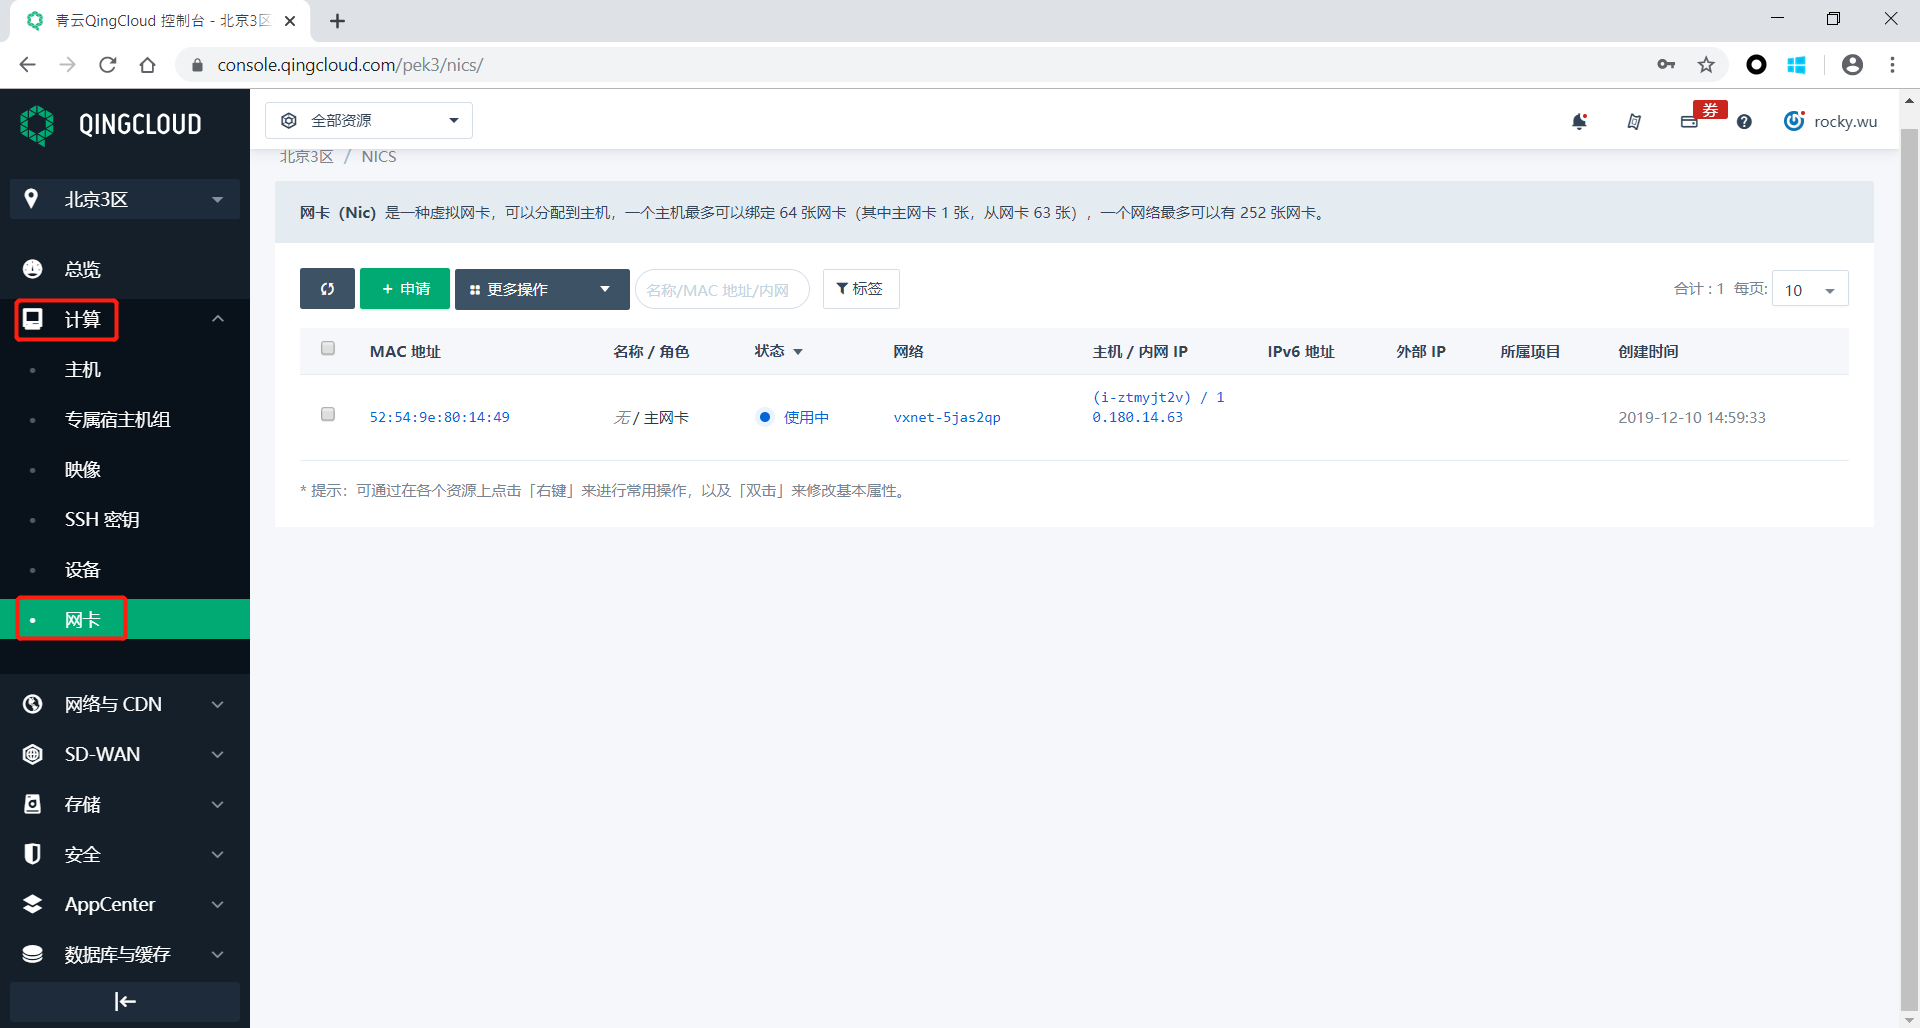
Network Interface
On the network card interface, select the network card of the Clear Linux OS host that you just created. Click the 更多操作 (More Actions) button above, and then click the 绑定公网IPv4 (Binding Public Network IPv4) button.
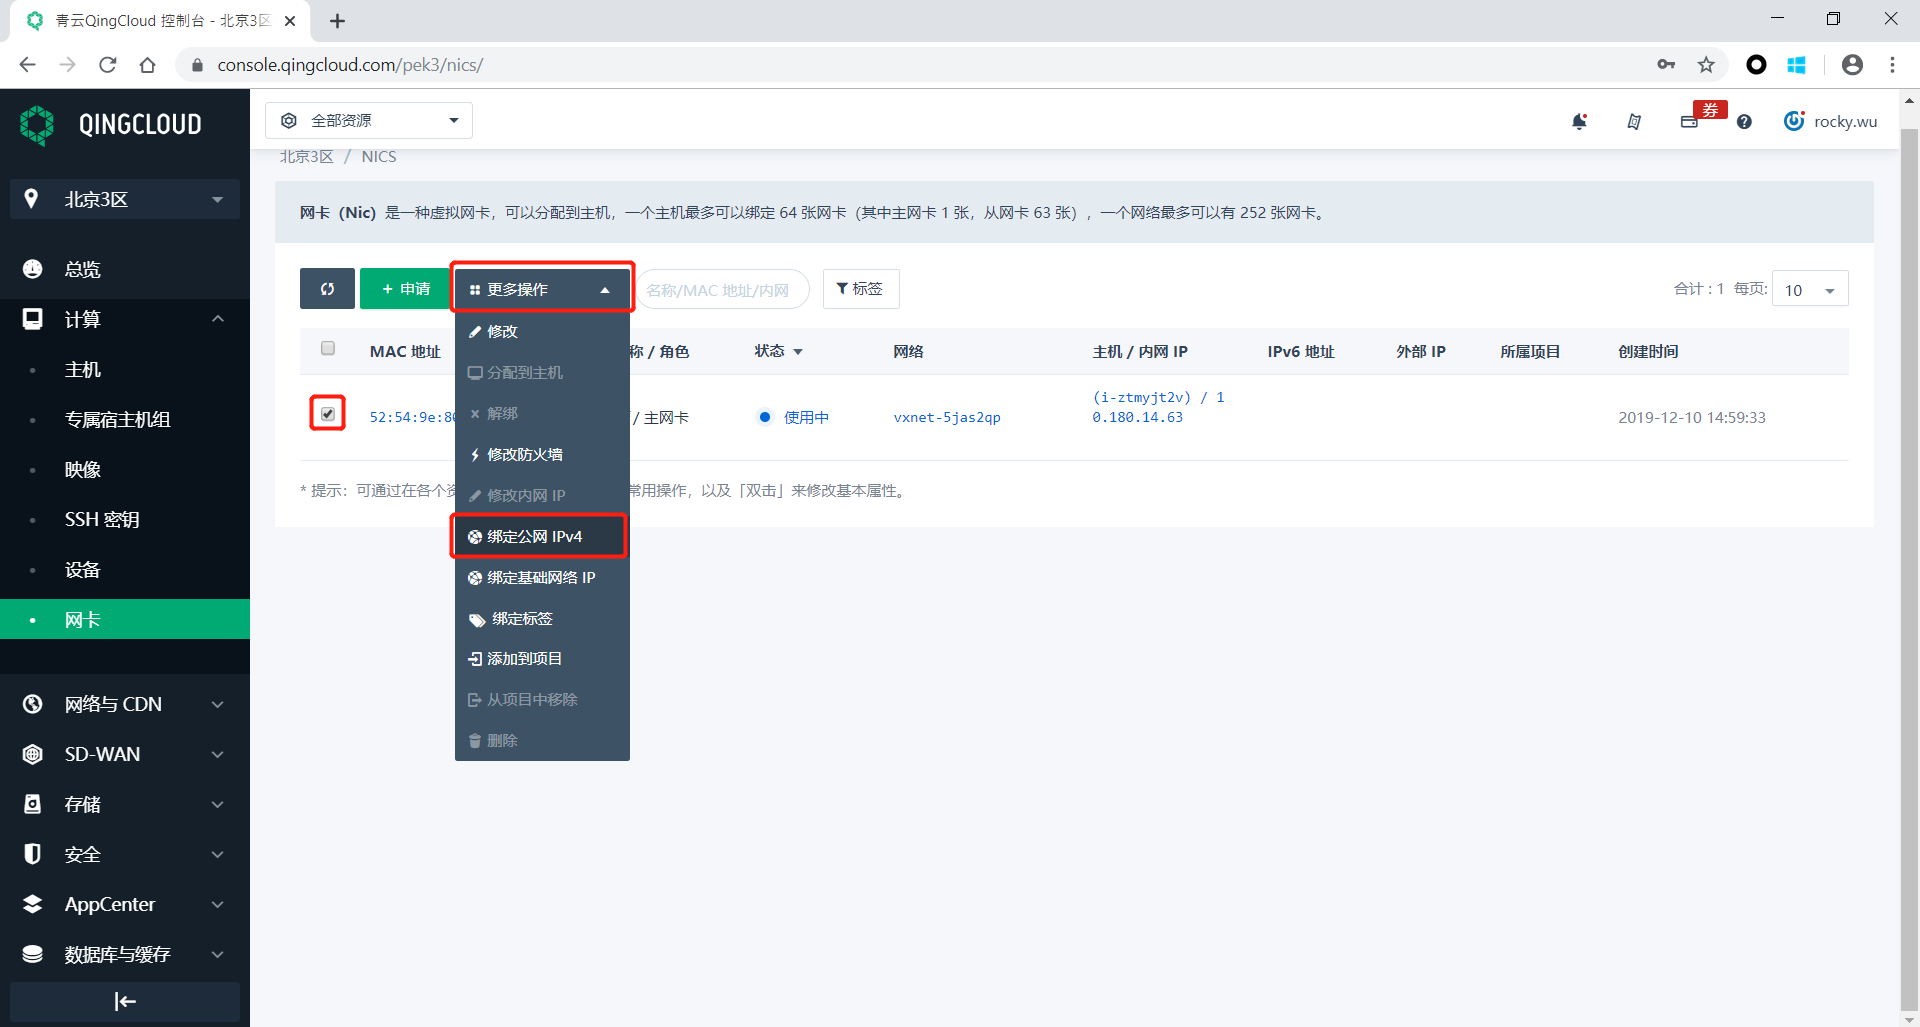
Bind selected
On the binding public network IP confirmation interface, select the public IP address that has just been applied for, and click the 提交 (Submit) button below . After waiting a moment, the state of the Clear Linux OS virtual host will change.
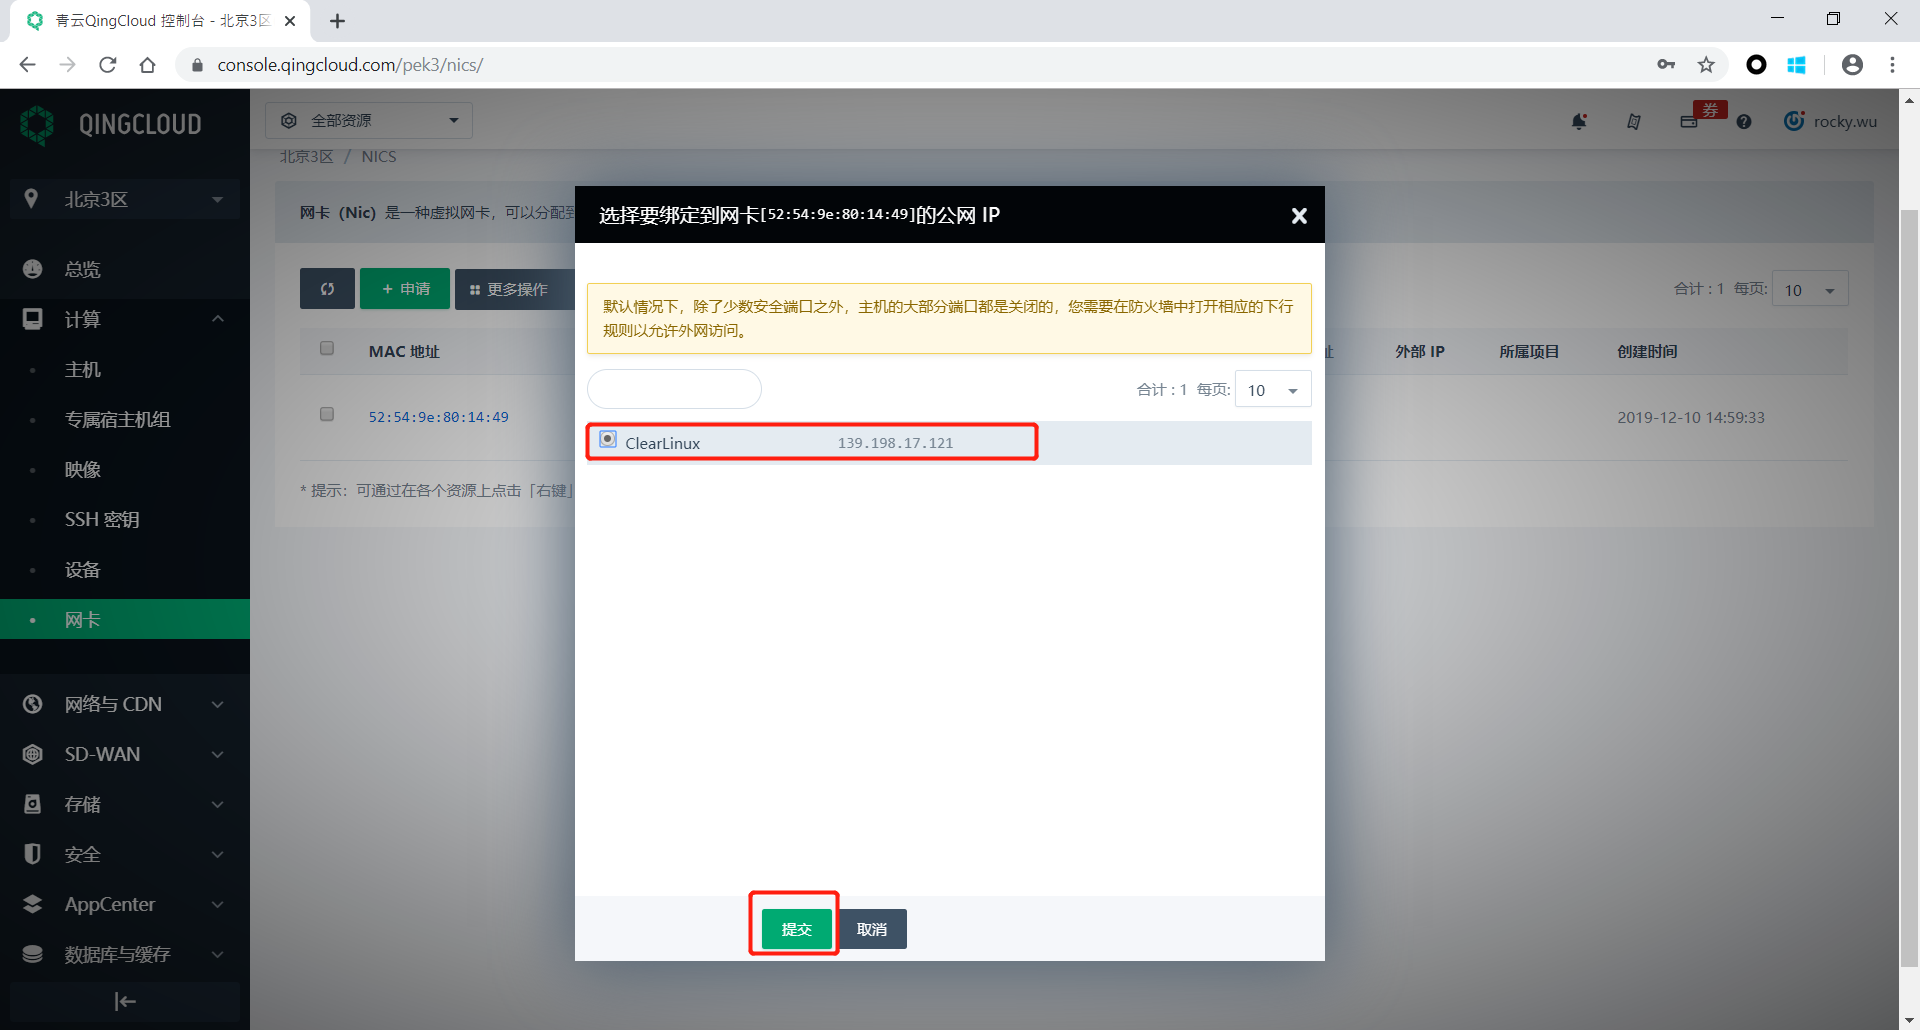
Commit binding
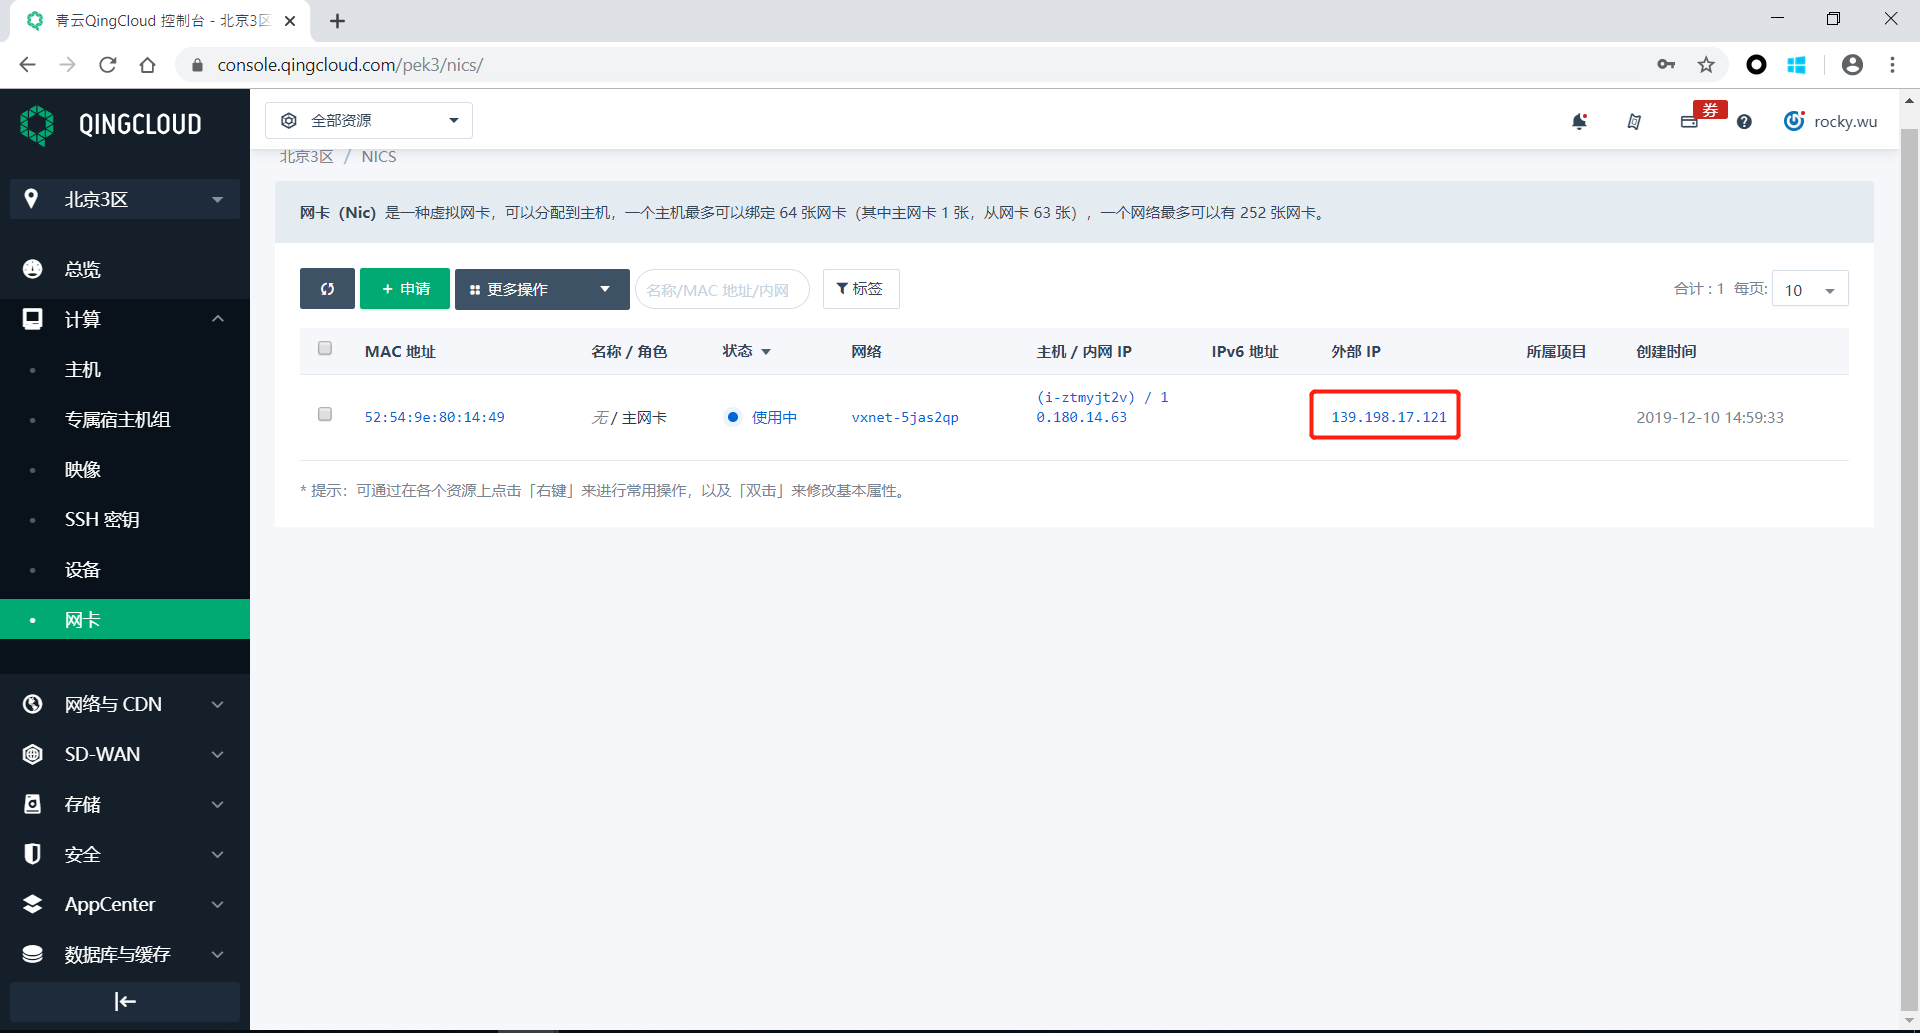
Public network IP binding succeeded
Connect to Clear Linux OS virtual host
Click the 计算>主机 (Compute>Host) buttons on the left side of the navigation bar to confirm that the current virtual host is running and has a public IP address.
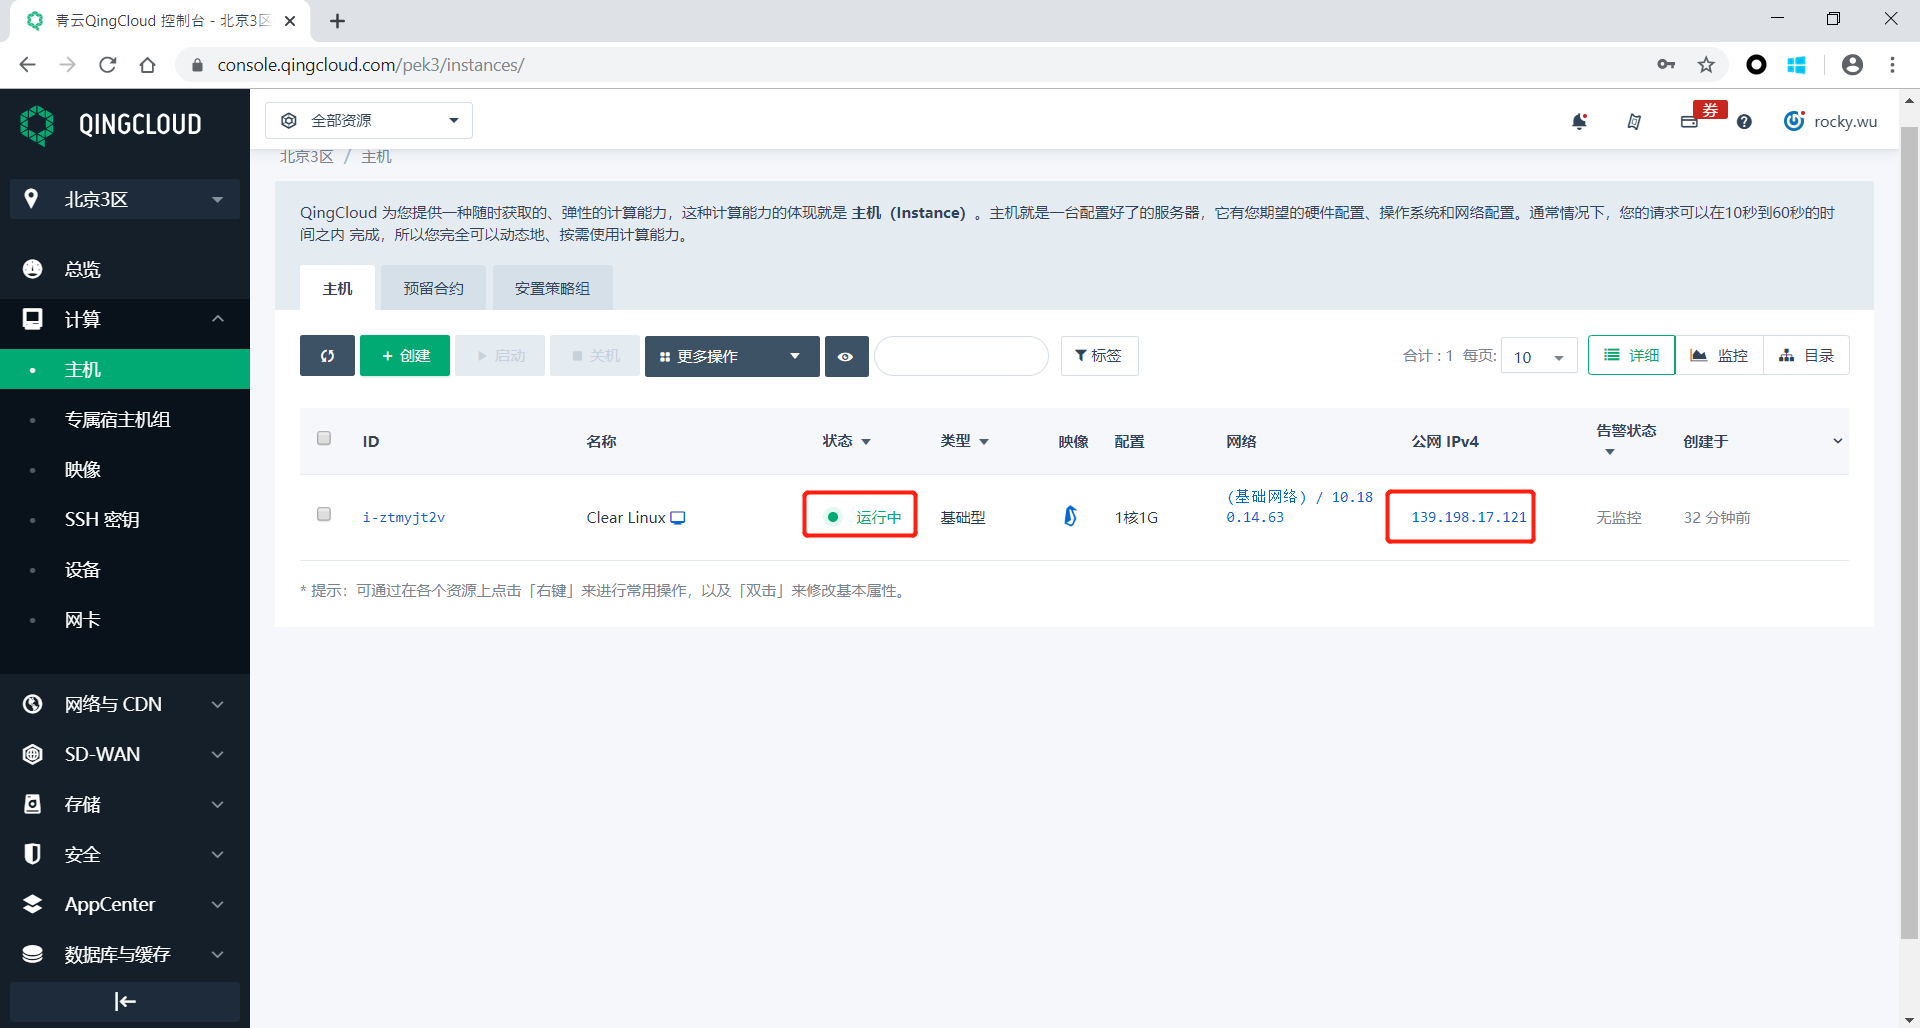
Confirm that the virtual host is currently in a normal state
Copy the public IP address of the current Clear Linux OS virtual host and connect to it from an SSH client. Here we need to use the previously saved SSH key.
In this tutorial, the MobaXterm client is used as an example to demonstrate the login process. Check each item as shown. For the user name, we choose
root. For the key, select the SSH key that was downloaded and saved to the local computer .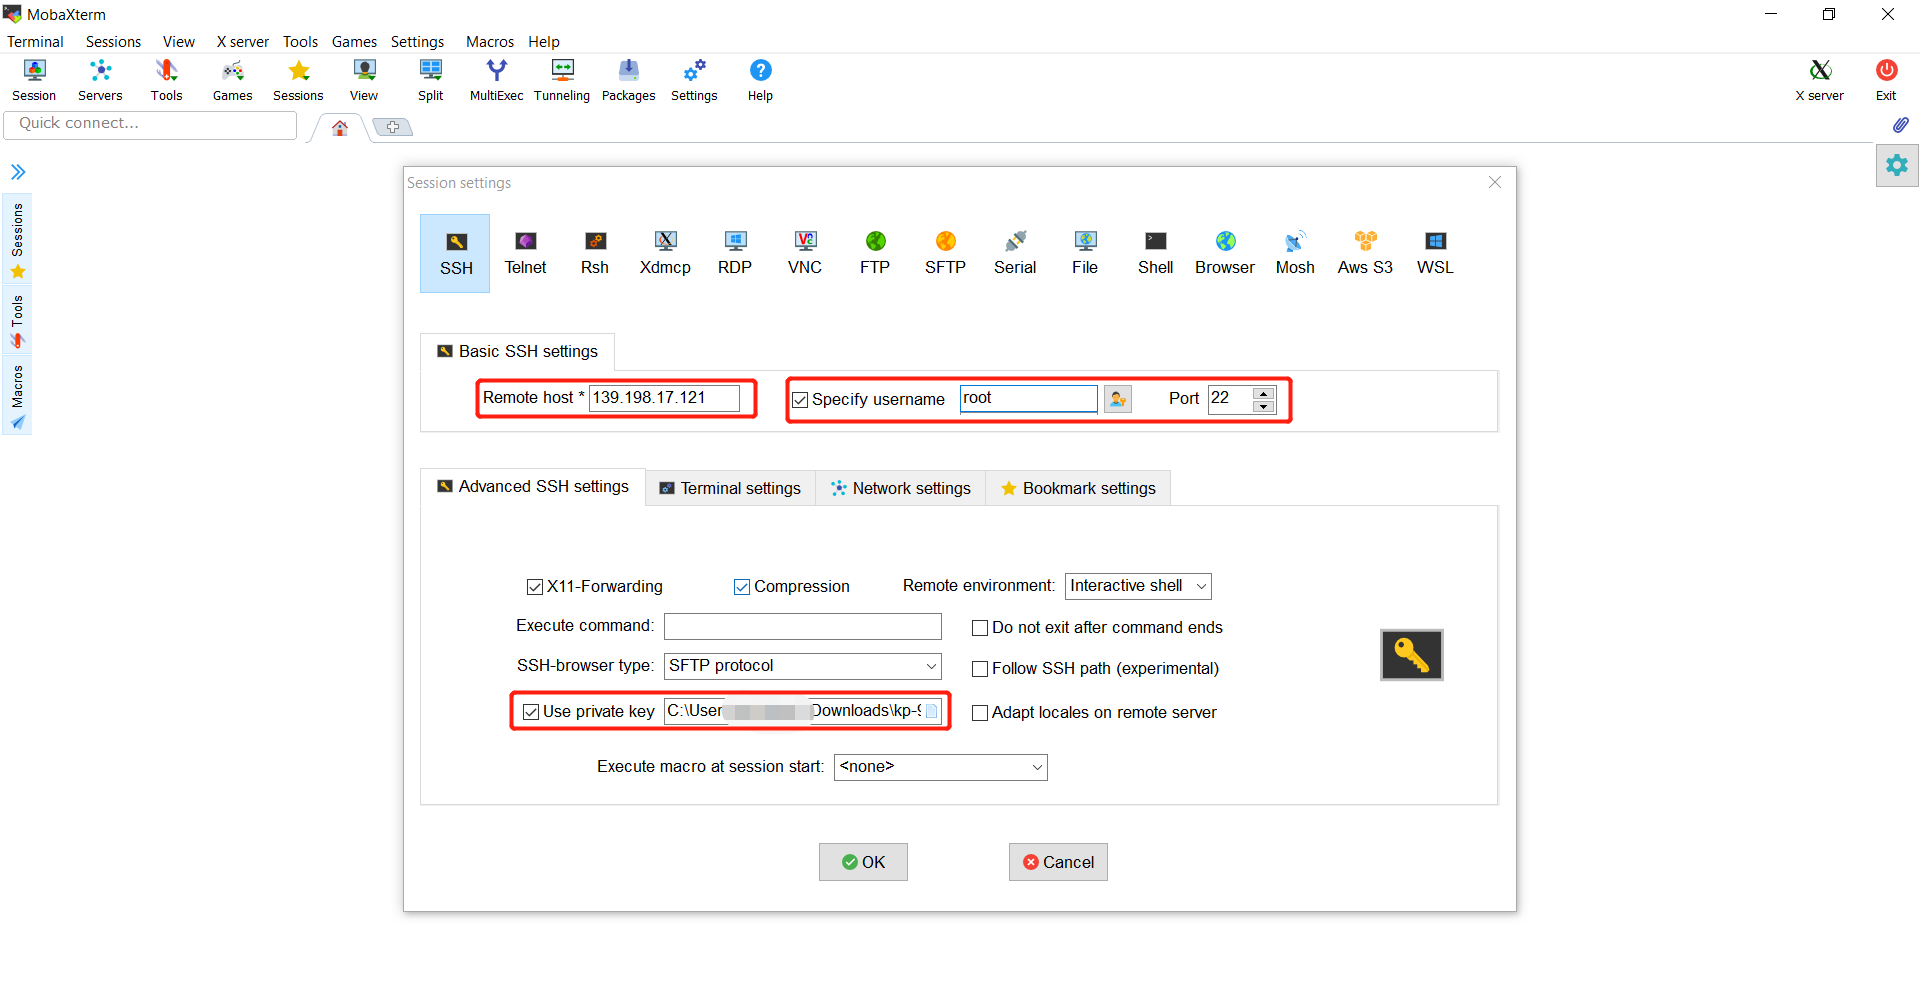
SSH login virtual host settings
Click Login to log in to the Clear Linux OS virtual host after completing the setup process.
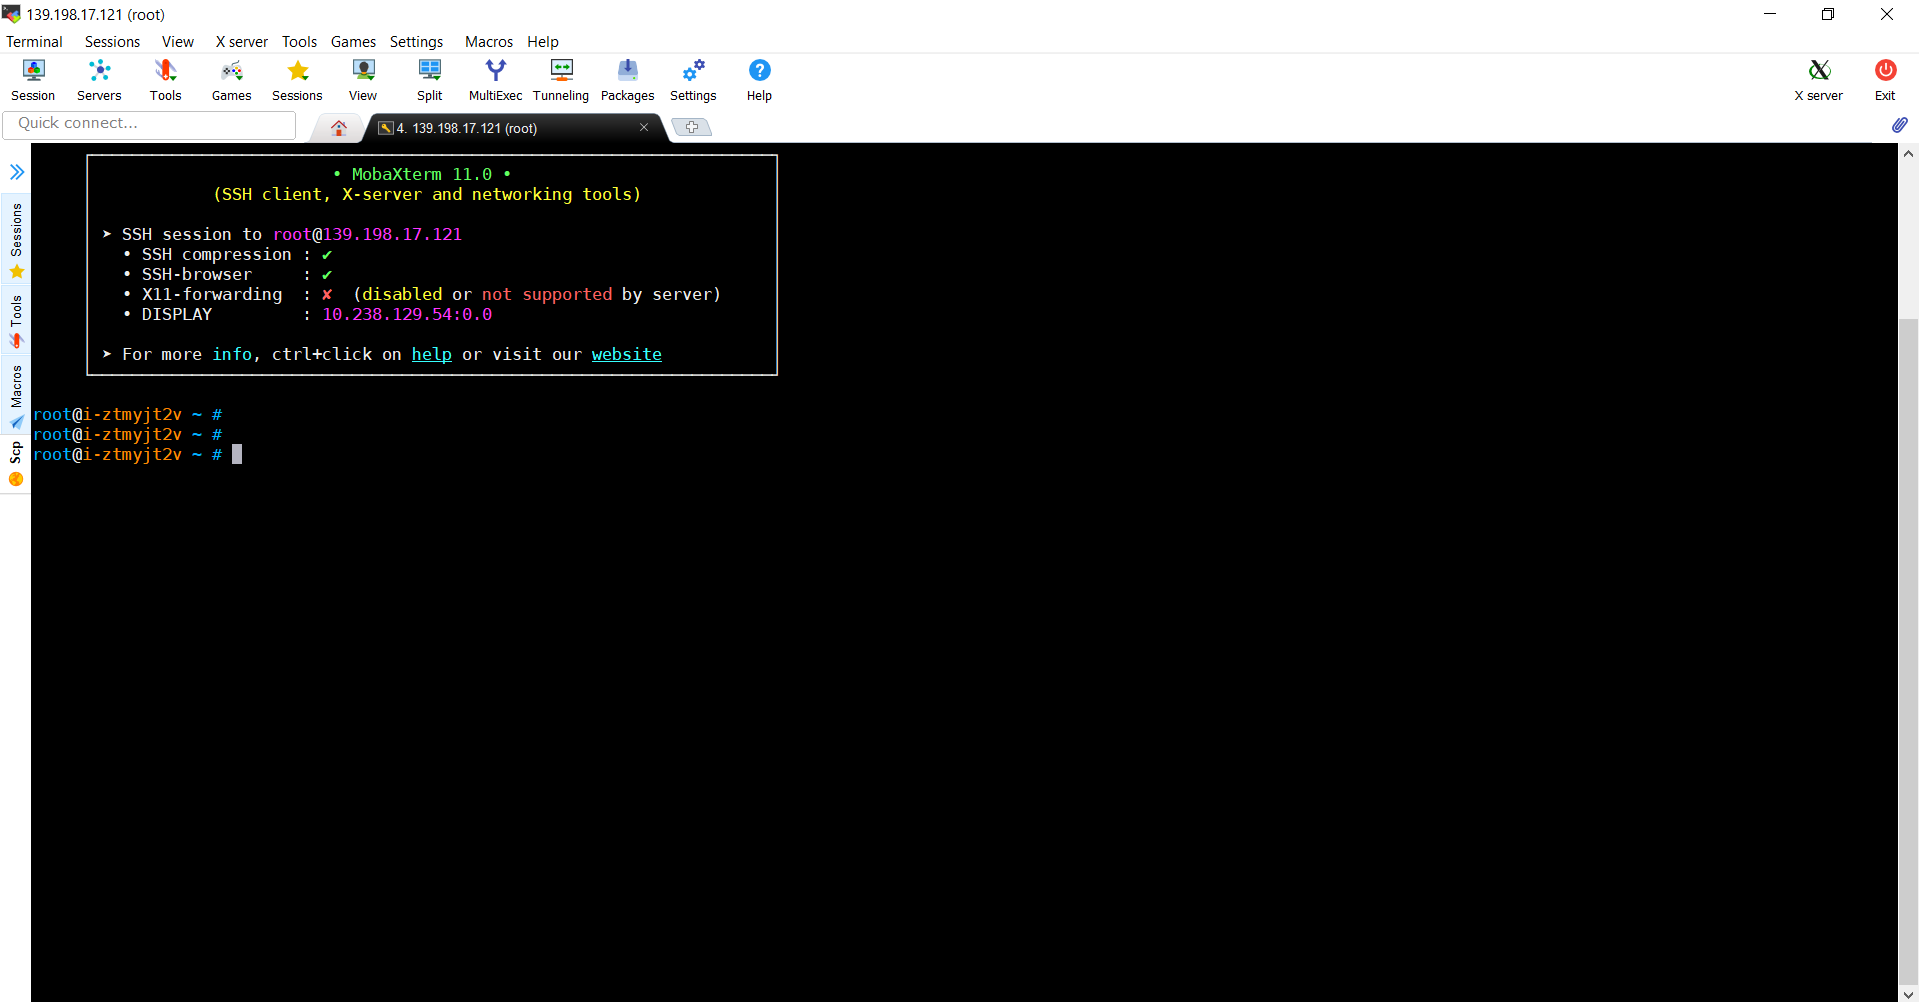
SSH login successful
Remove Clear Linux OS virtual host
This section explains how to delete a Clear Linux OS virtual host created on QingCloud.
On the left navigation bar select 计算>主机 (Compute>Master), find the Clear Linux OS host you just created, and click the checkbox next to it. Select 更多操作>删除 (More Actions>Delete) to delete the virtual host.
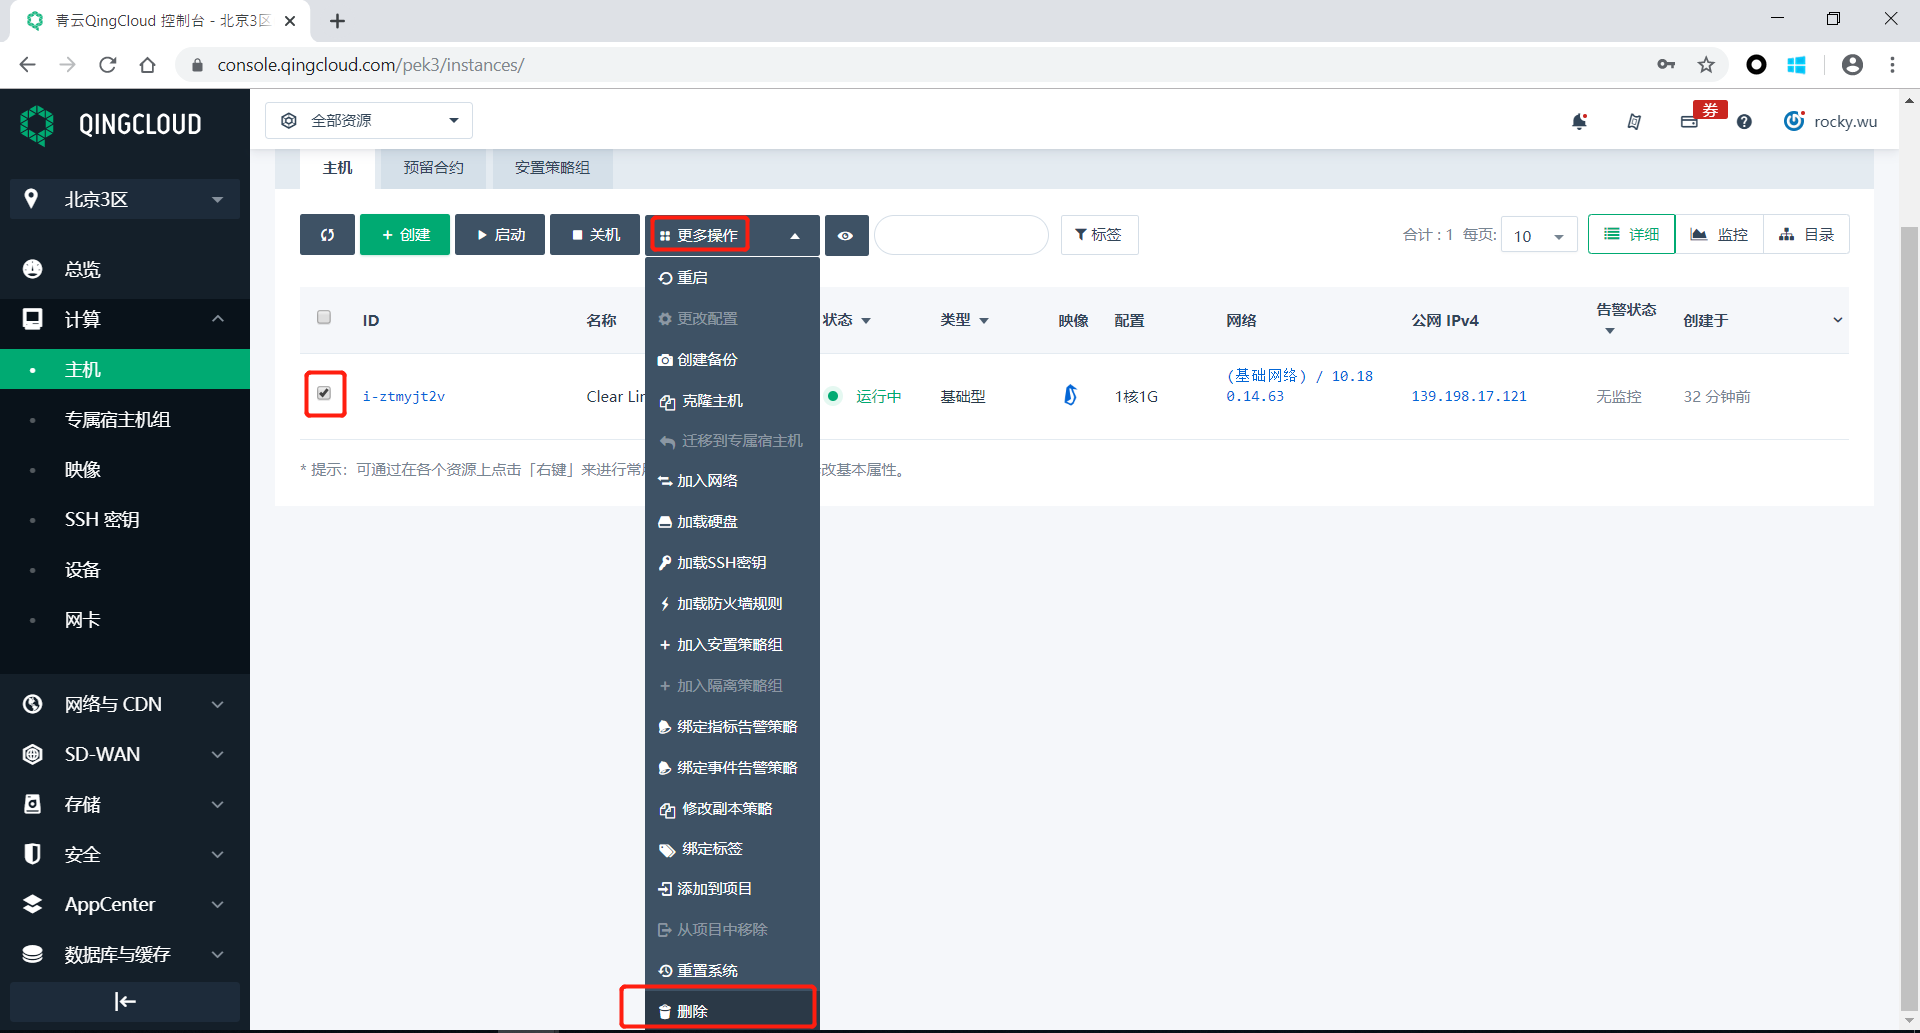
Remove Clear Linux OS Virtual Host
Delete the applied public IP
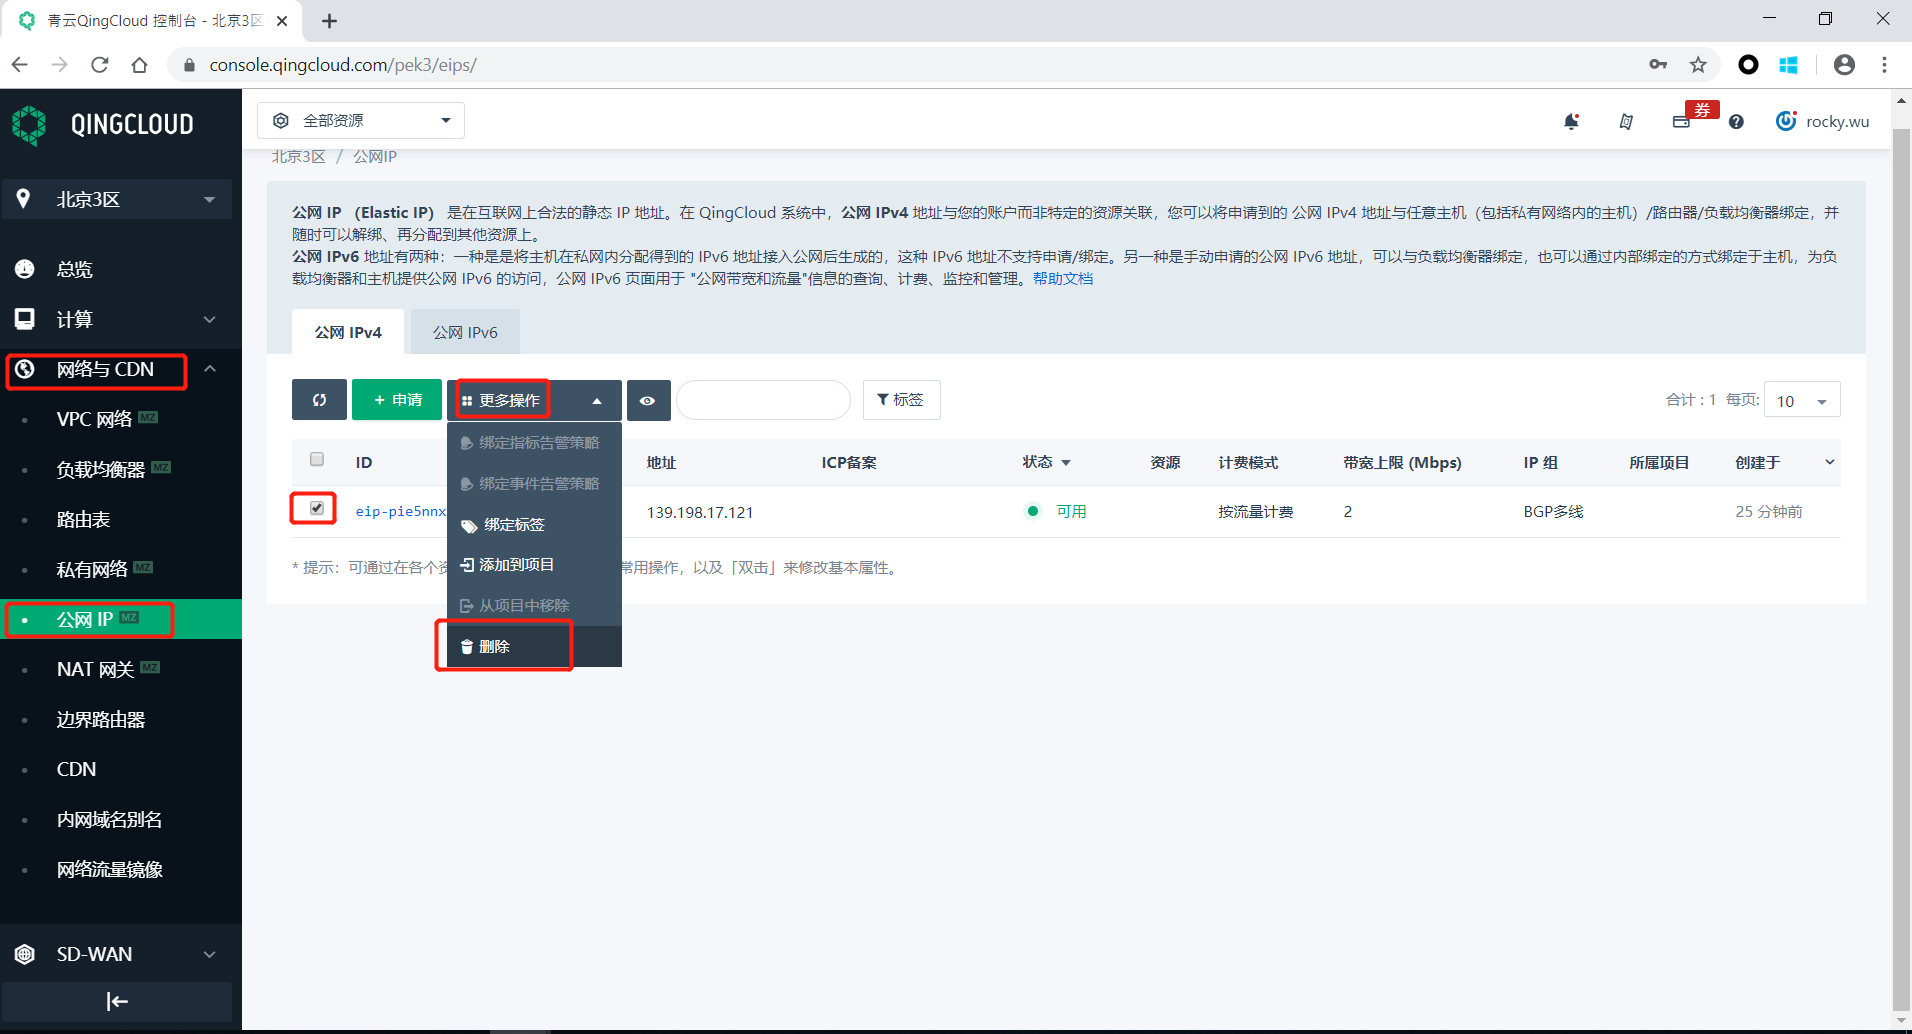
Select 网络与CDN>公网IP (Network and CDN>Public IP) from the navigation bar on the left , and then find the public IP address just applied. Select it as shown, then click 更多操作>删除 (More Actions>Delete) to delete.
Delete public network IP address
